iOS App Installation
| RealCADENCE™ for iOS is an Apple Enterprise app. Installation can be performed via MDM or manual installation. For more information, see Apple’s support link:
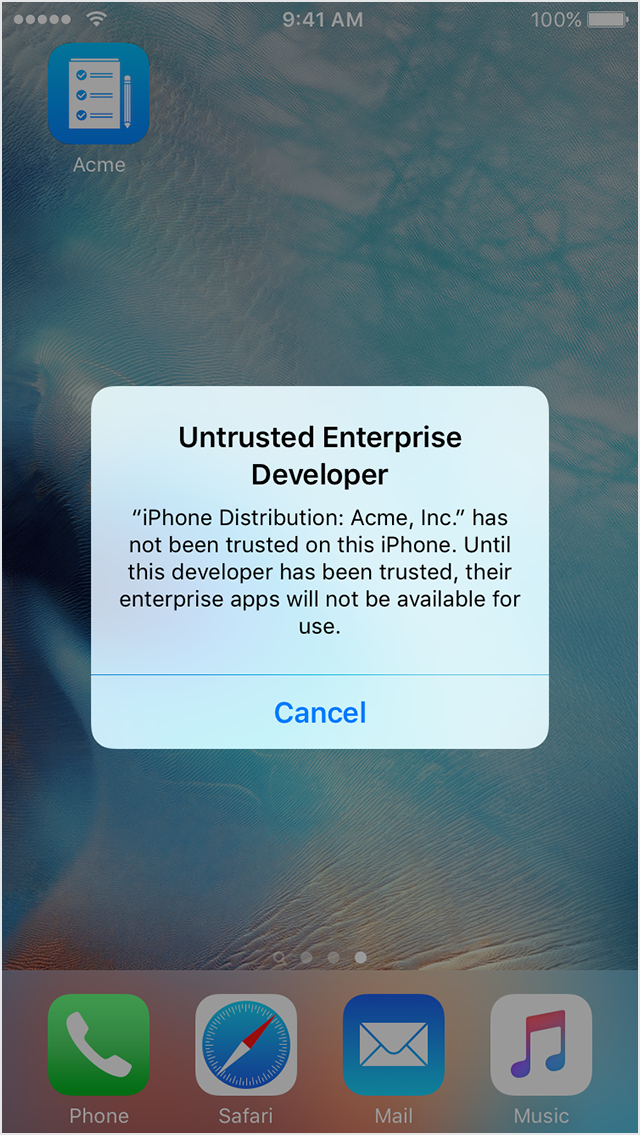
https://support.apple.com/en-us/HT204460 Your account representative will have instructions for any specific installation procedures for your team. (Excerpted from Apple support page)If you install an app by Mobile Device Management (MDM), trust is automatically established. If you manually install an app, you must also manually establish trust. Apple recommends that you use an MDM solution to distribute the apps. This method is secure and doesn’t require user interaction. You can also install custom apps from a secure website that your organization operates. If you don’t install apps from your organization, download and install apps only from the Apple App Store. This is the best way to protect your iPhone, iPad, or iPod touch. Manually install and trust an enterprise appWhen you first open an enterprise app that you’ve manually installed, you see a notification that the developer of the app isn’t trusted on your device. You can dismiss this message, but then you can’t open the app.
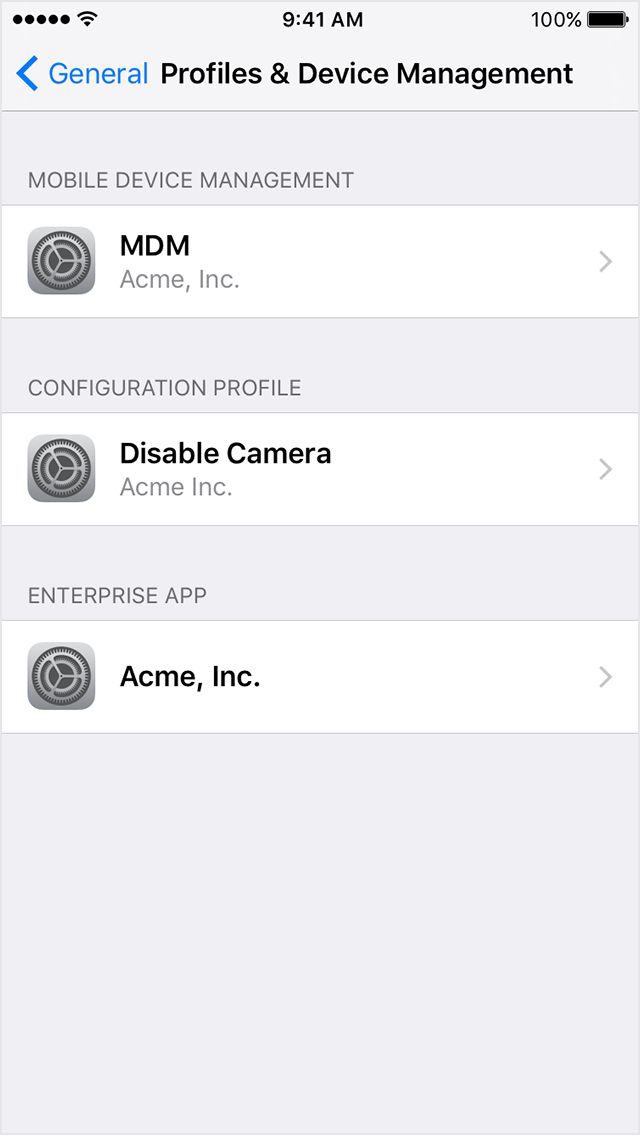
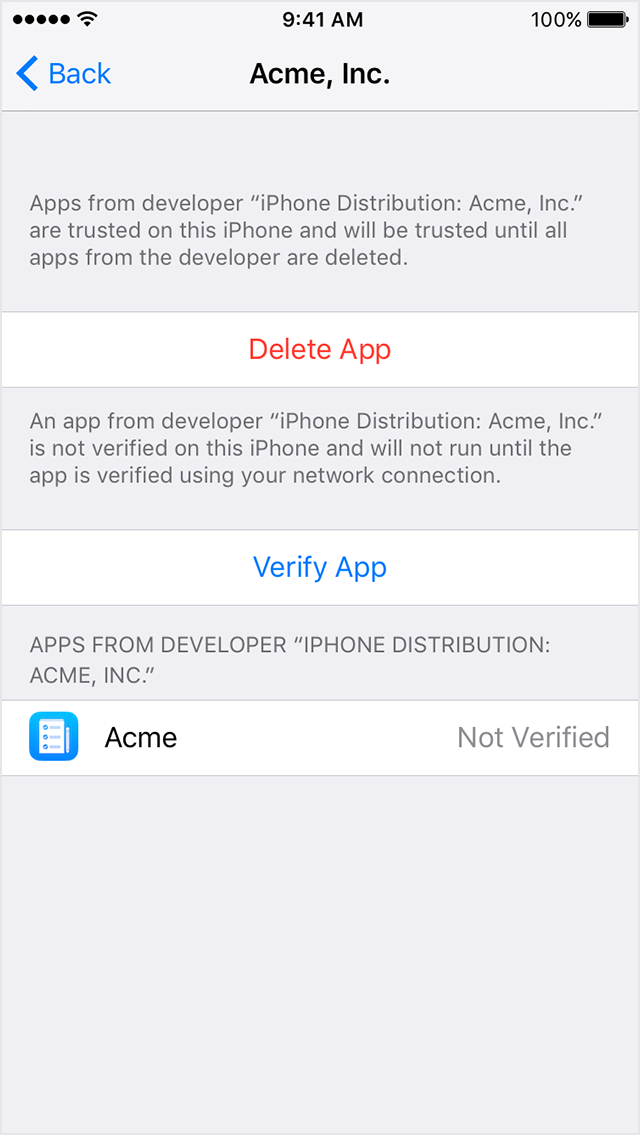
After you dismiss this message, you can establish trust for the app developer. Tap Settings > General > Profiles or Profiles & Device Management. Under the “Enterprise App” heading, you see a profile for the developer.
Tap the name of the developer profile under the Enterprise App heading to establish trust for this developer.
Then you see a prompt to confirm your choice. After you trust this profile, you can manually install other apps from the same developer and open them immediately. This developer remains trusted until you use the Delete App button to remove all apps from the developer.
You must be connected to the Internet to verify the app developer’s certificate when establishing trust. If you’re behind a firewall, make sure that it’s configured to allow connections to https://ppq.apple.com. If you aren’t connected to the Internet when you trust an app, the device displays “Not Verified” instead. To use the app, connect to the Internet and tap the Verify App button. After you verify an app for the first time, your iPhone, iPad, or iPod touch must reverify the app developer’s certificate periodically to maintain trust. If you can’t reverify, you may see a message that verification will expire soon. To maintain trust, connect your device to the Internet, then tap the Verify App button or launch the app. |

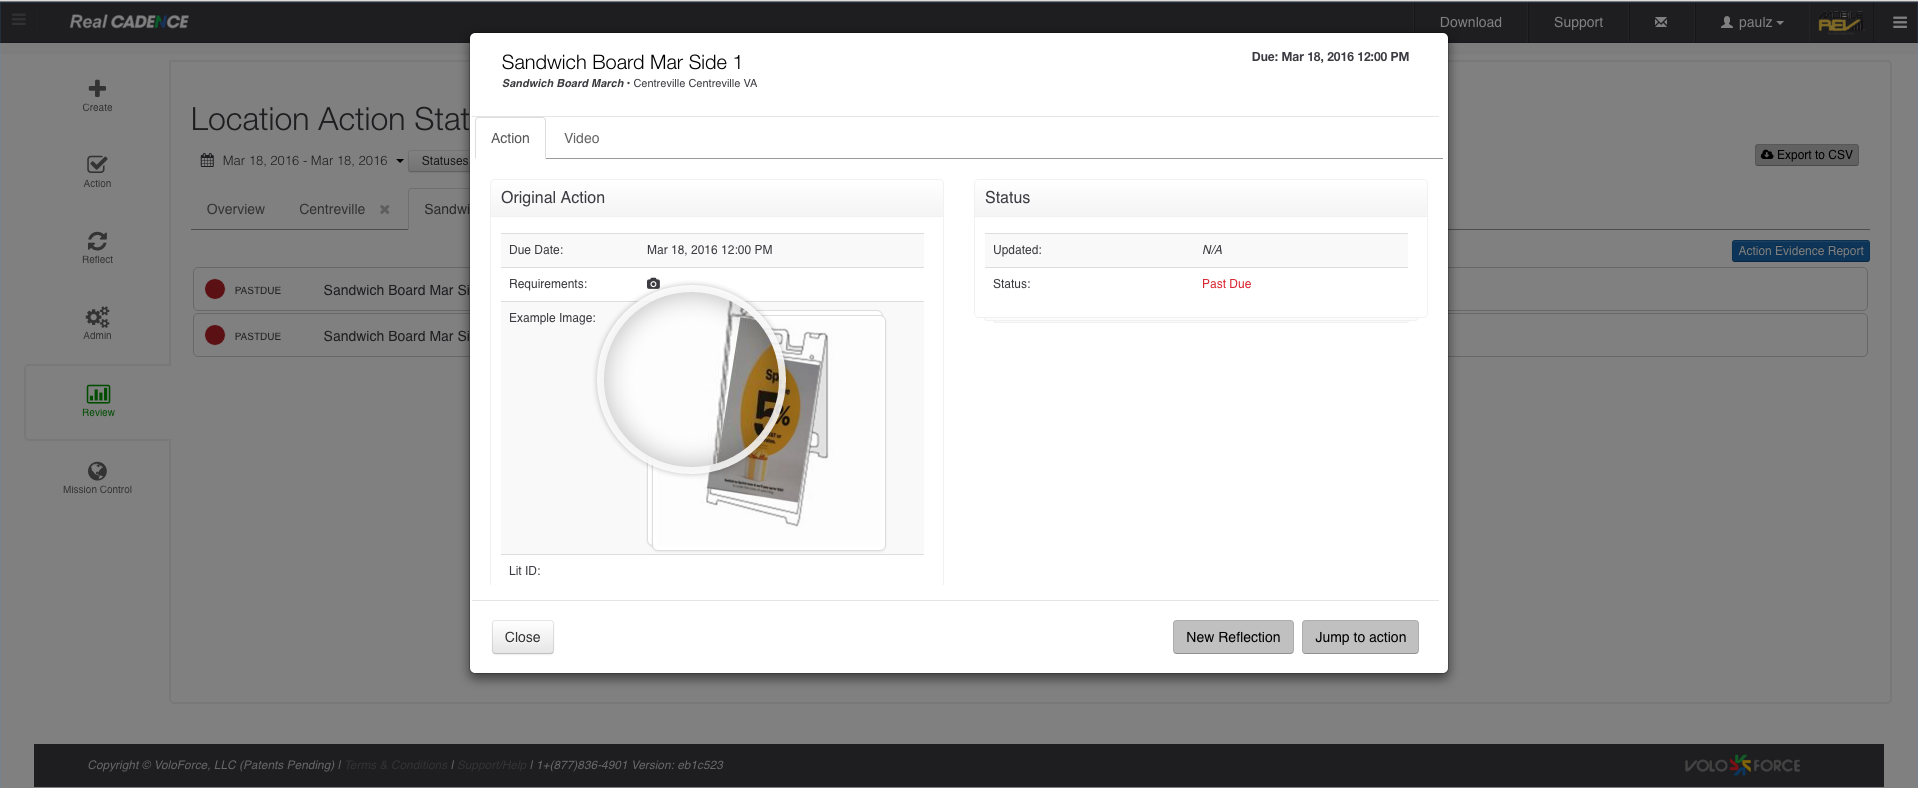
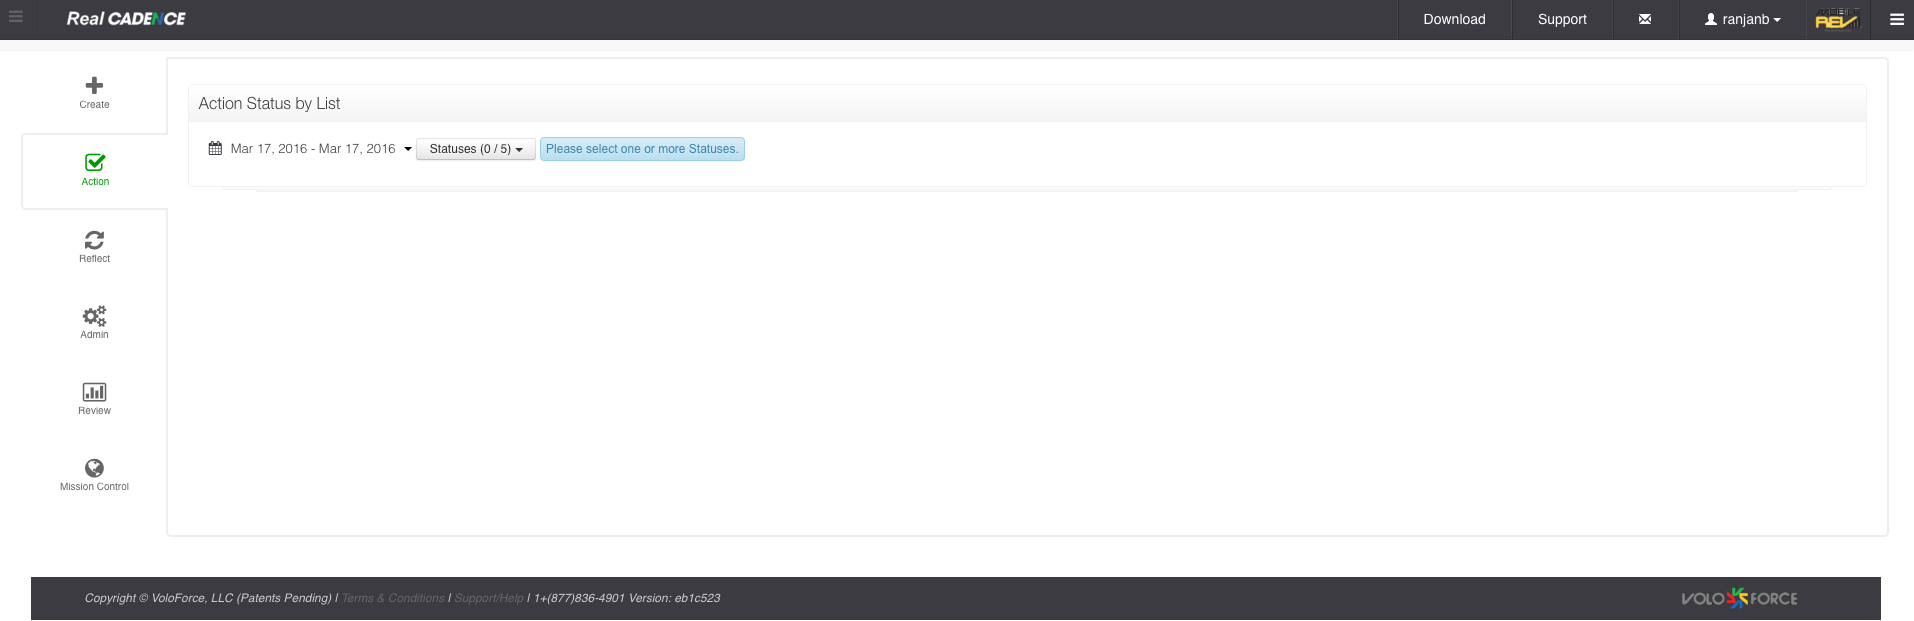
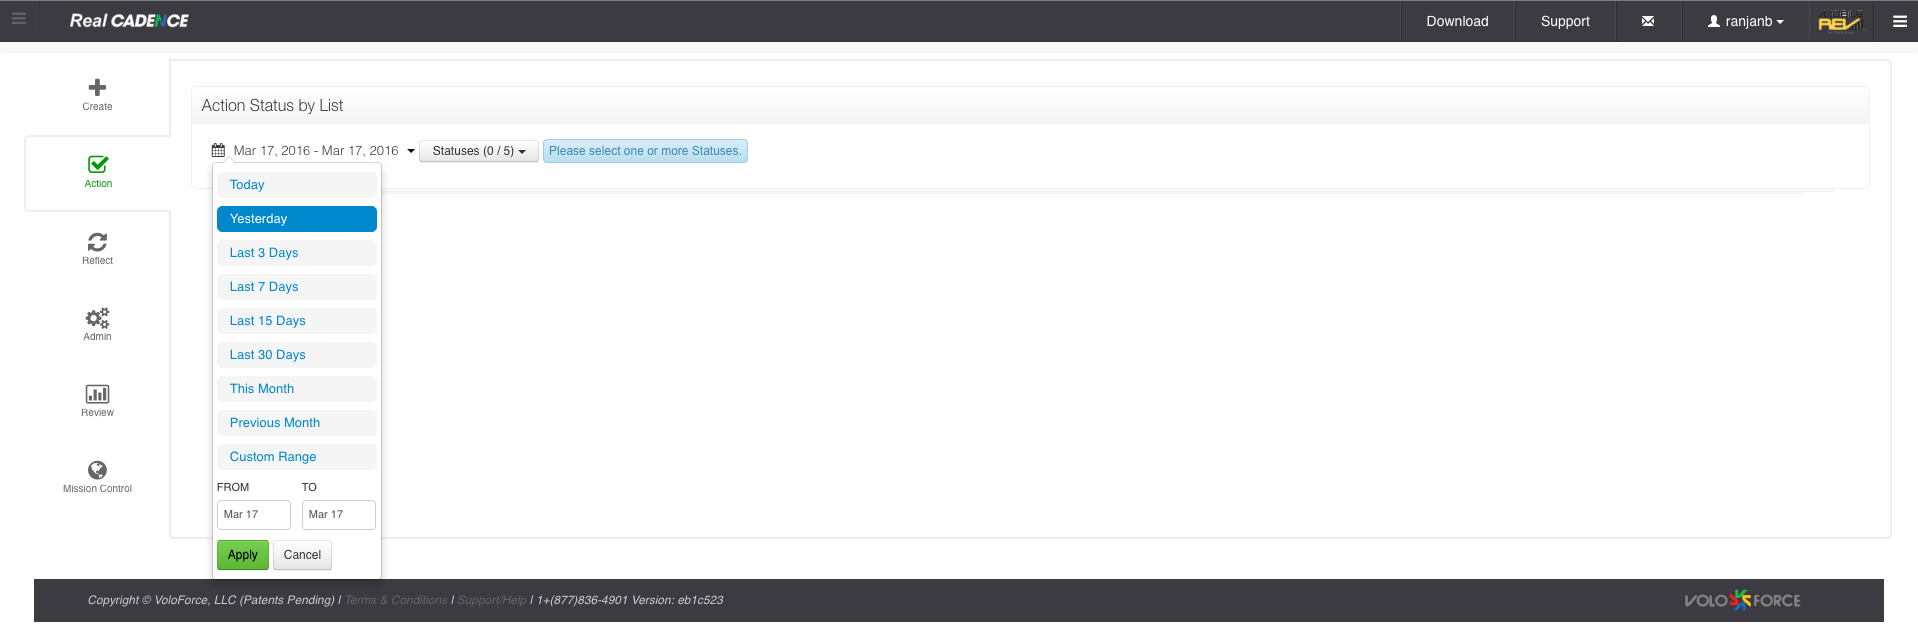
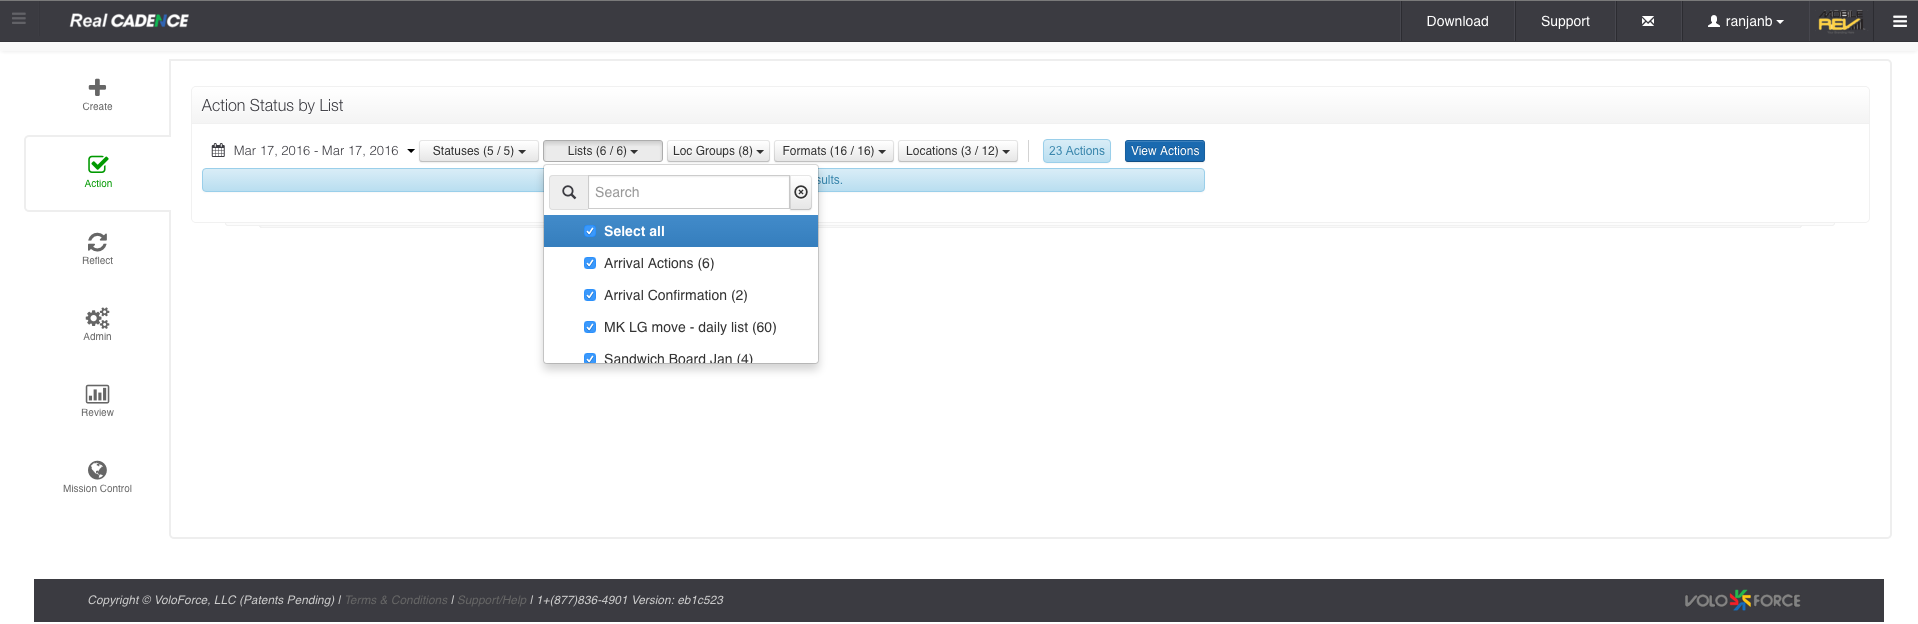
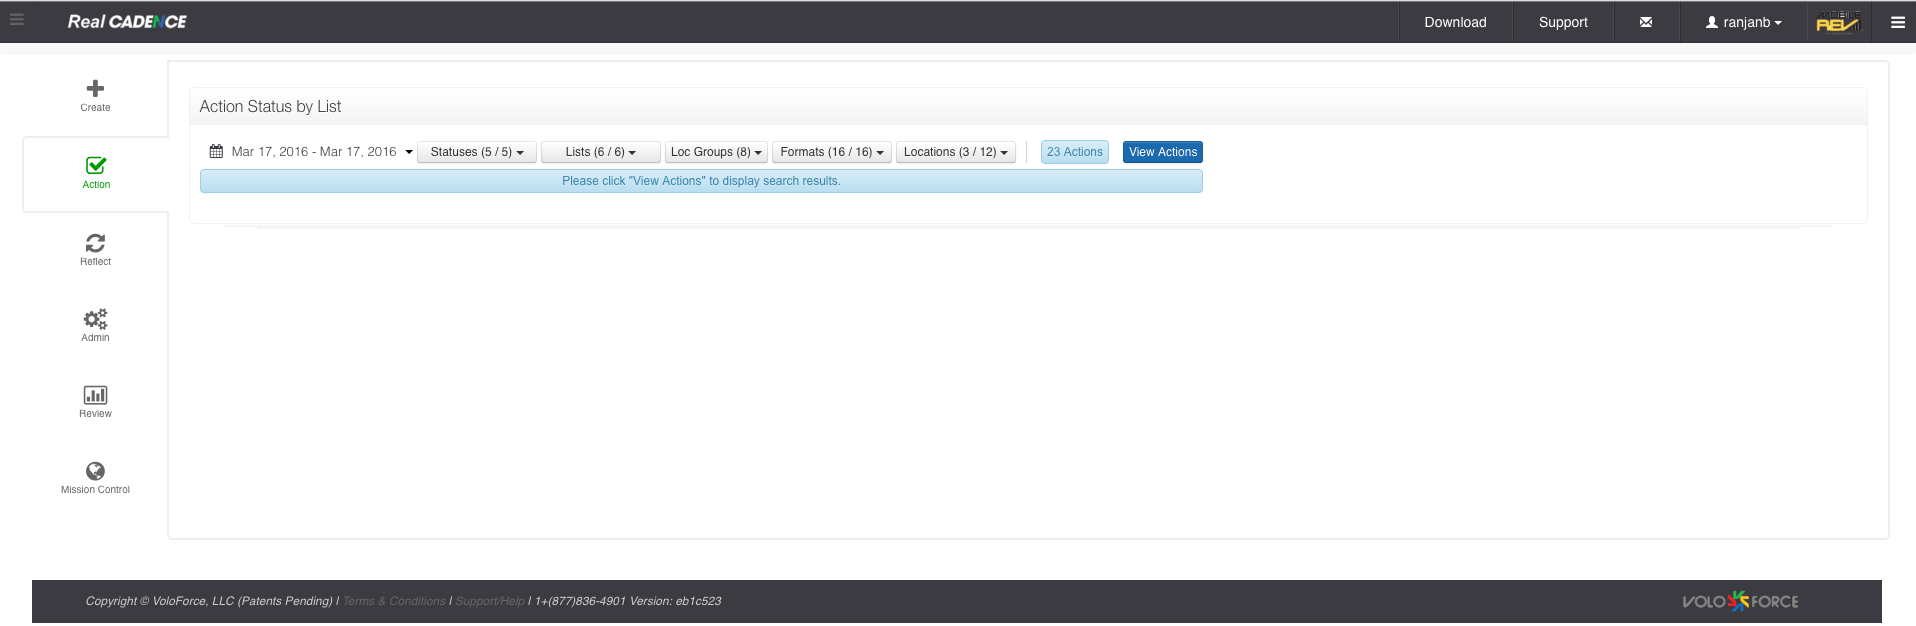
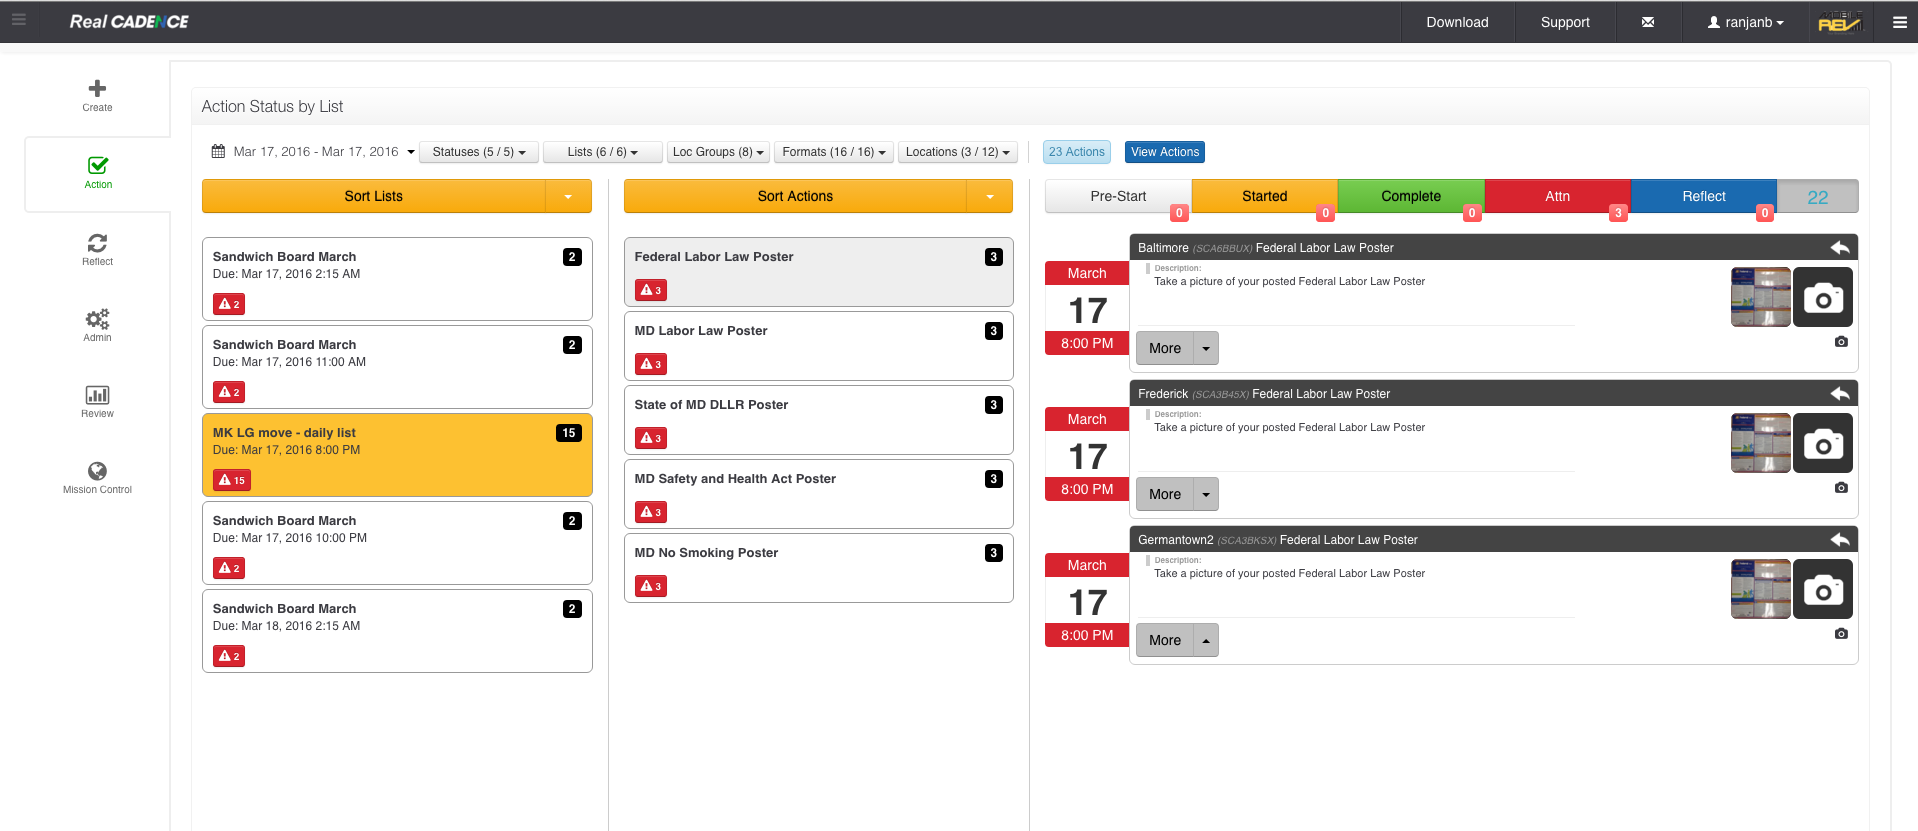
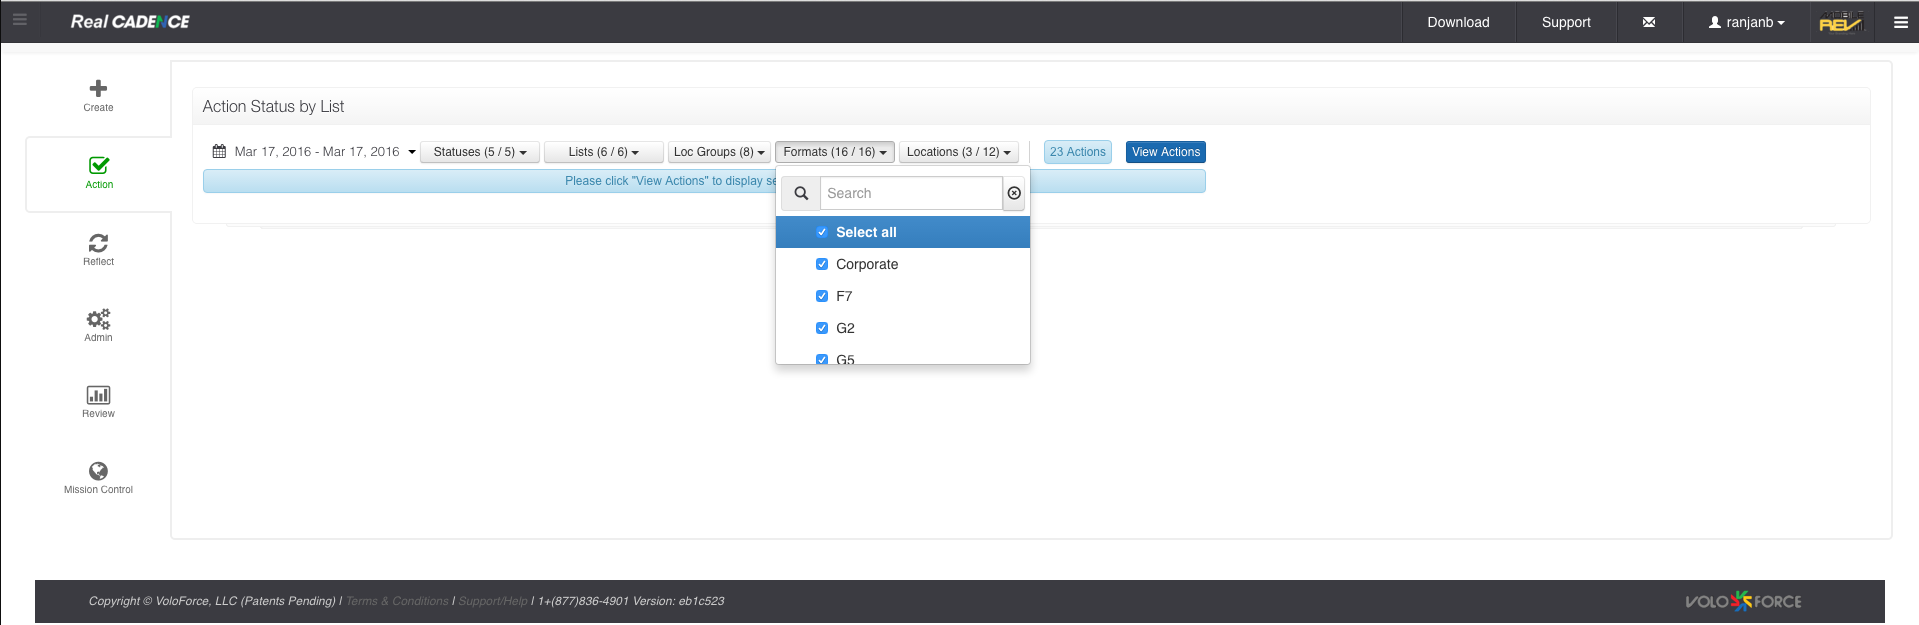
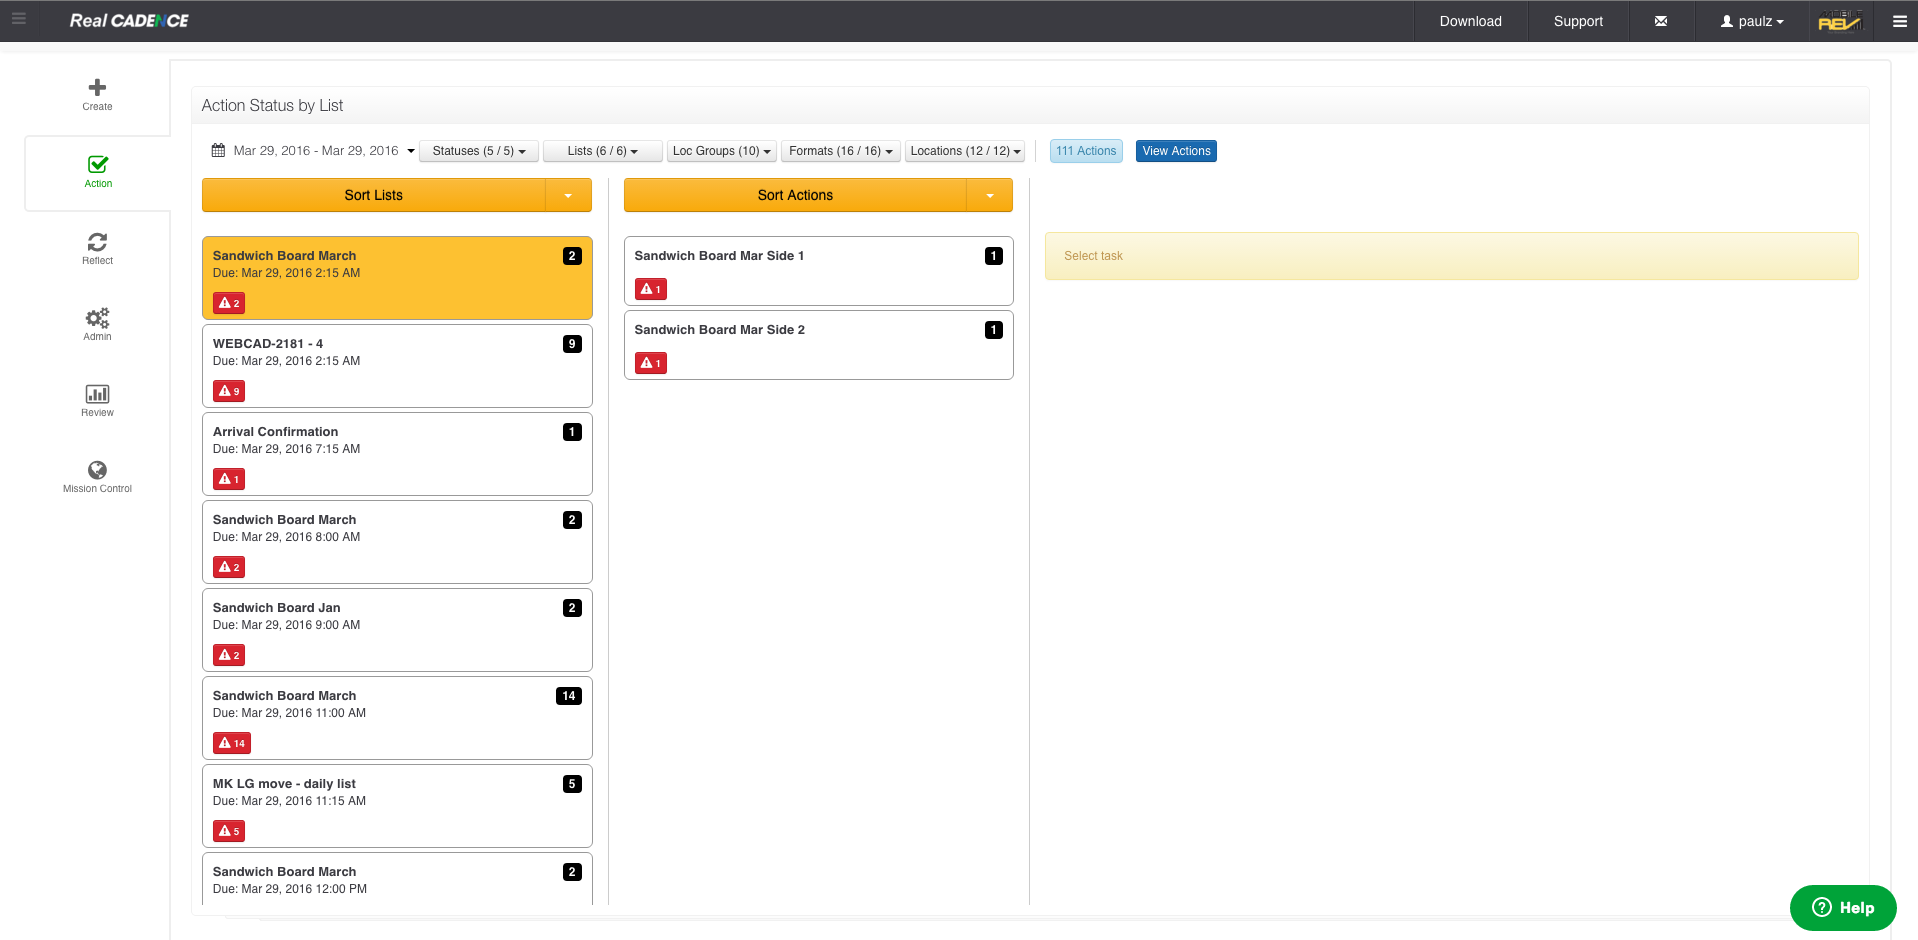
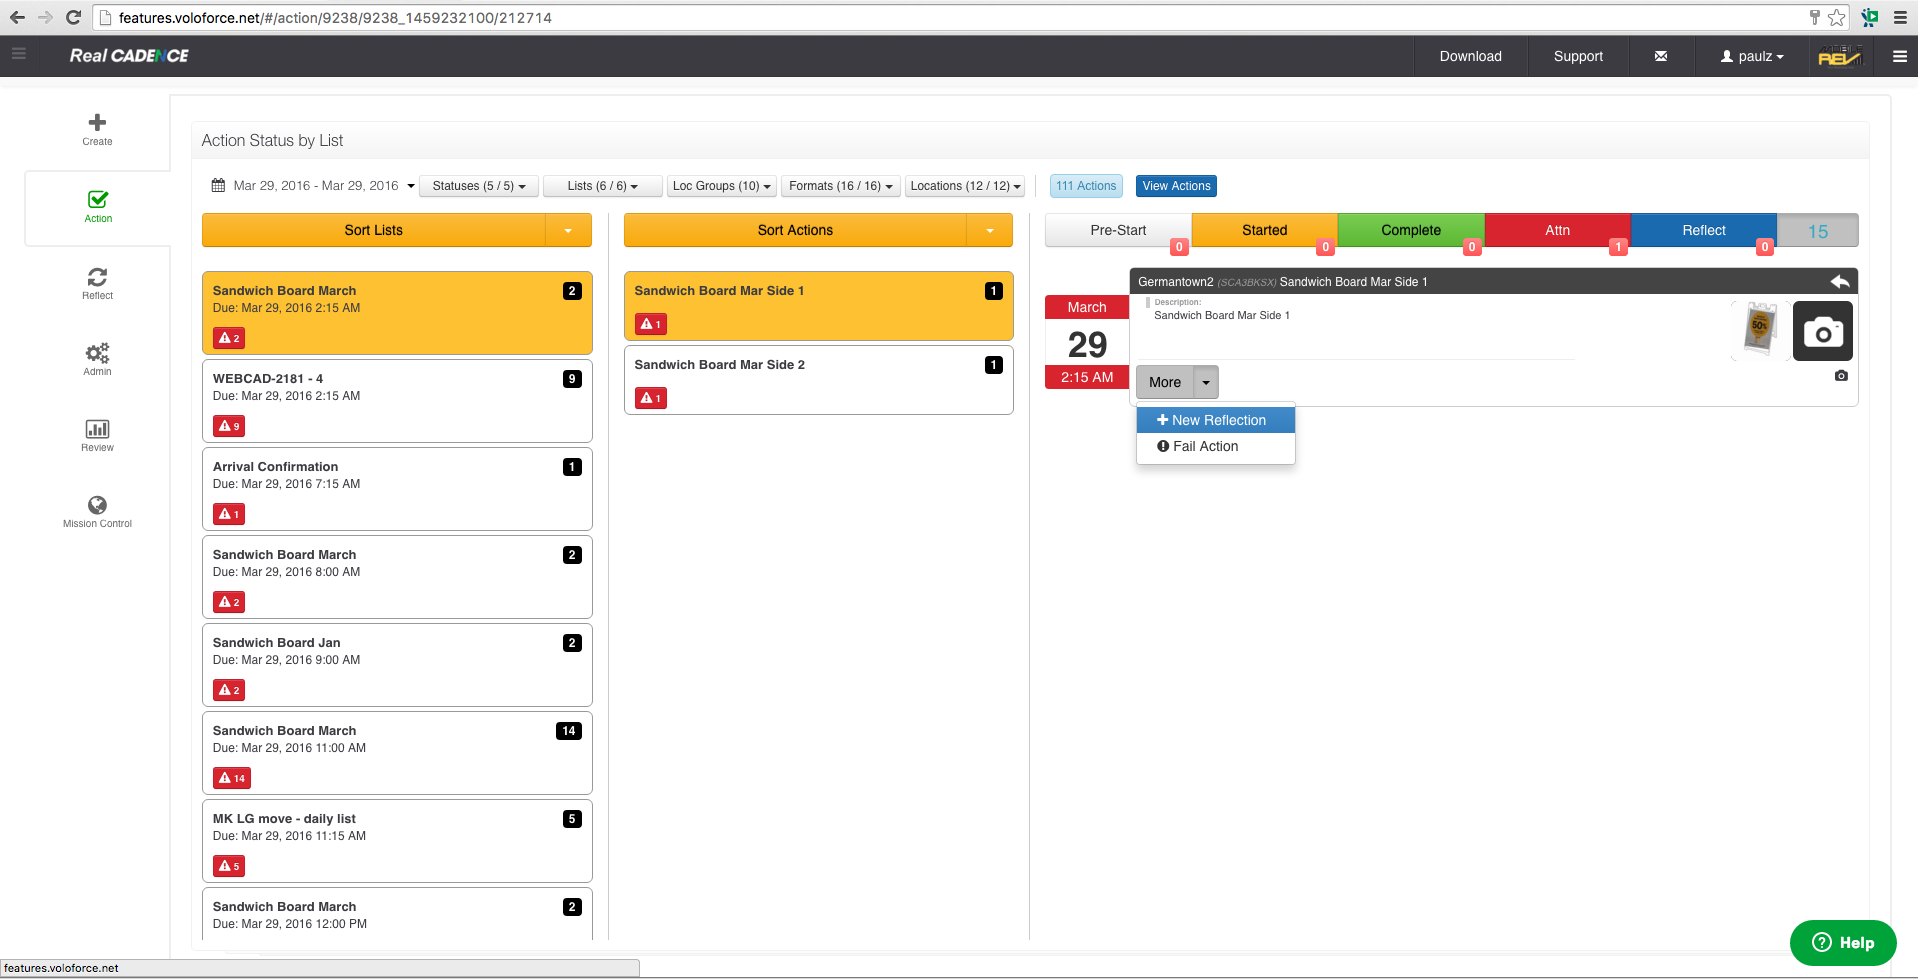
How-to: Review Action Statuses for Action Lists
|


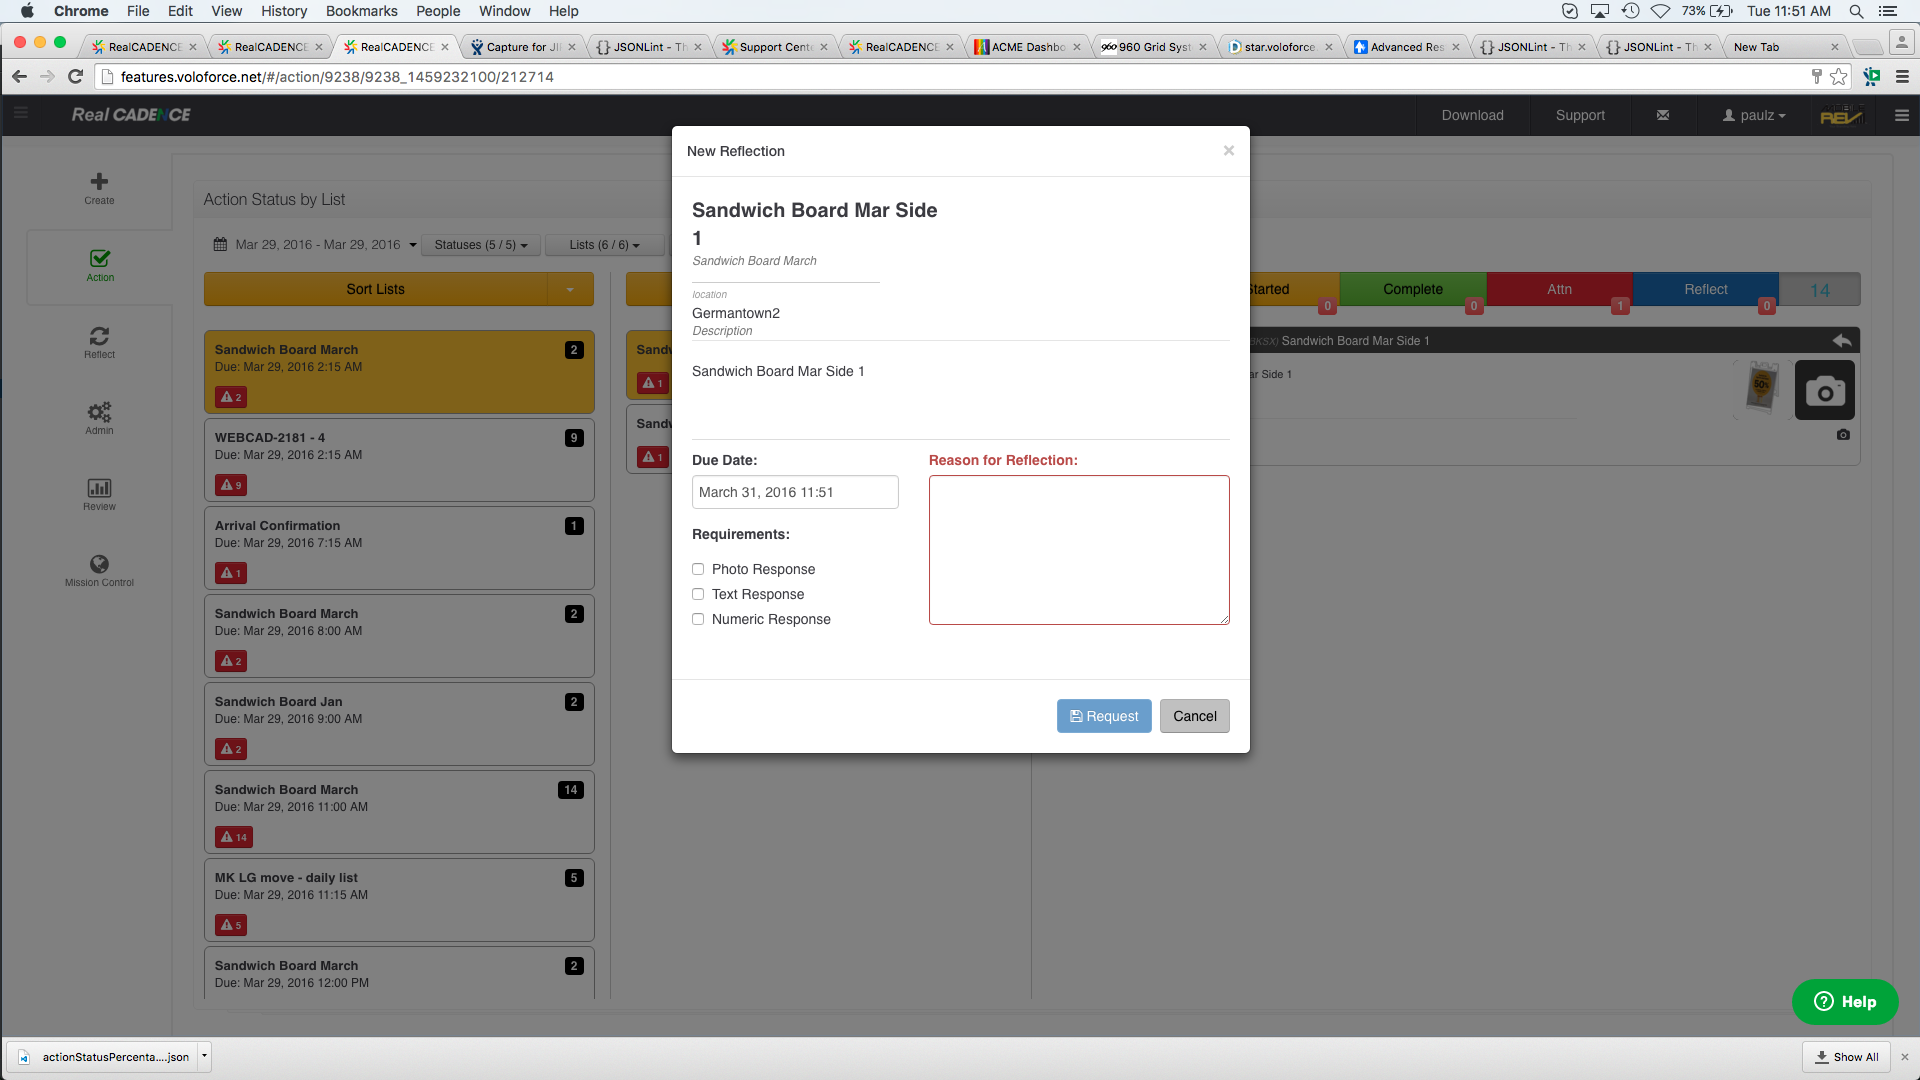
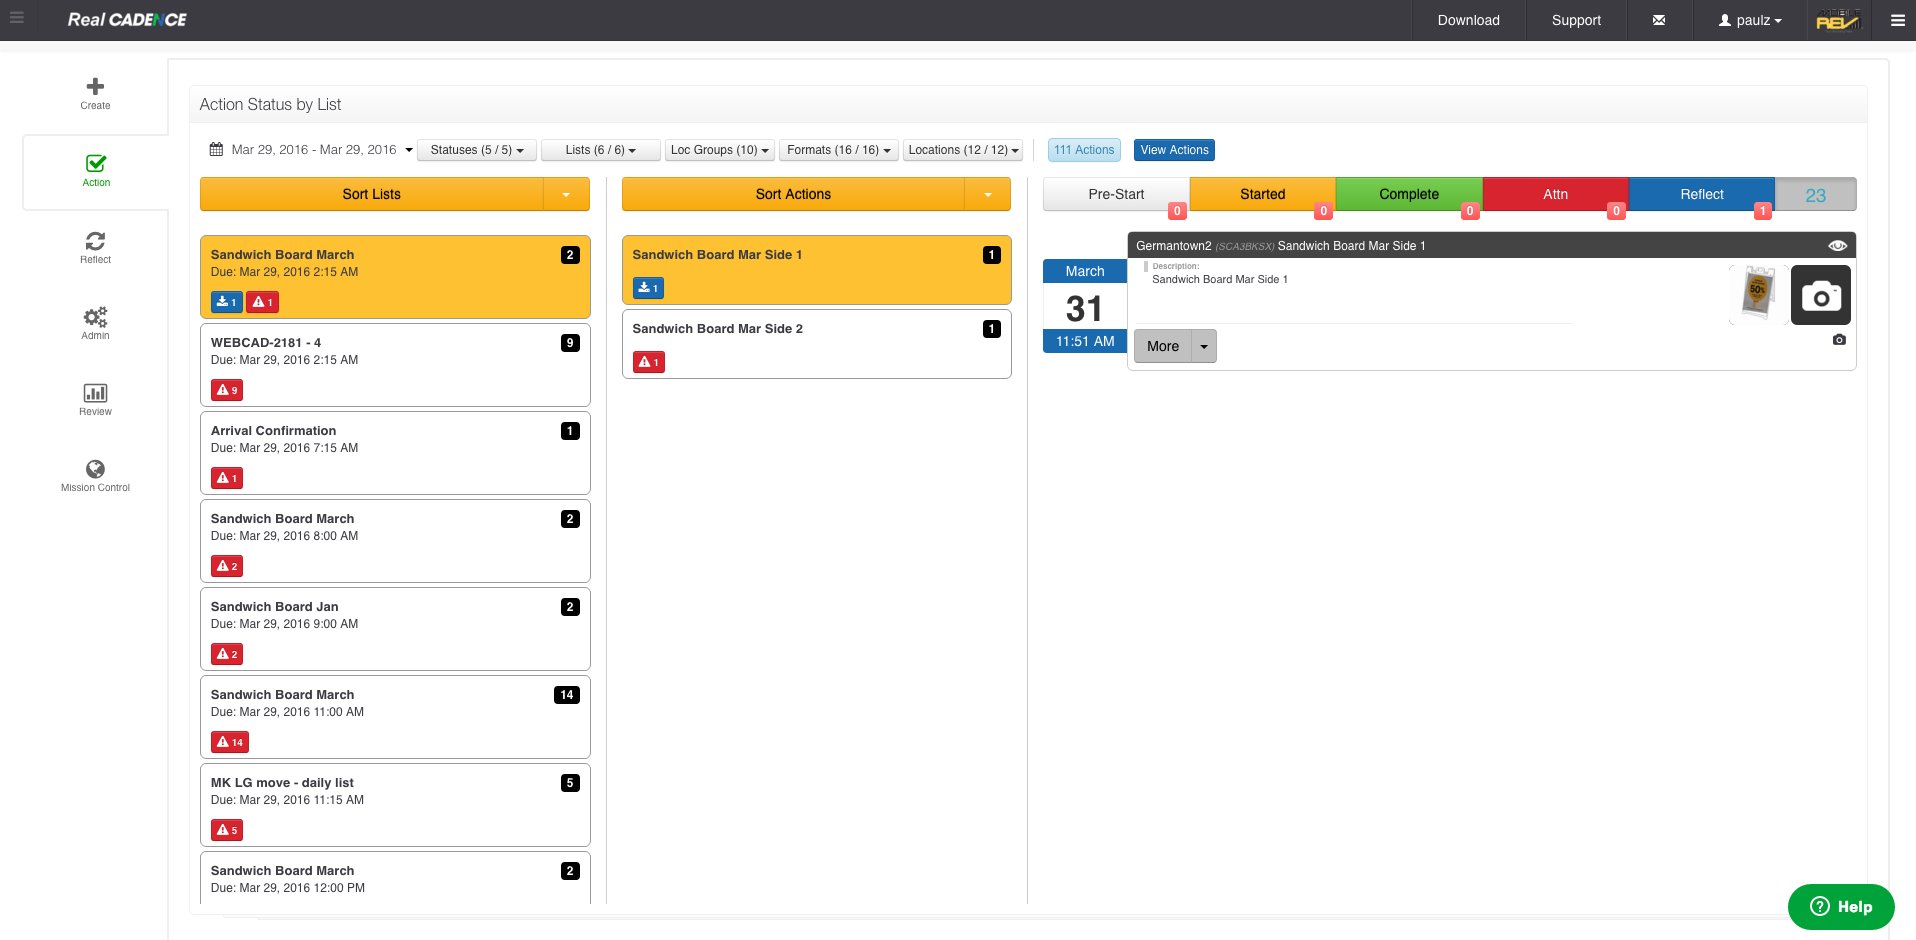
How to: Create A Reflection from Action View
|


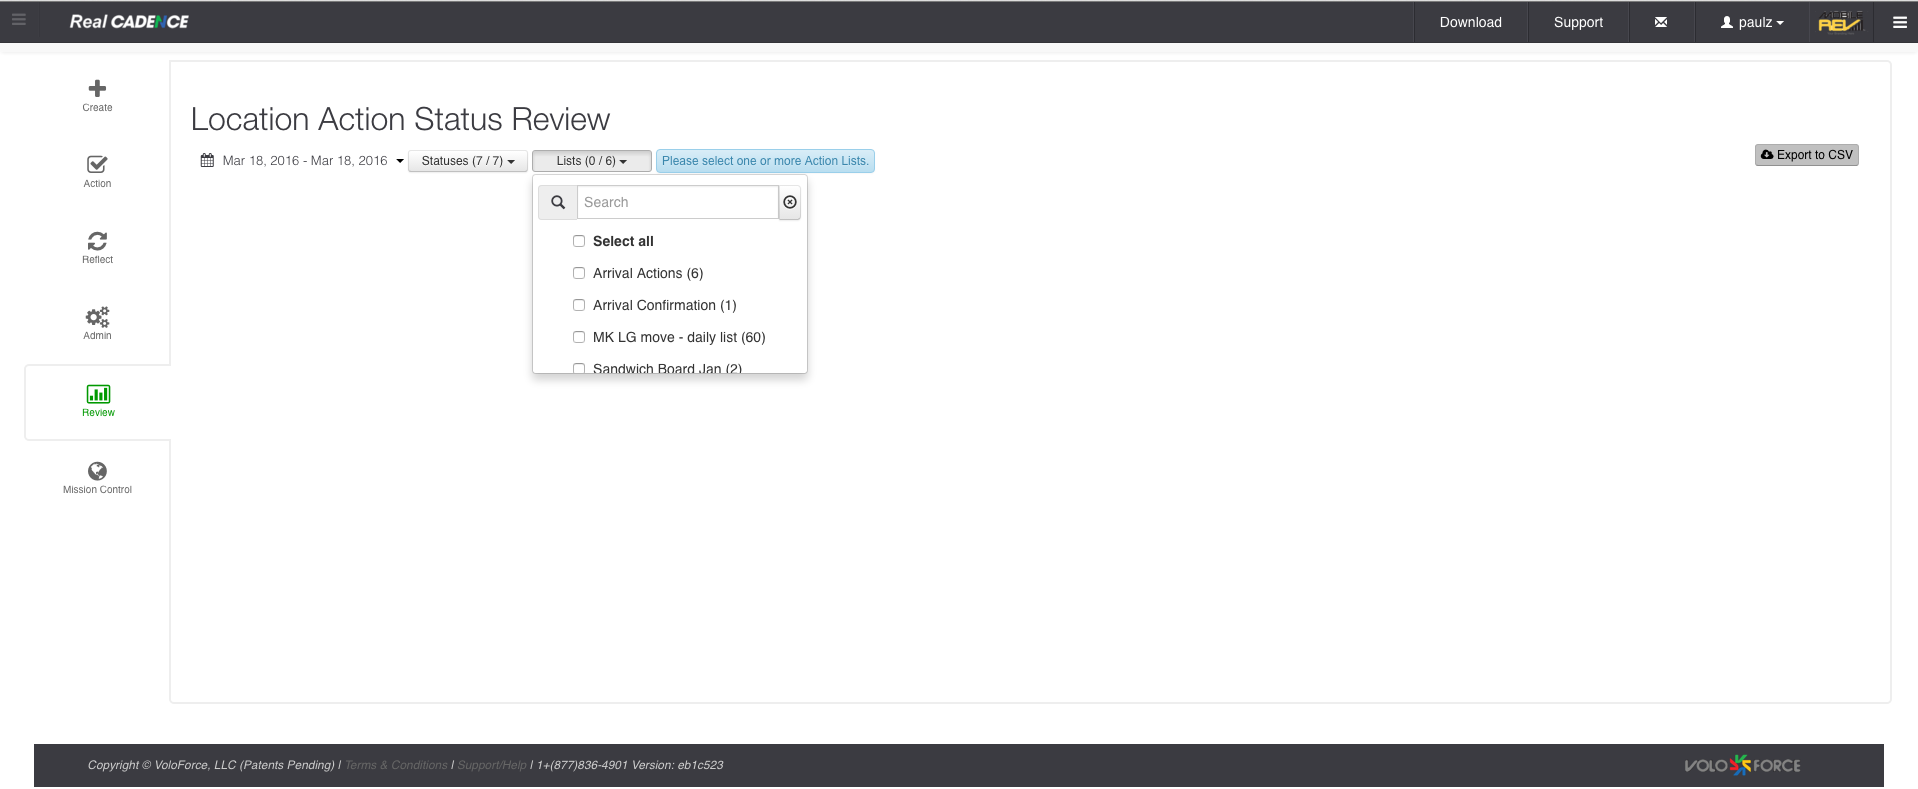
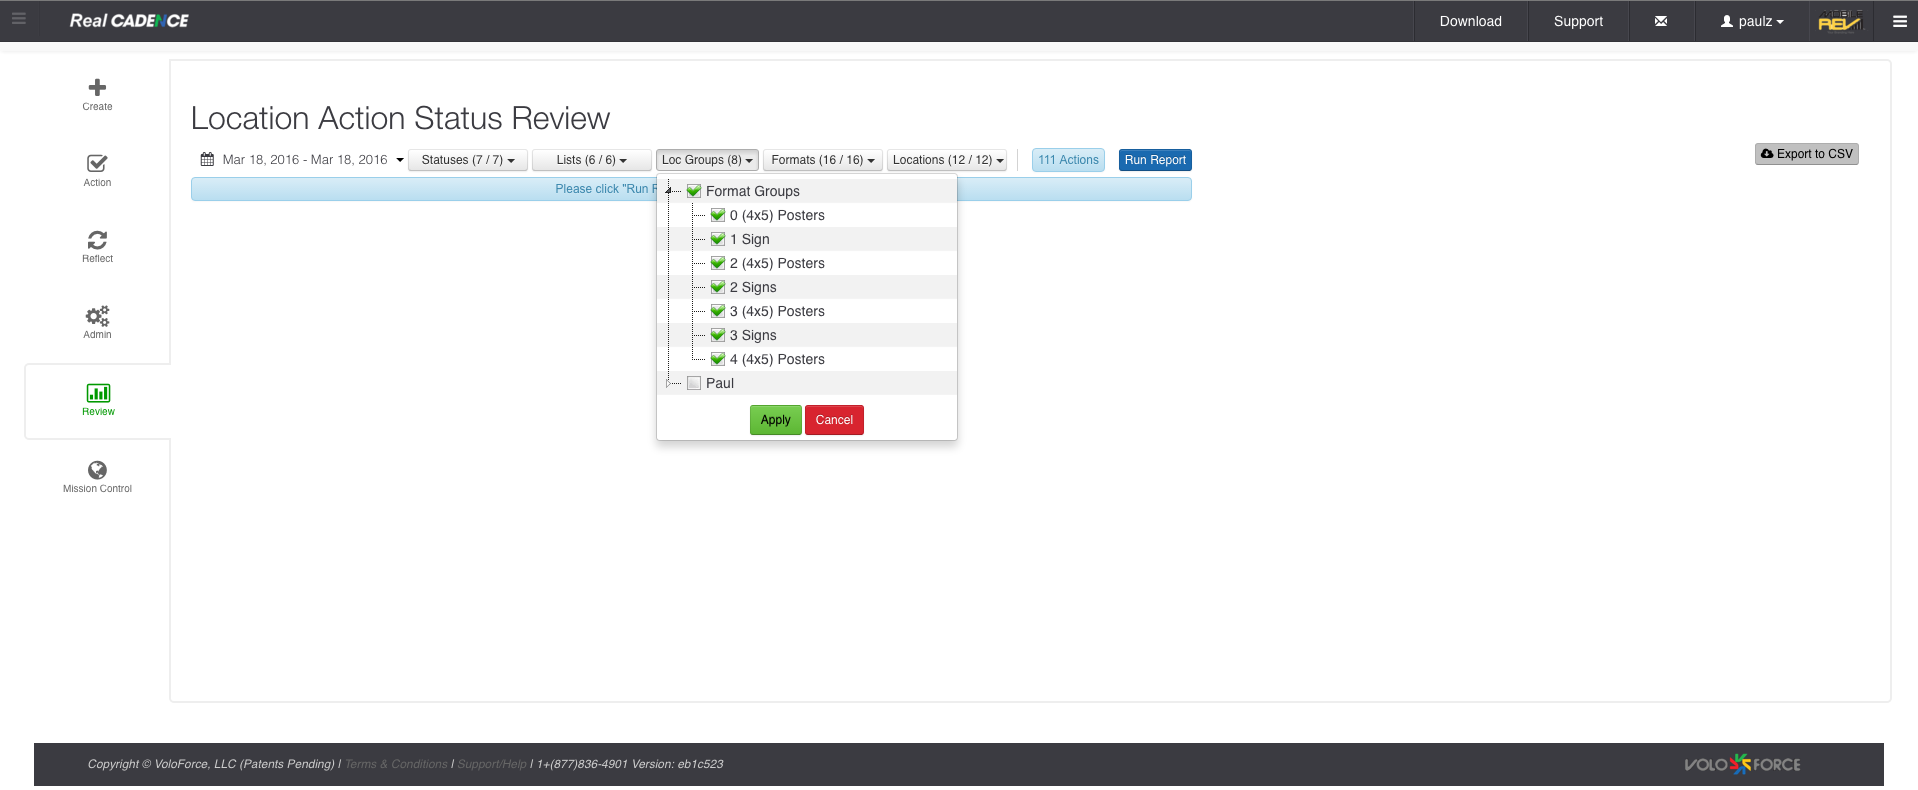
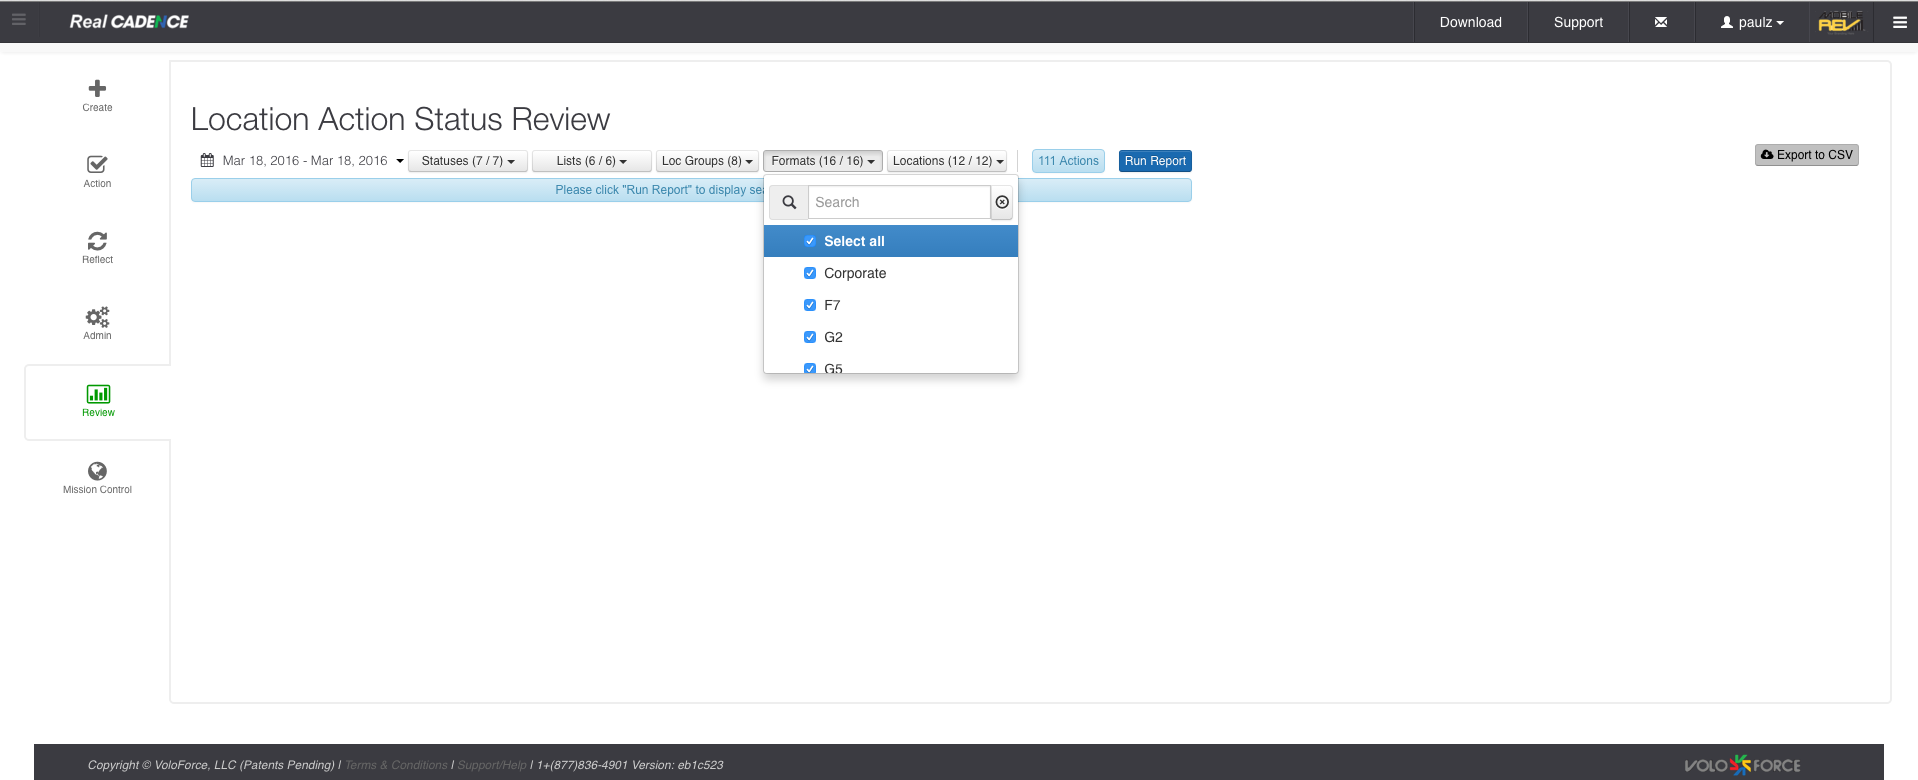
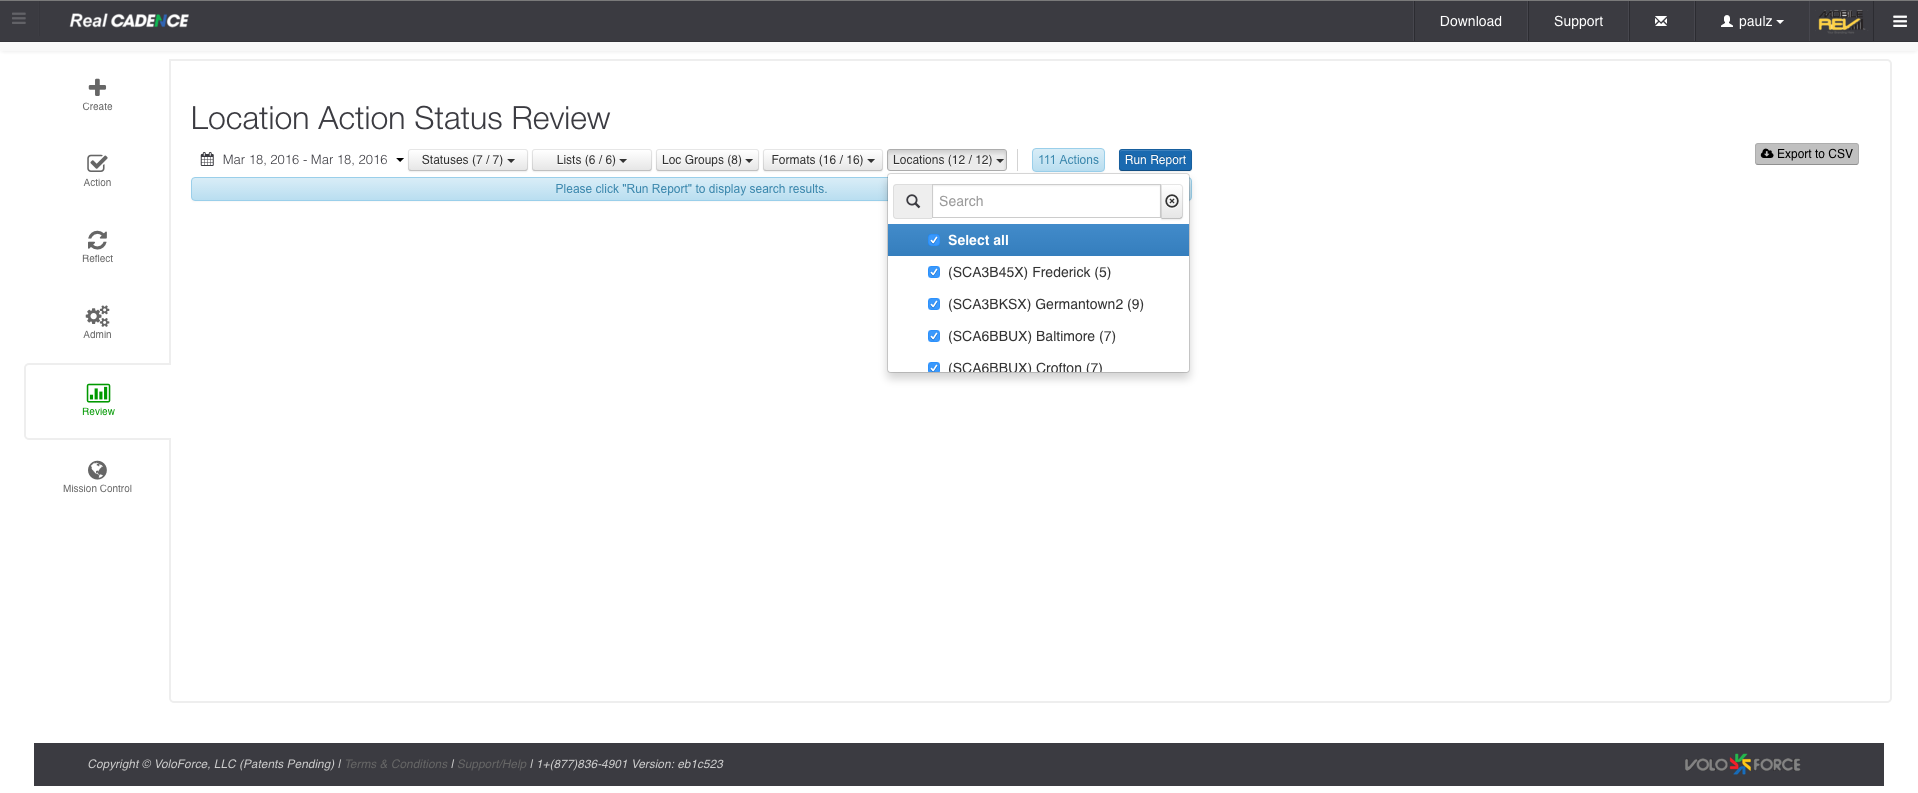
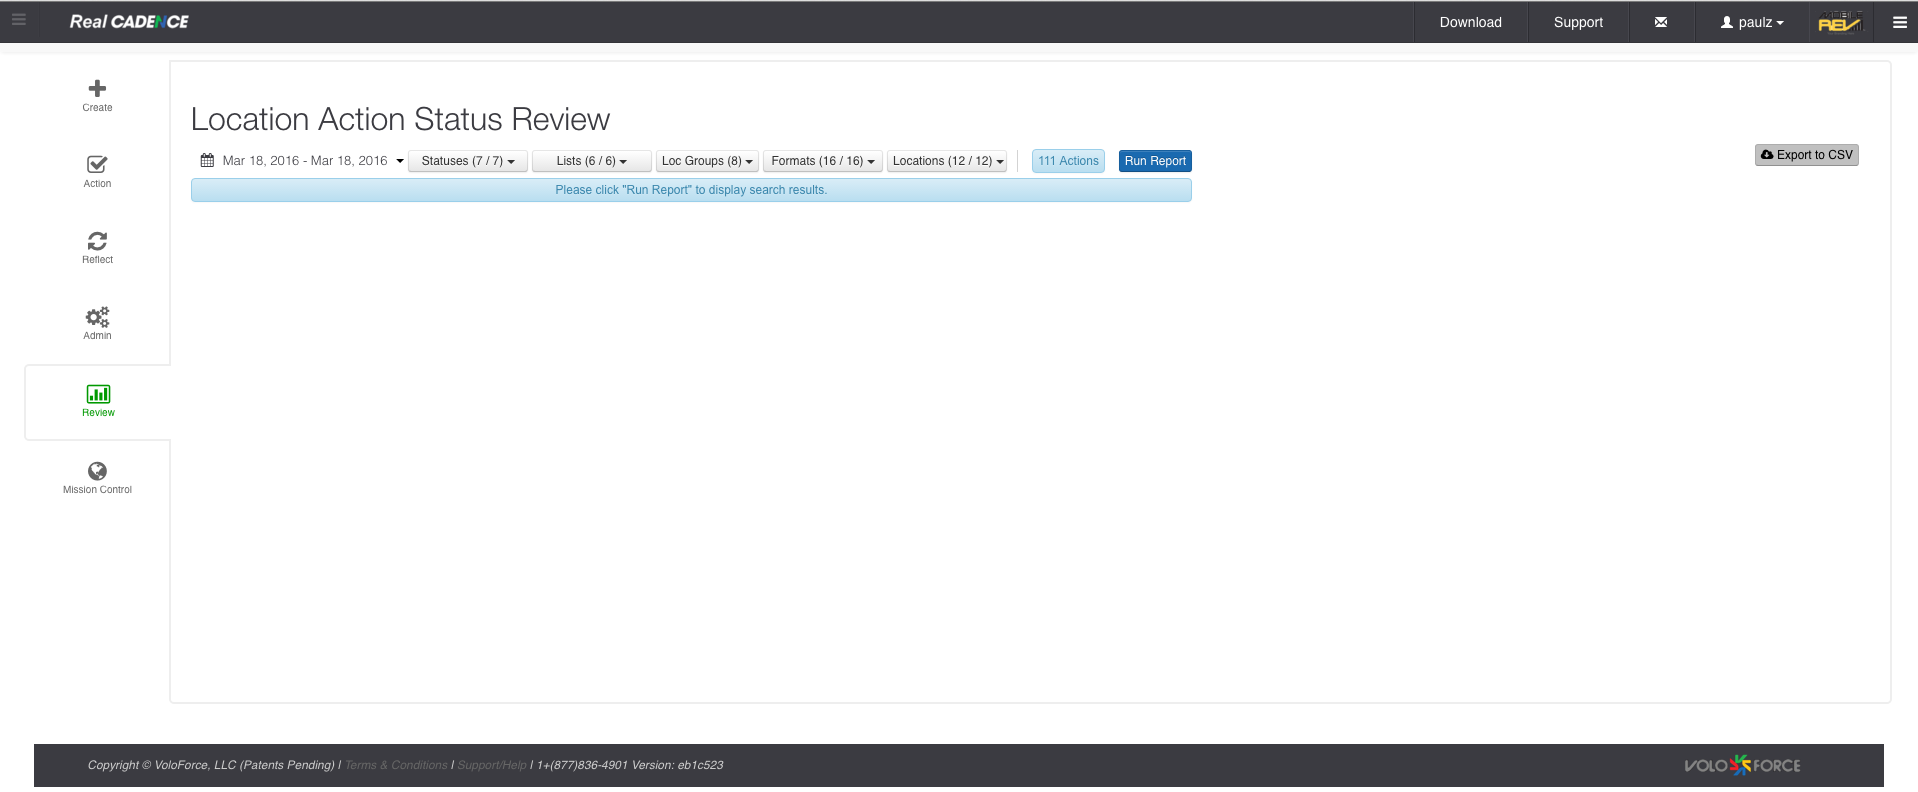
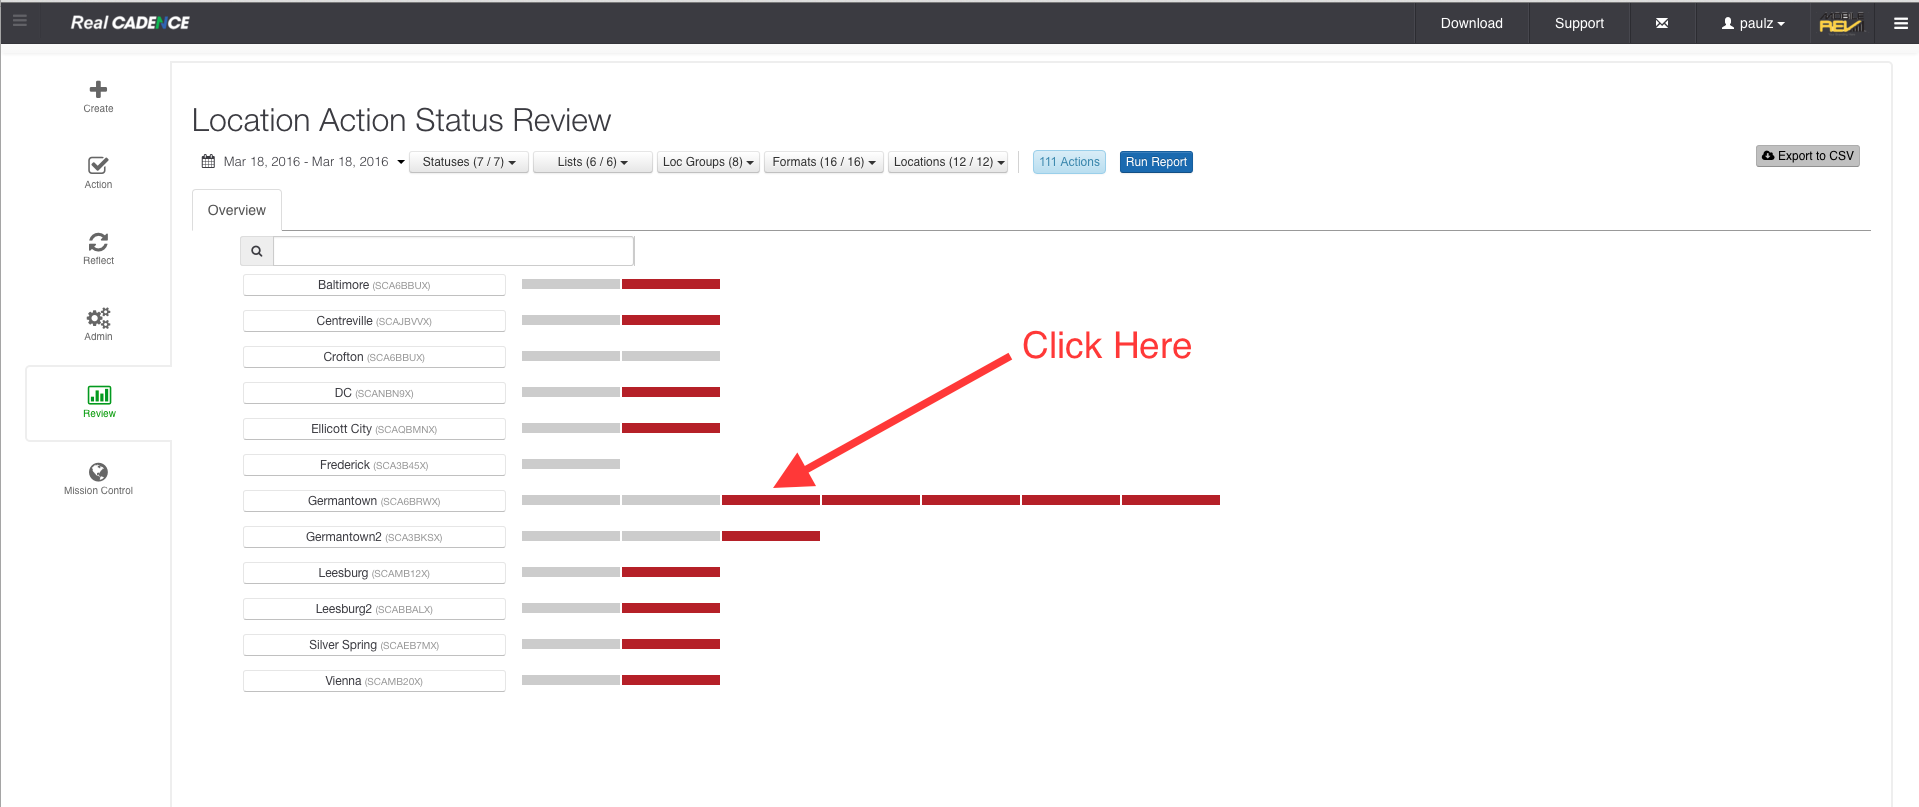
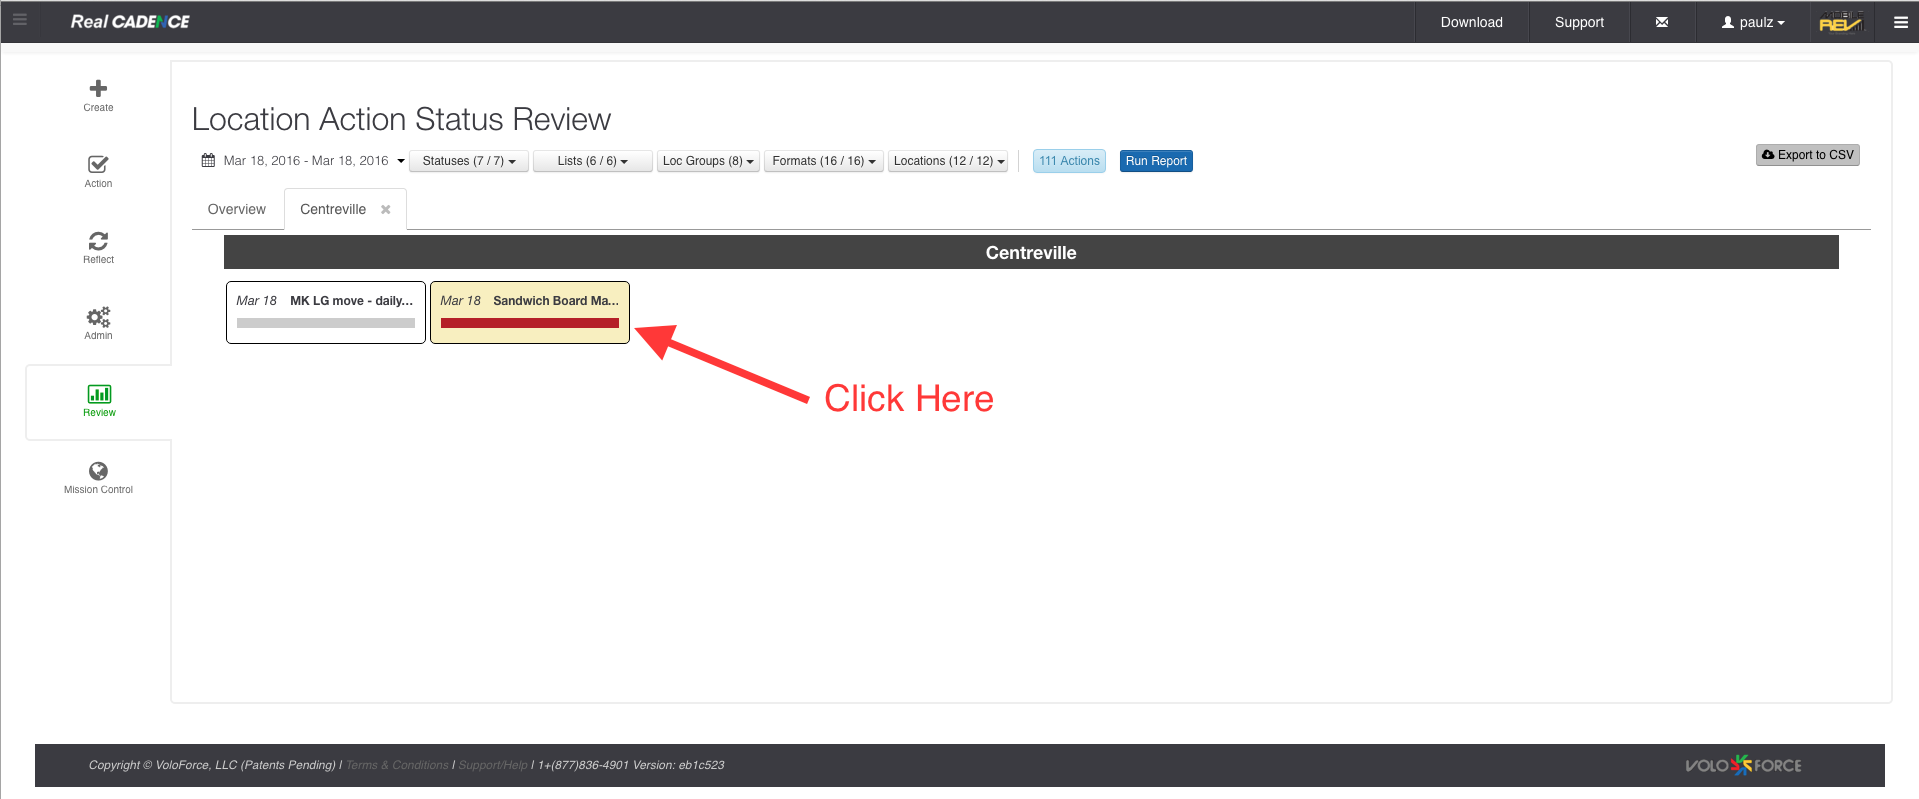
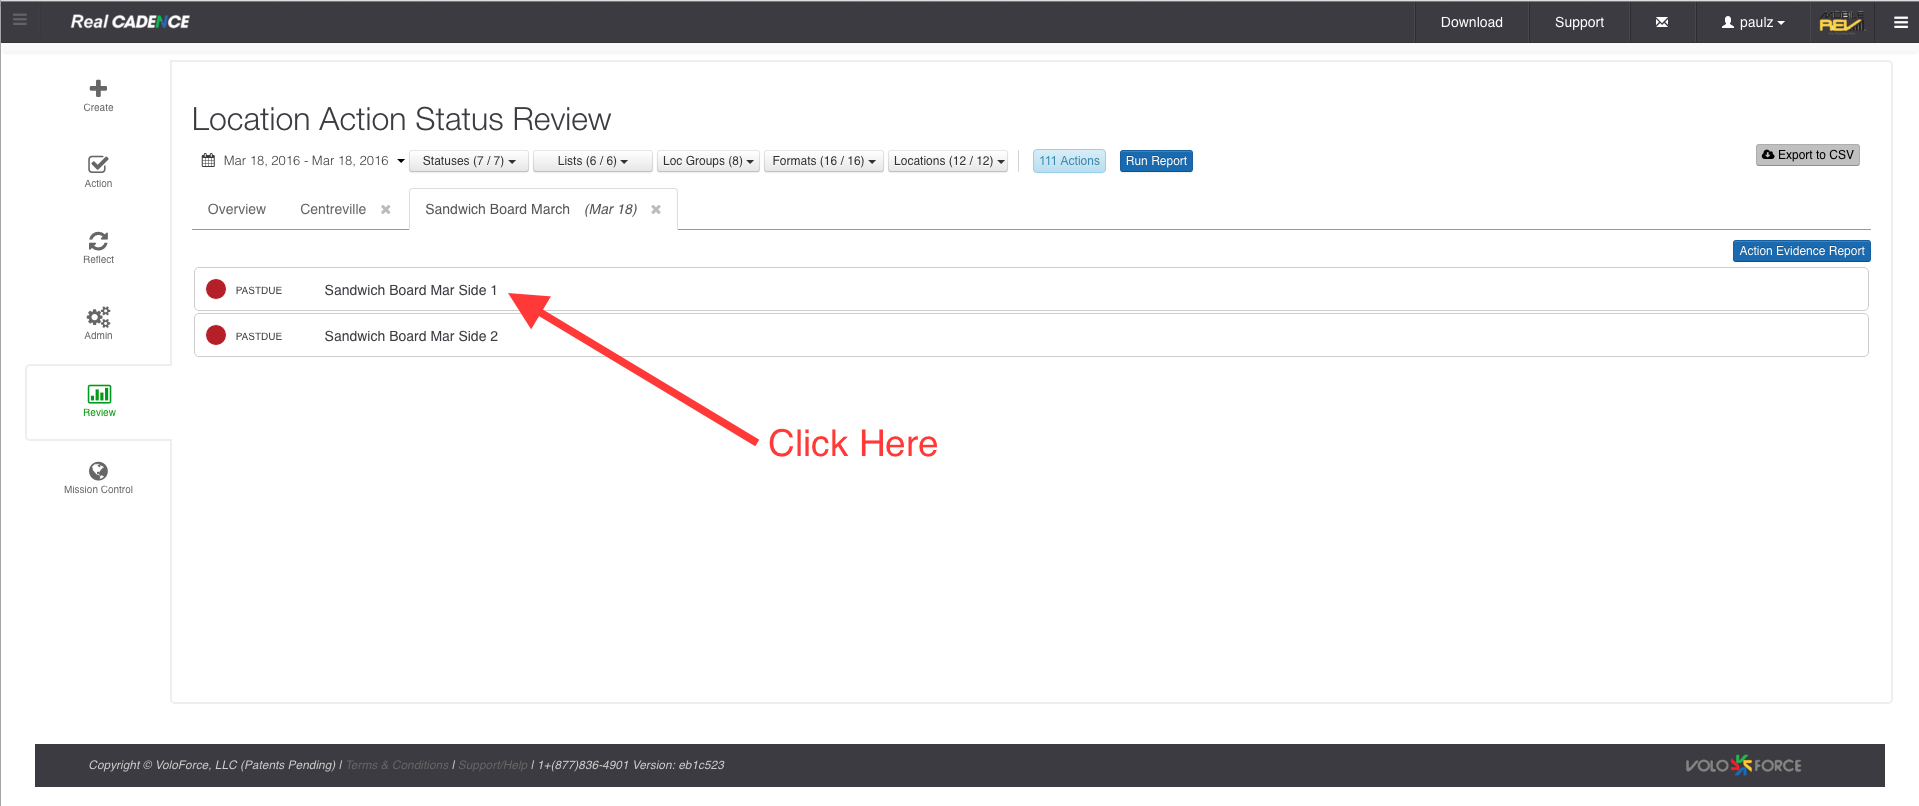
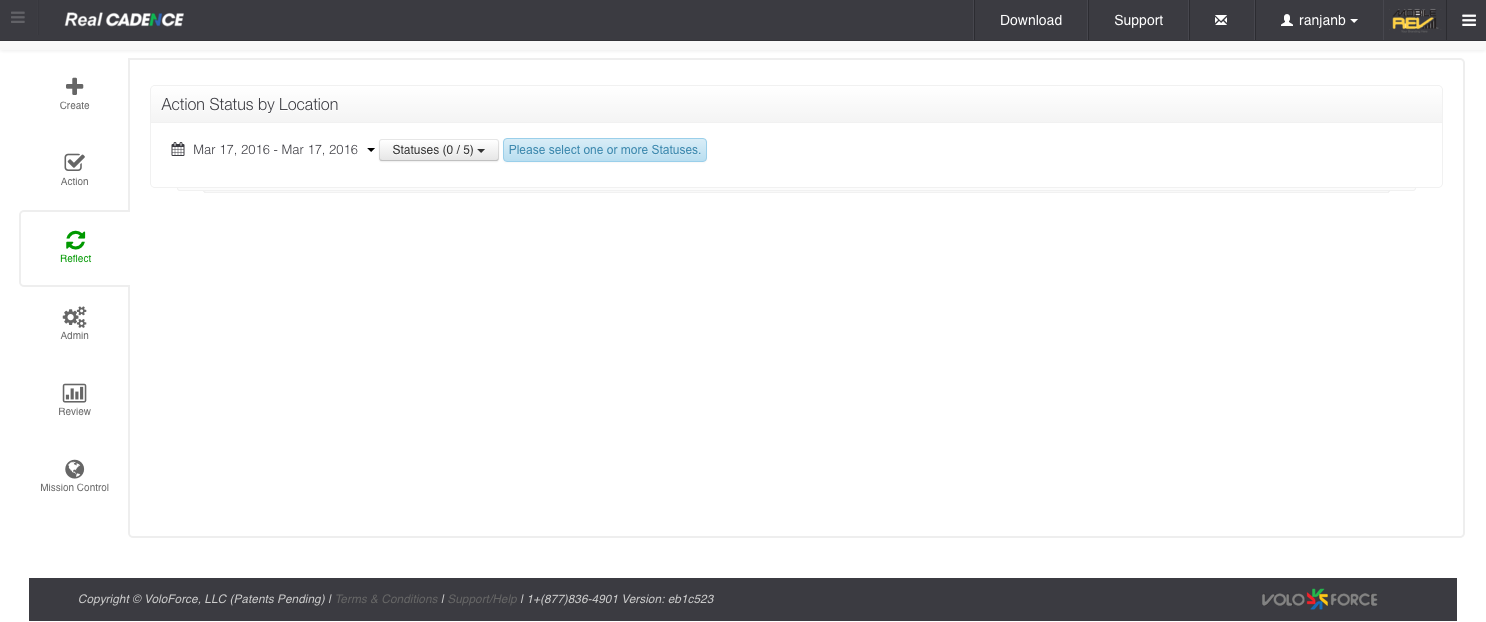
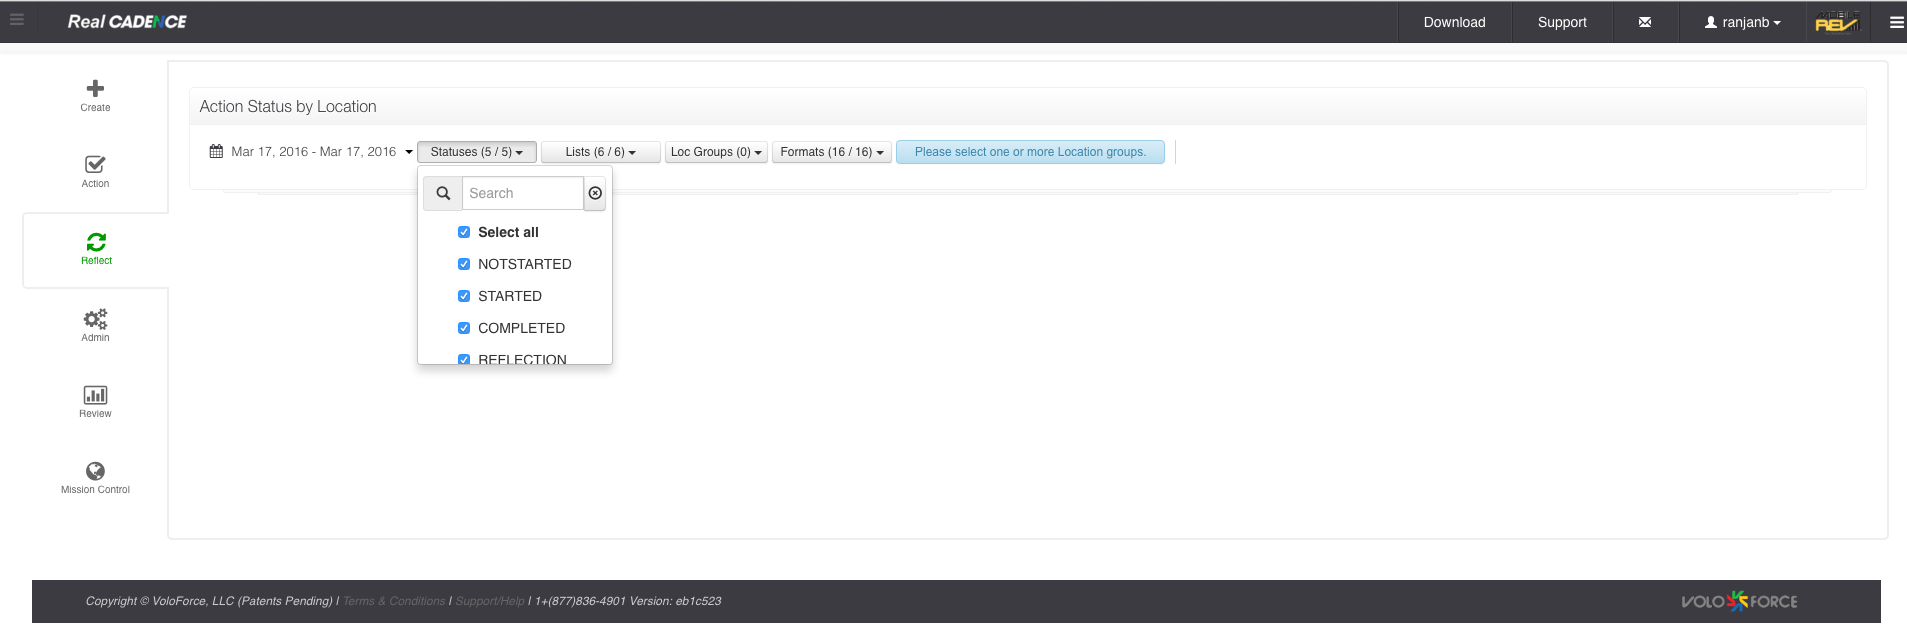
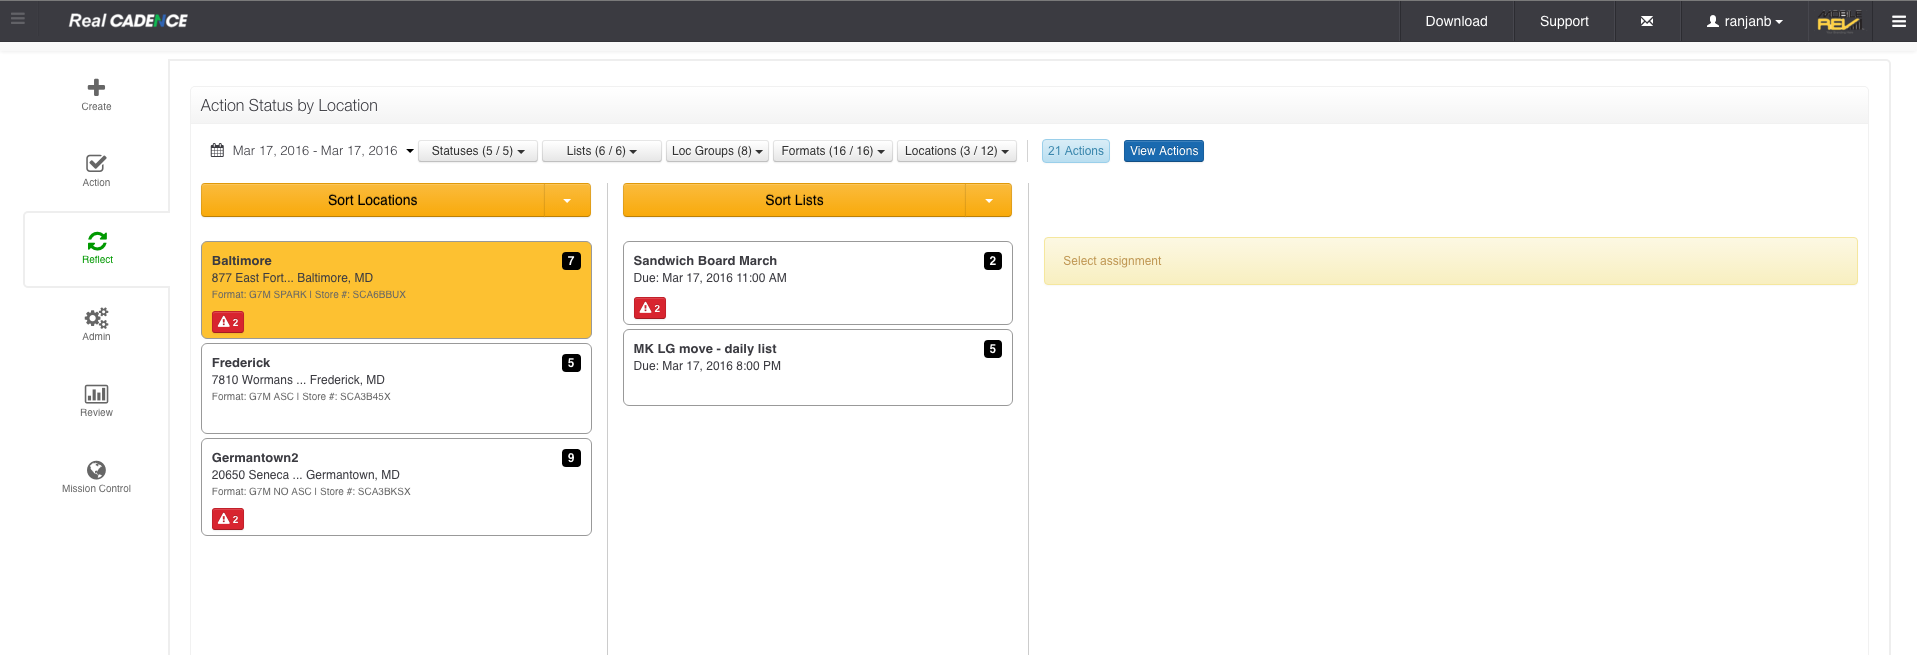
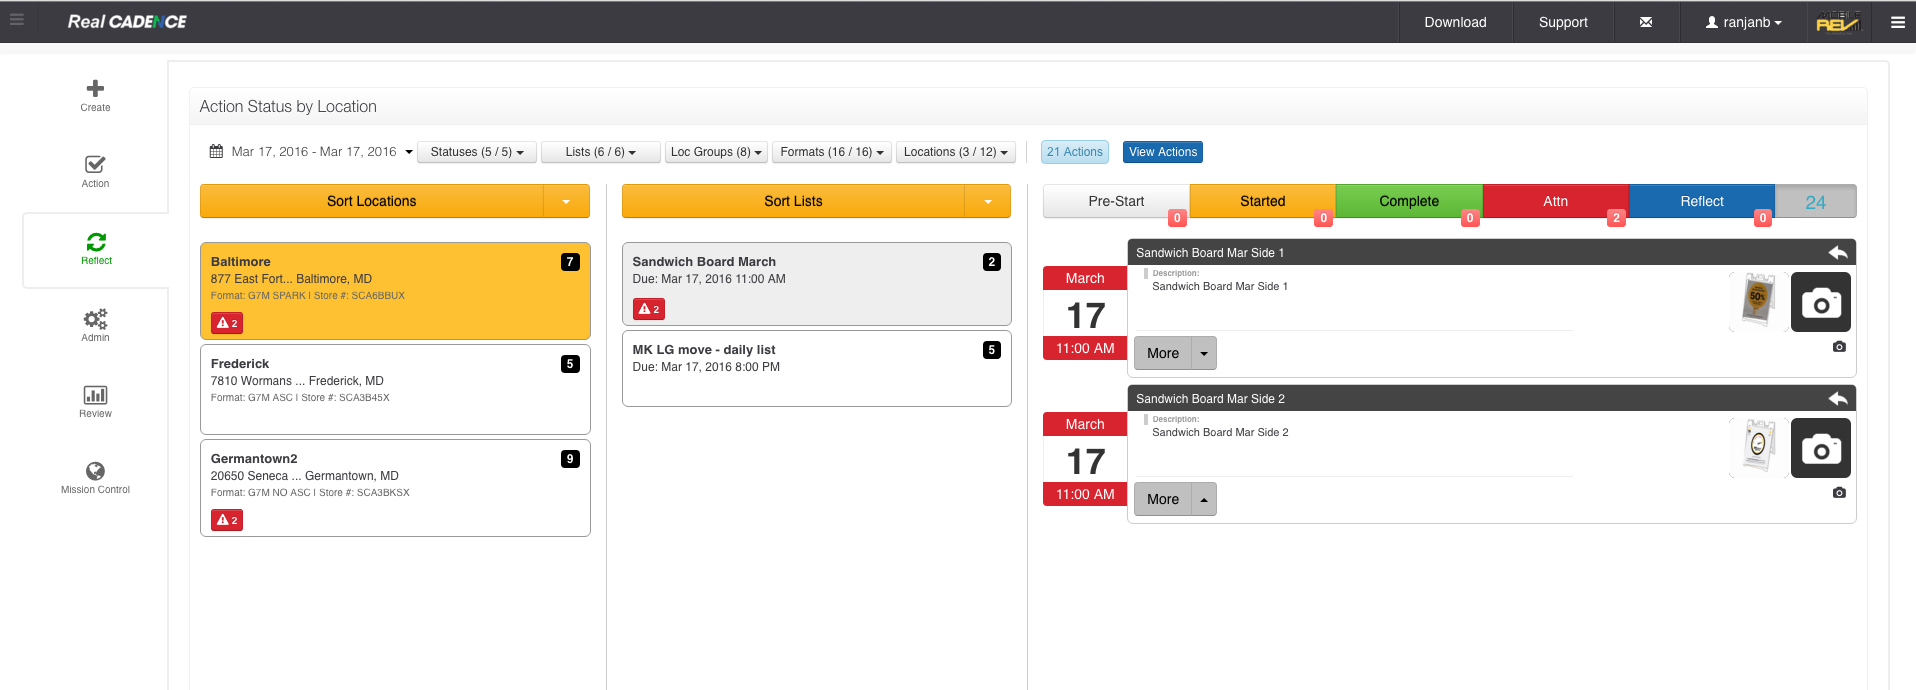
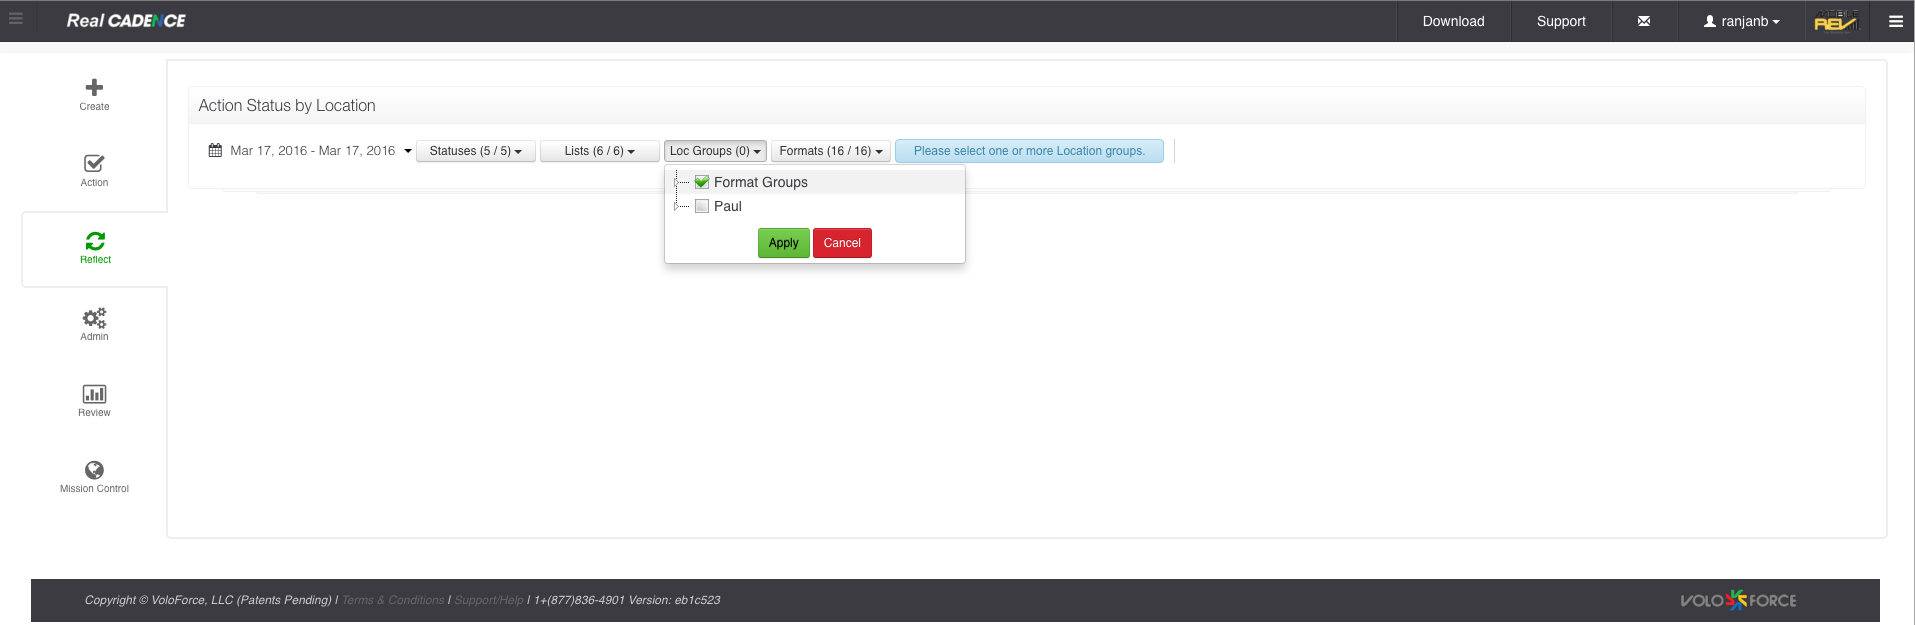
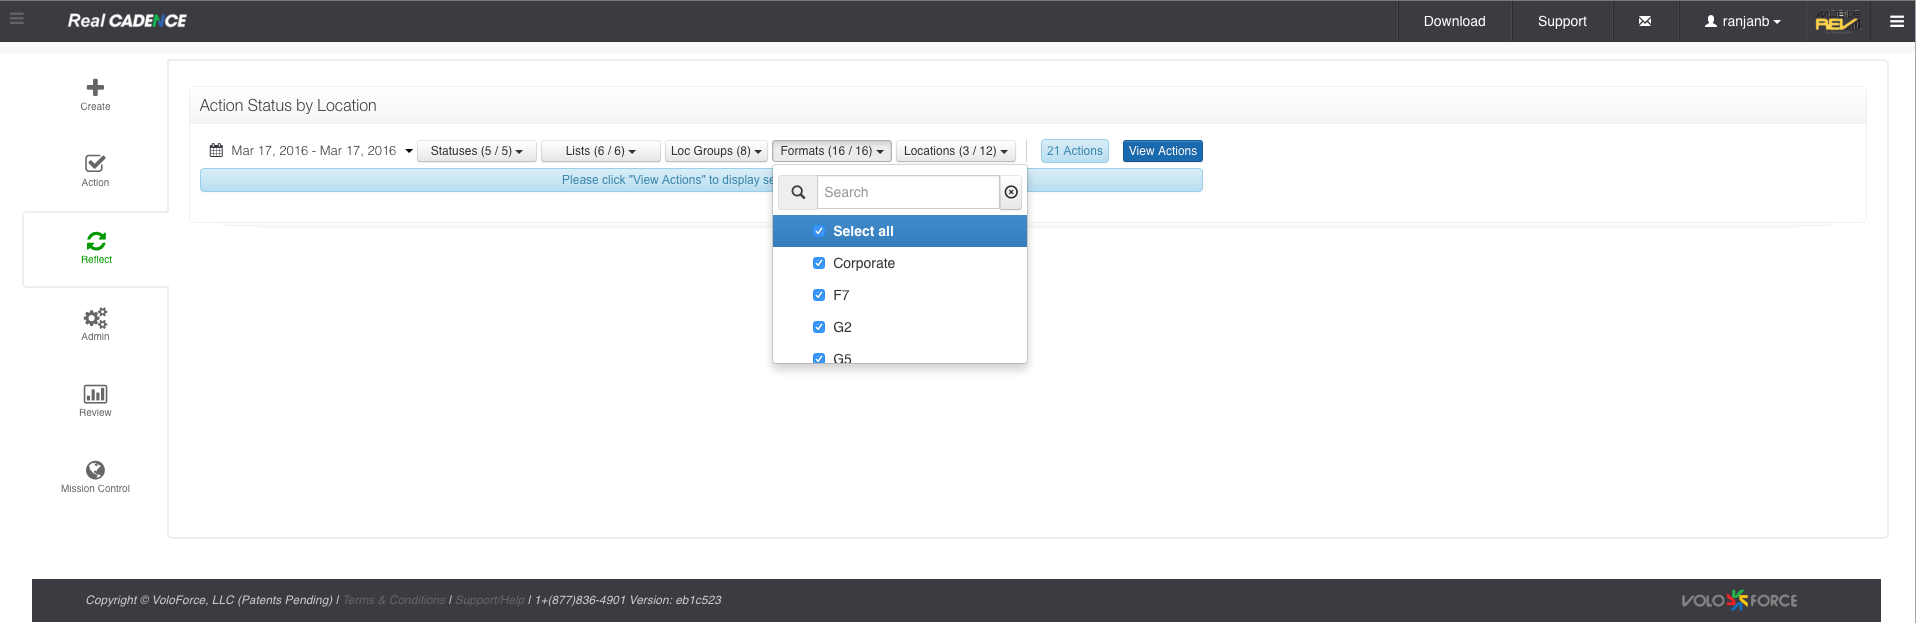
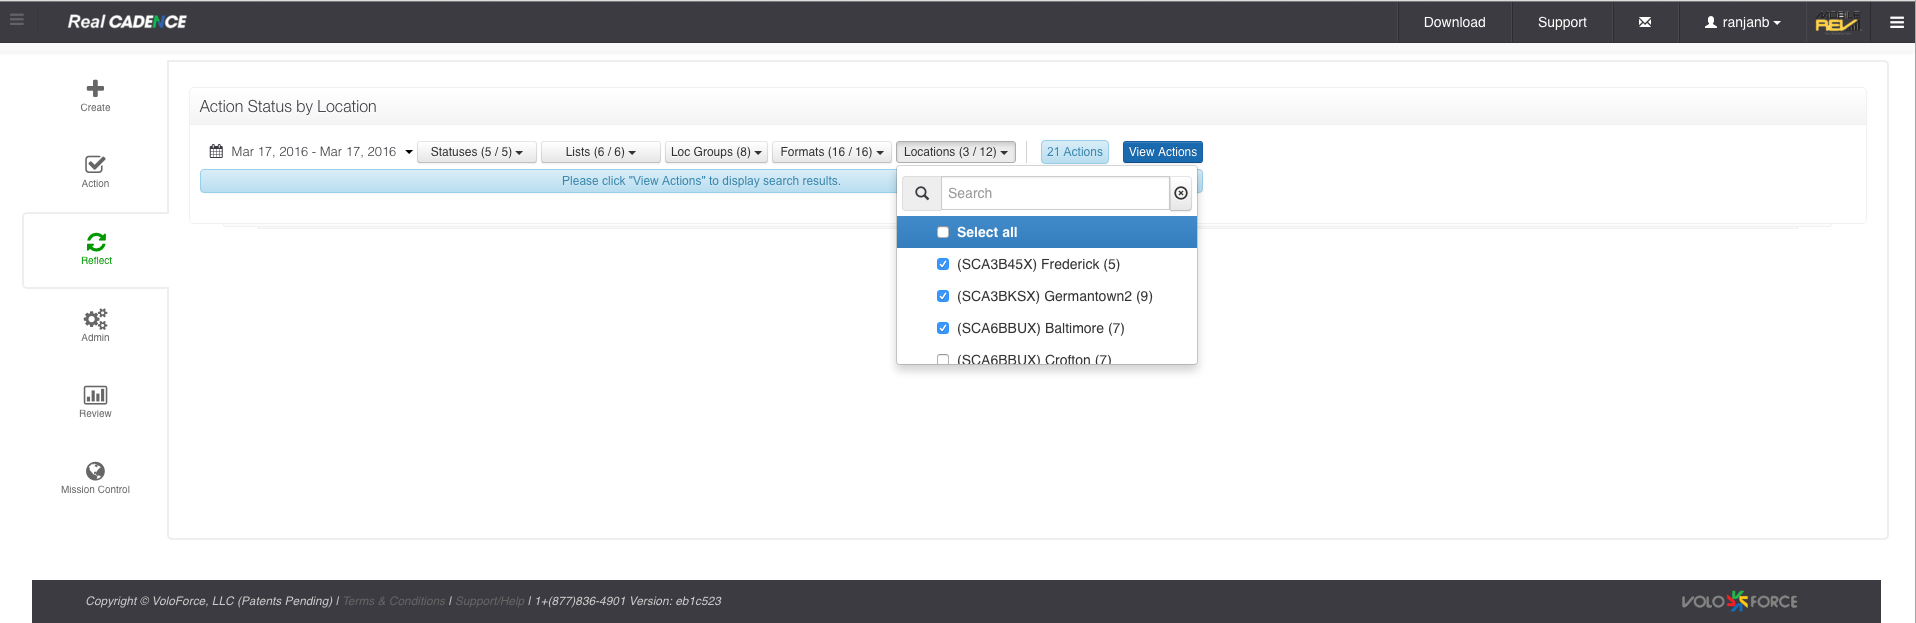
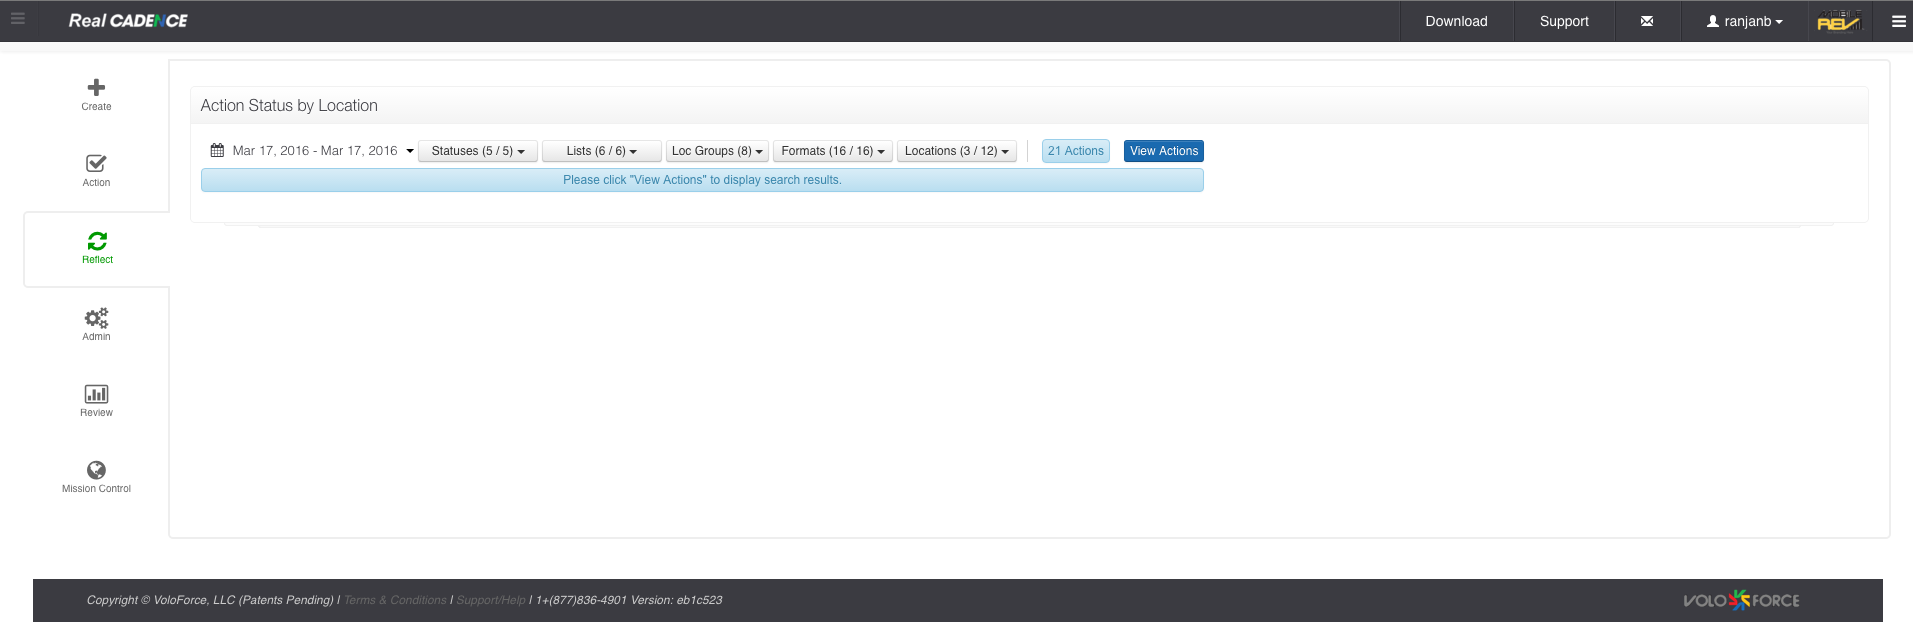
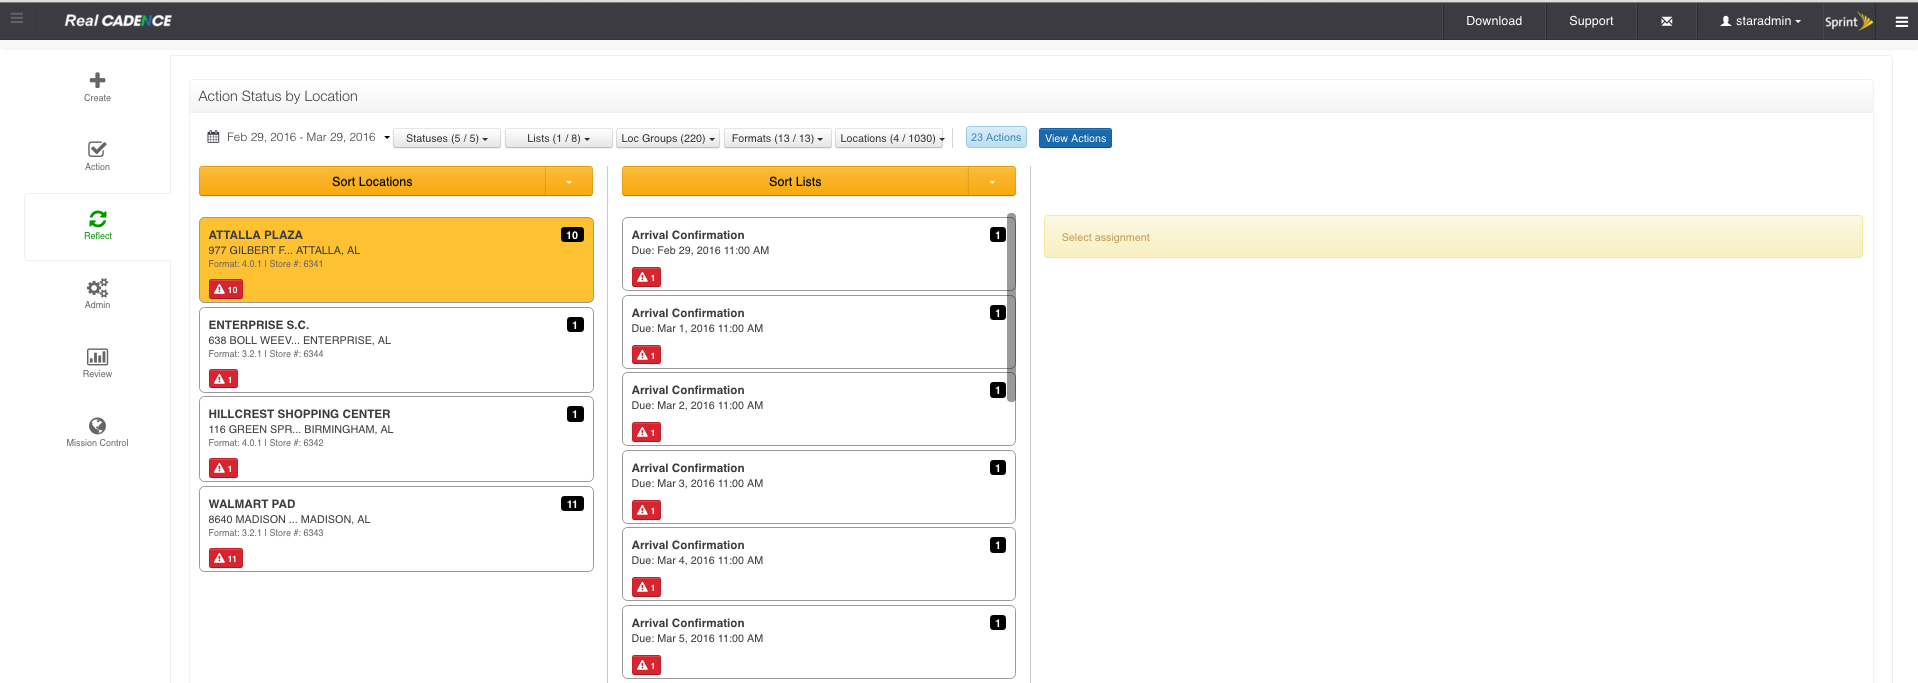
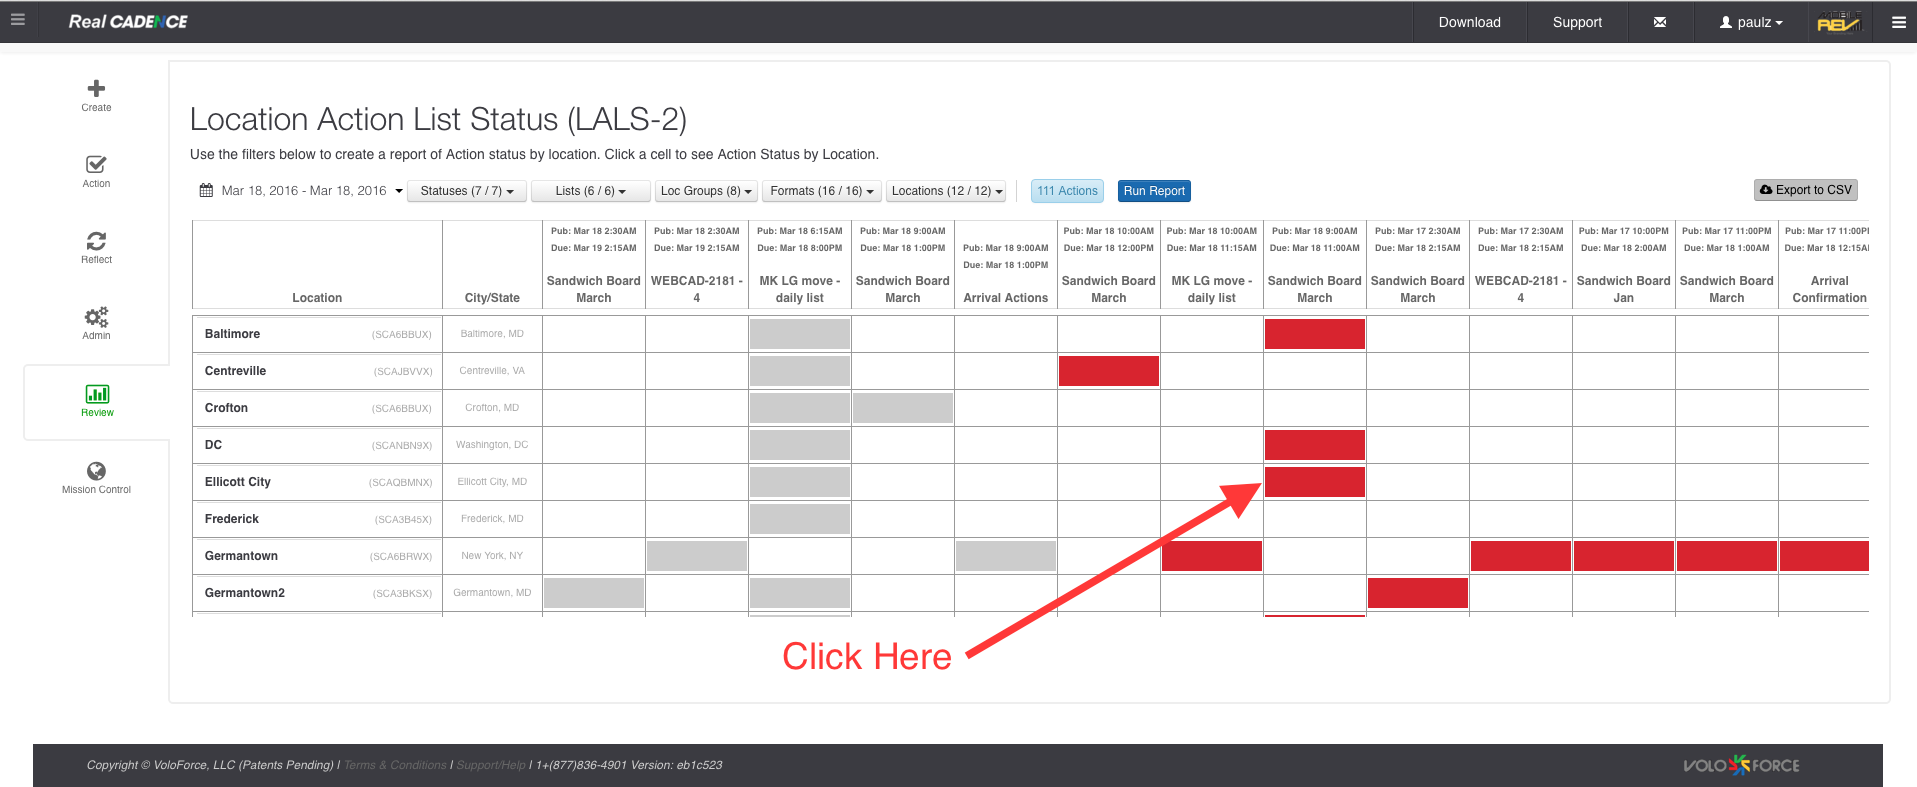
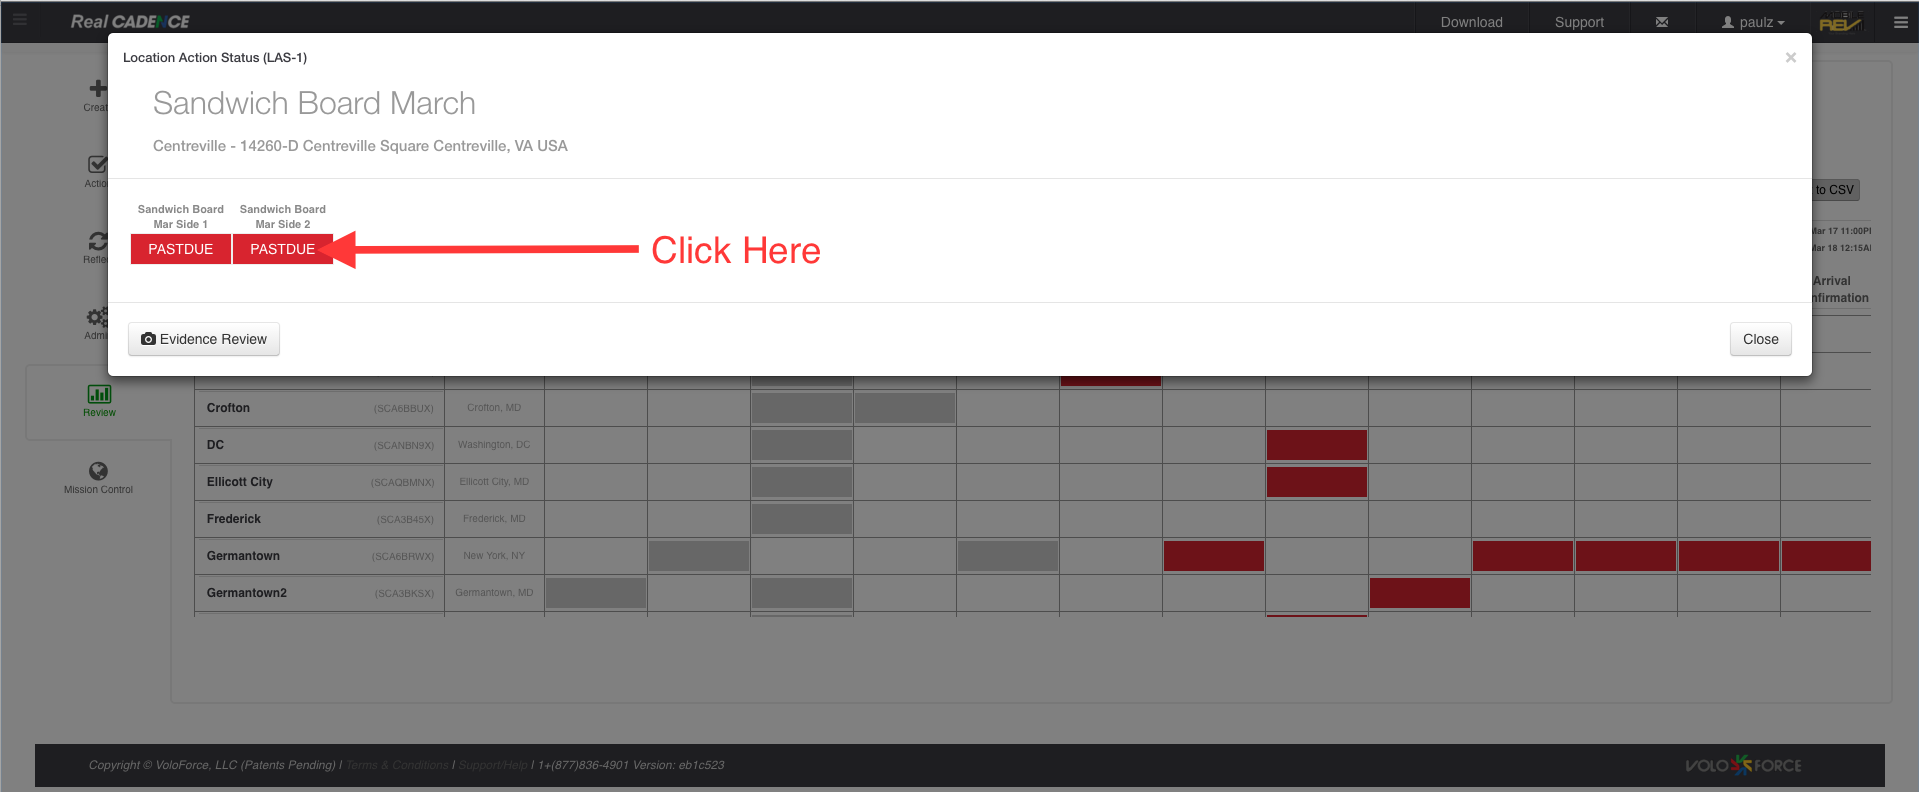
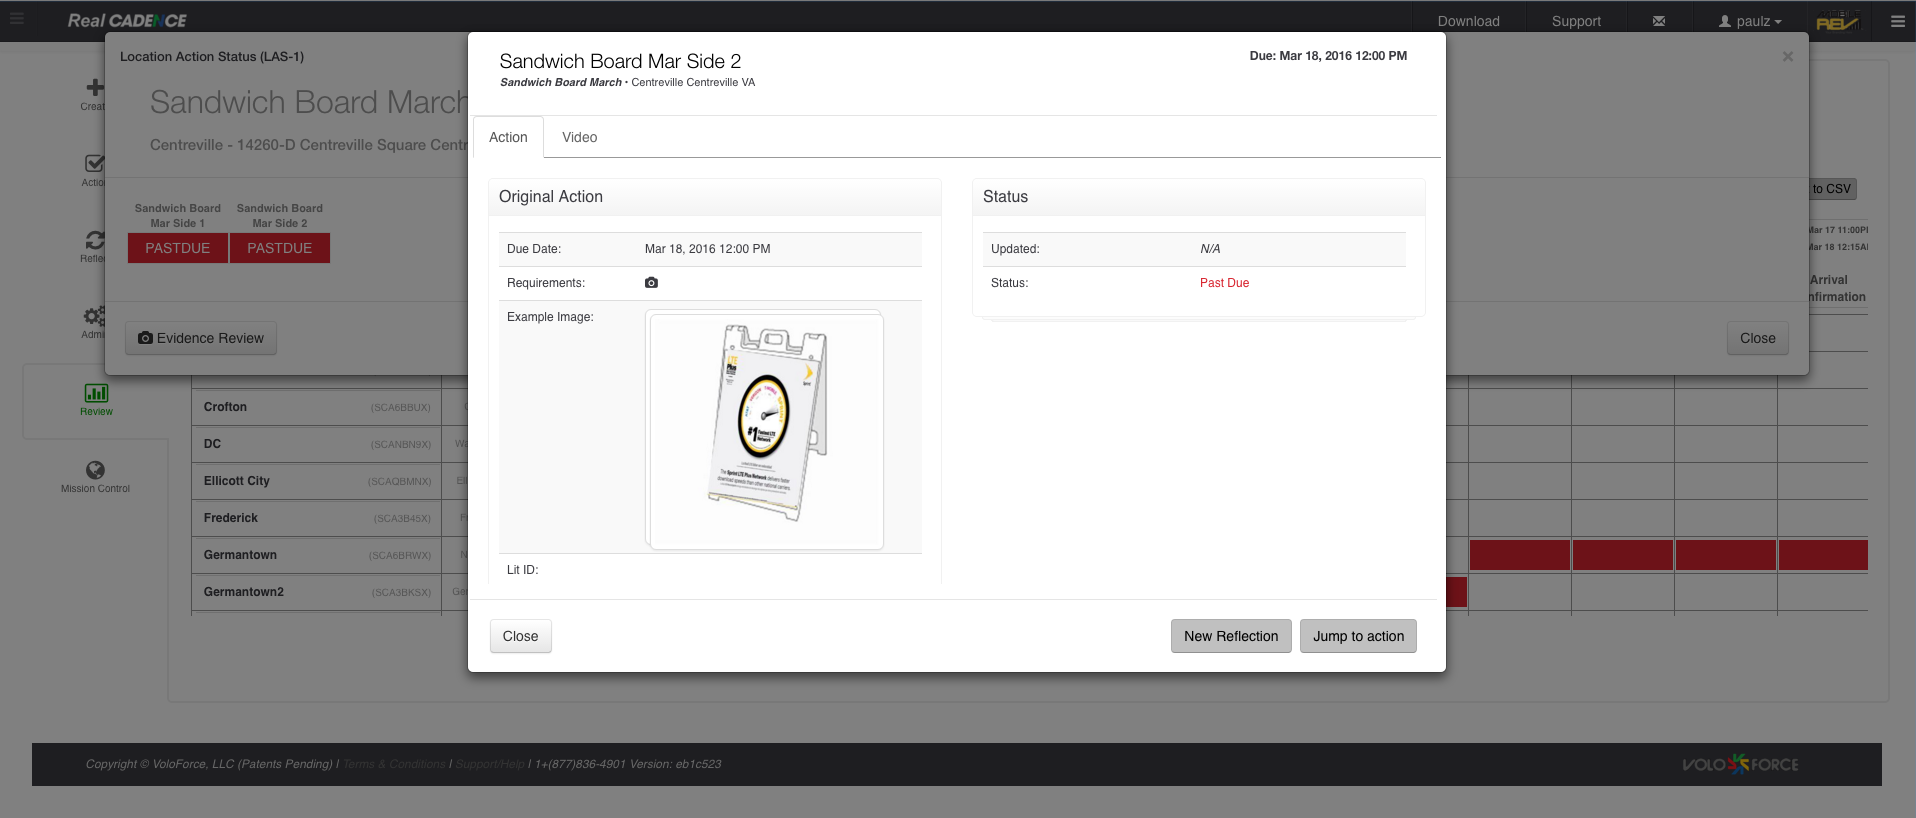
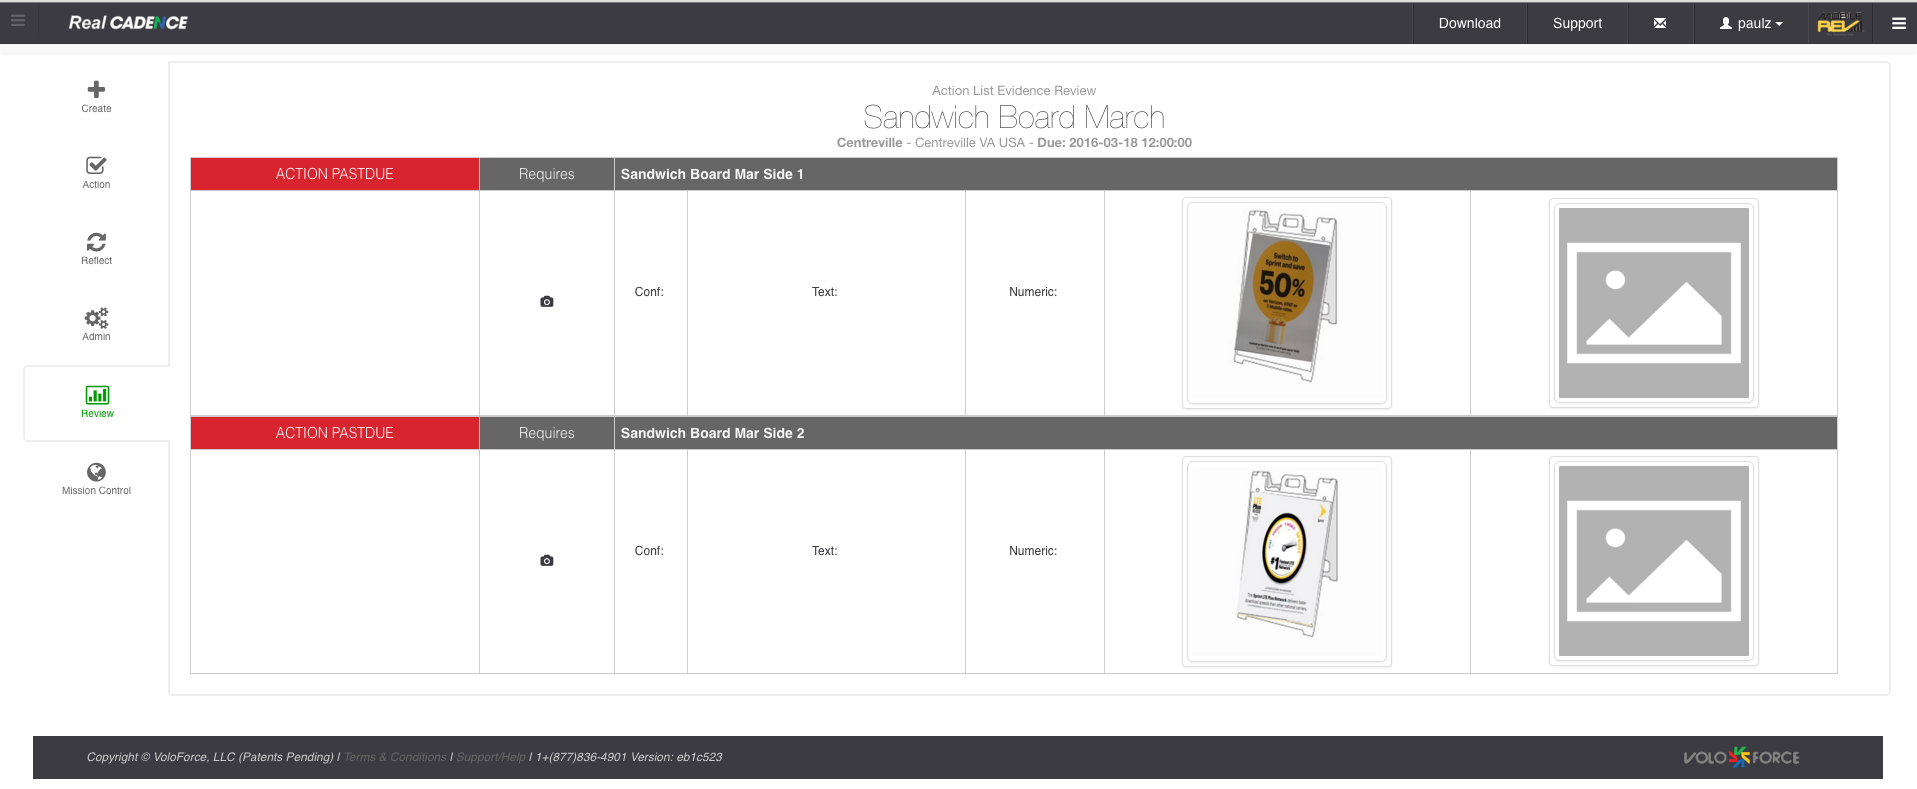
How-to: Review Action Statuses for a Location
|


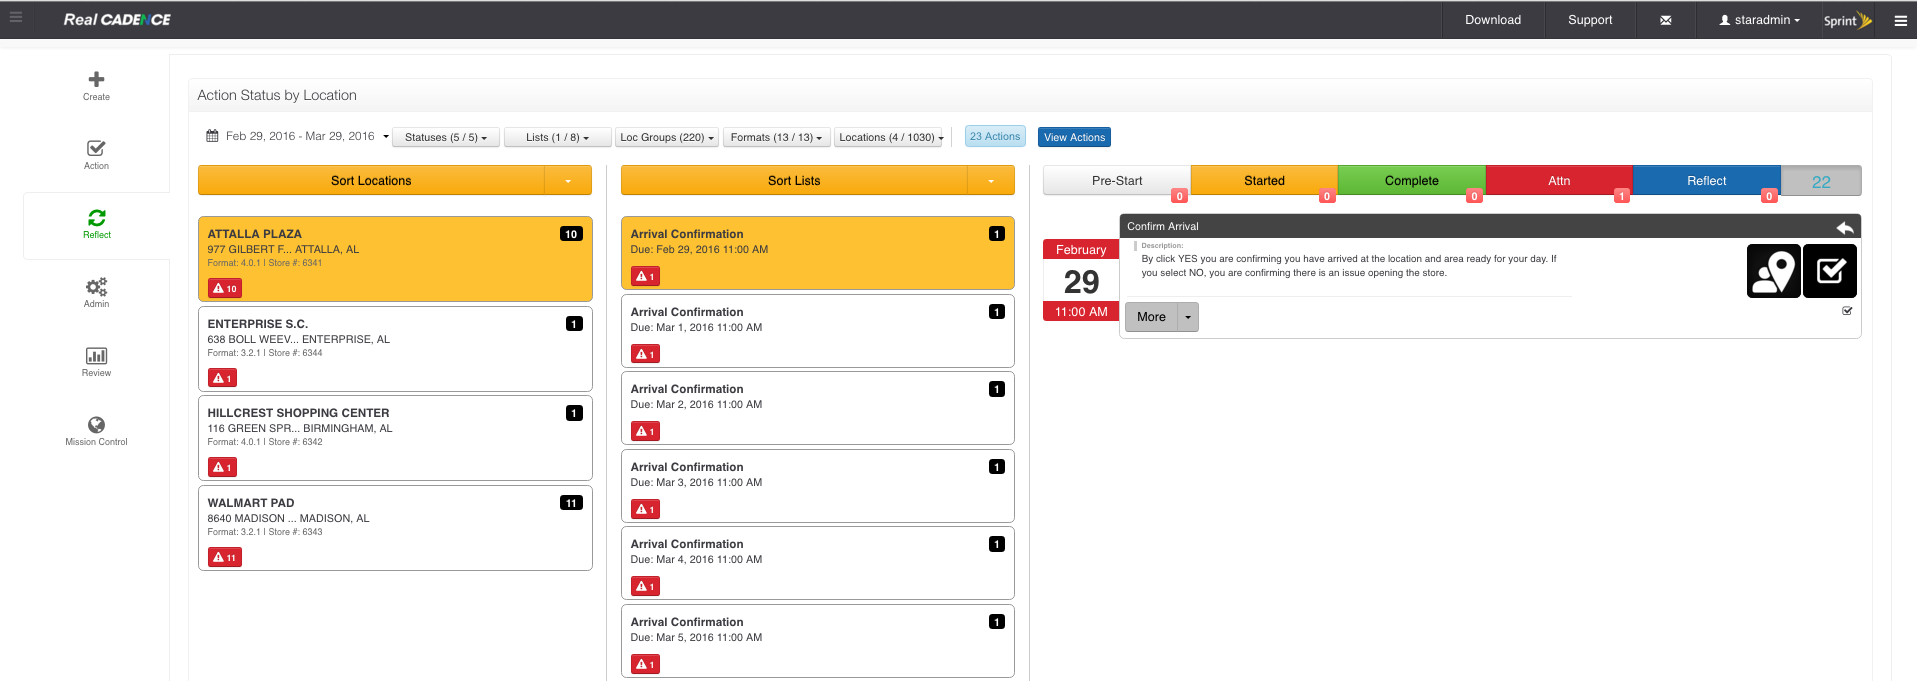
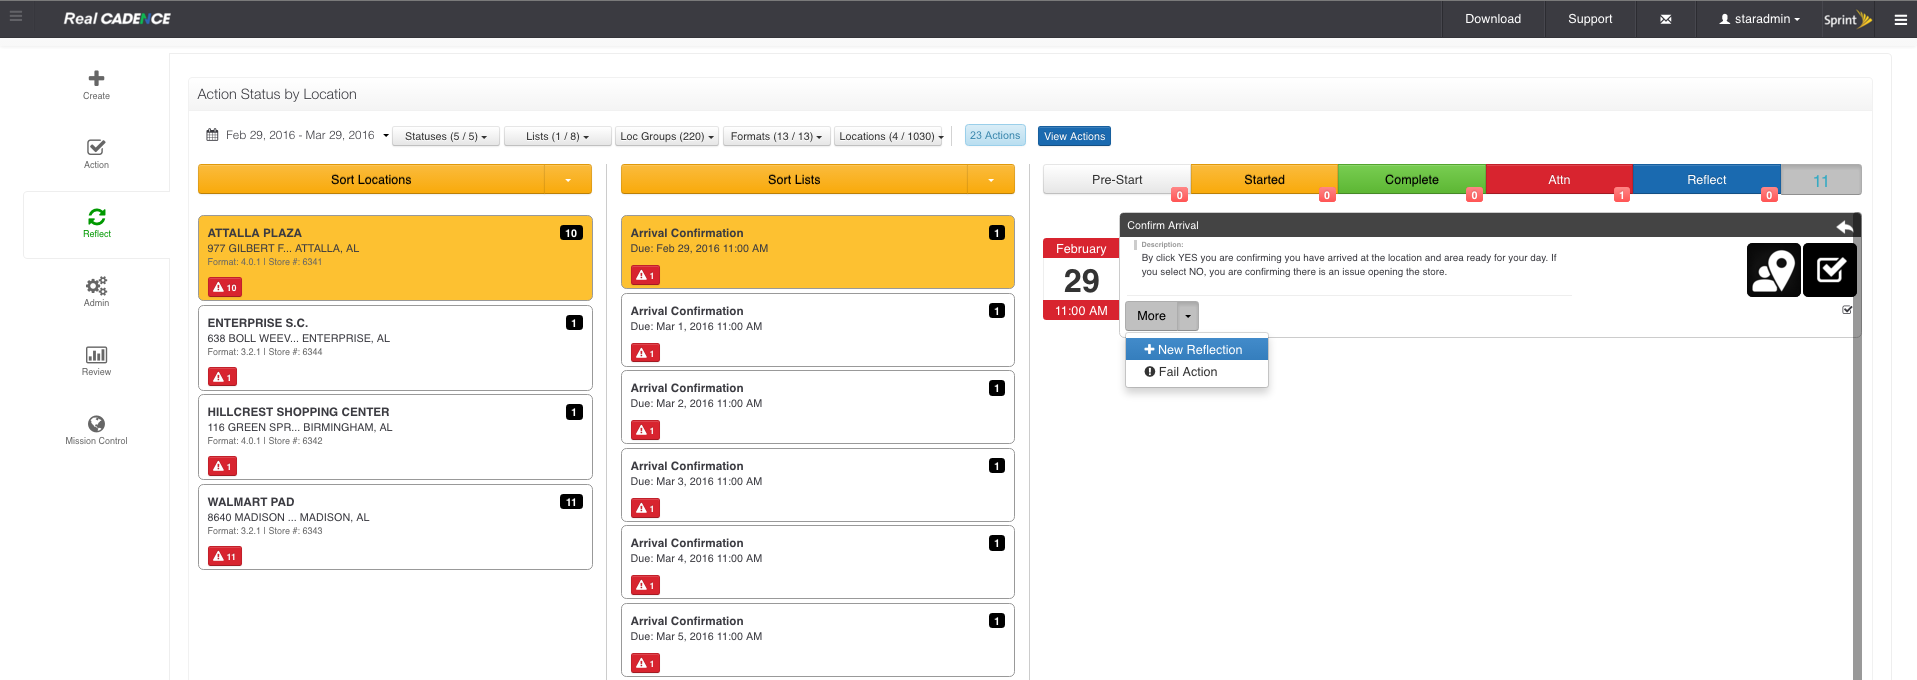
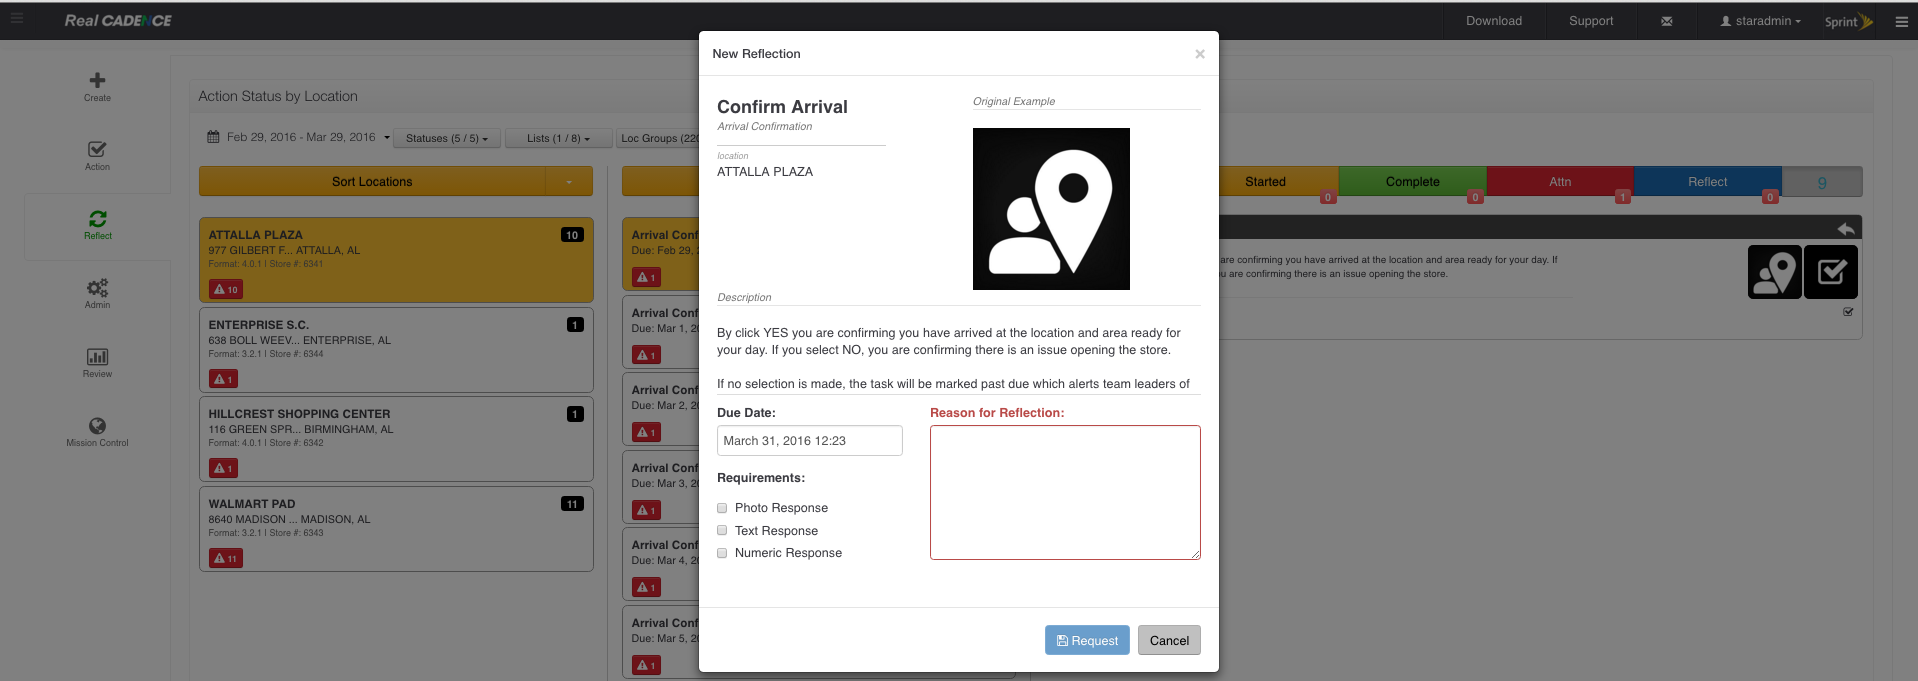
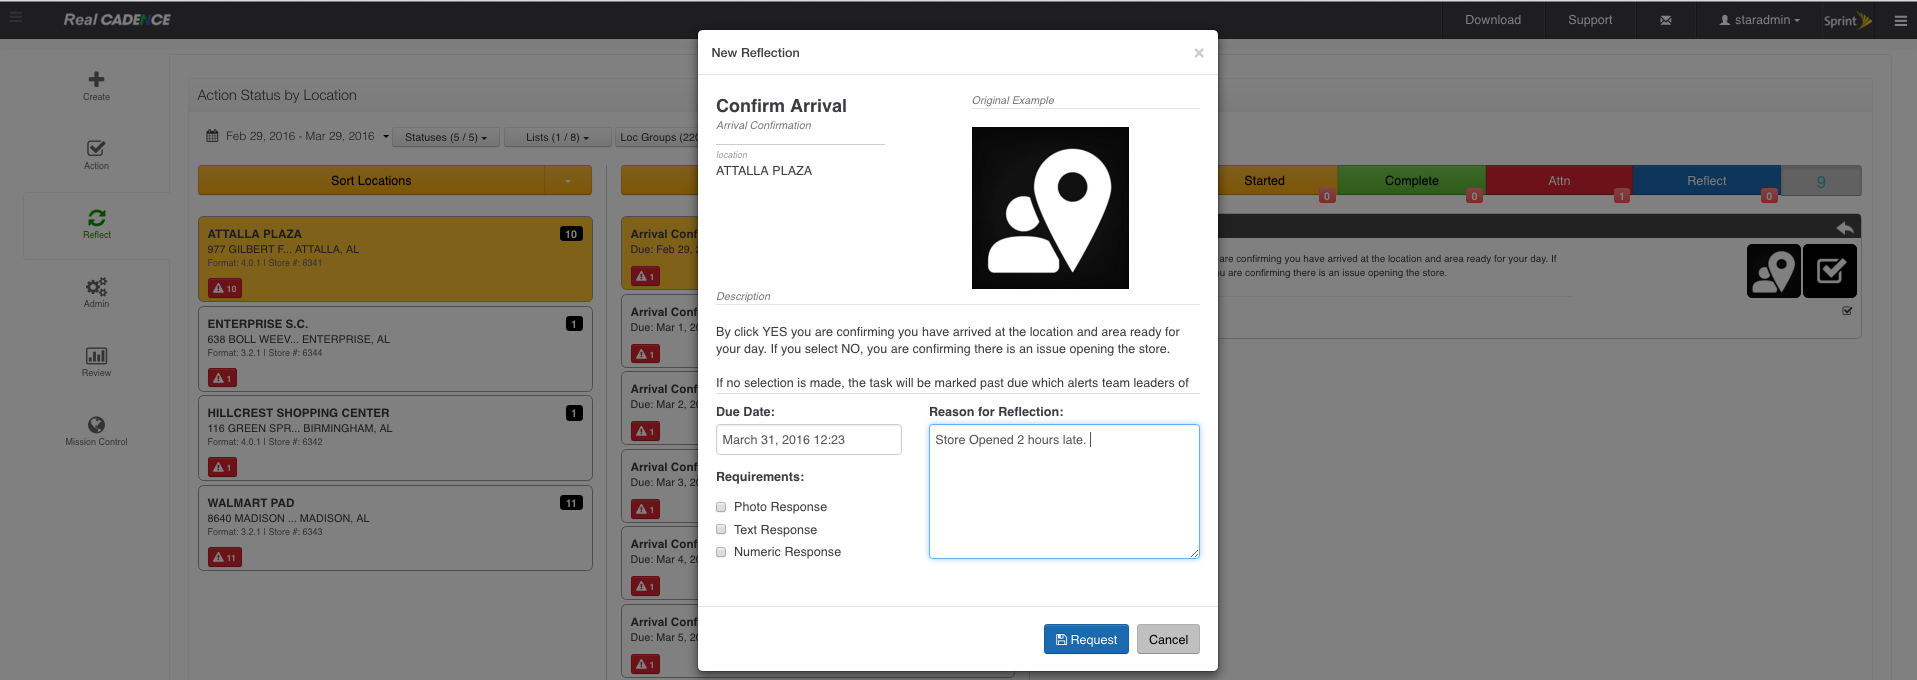
How To: Create a Reflection from Reflect View
|


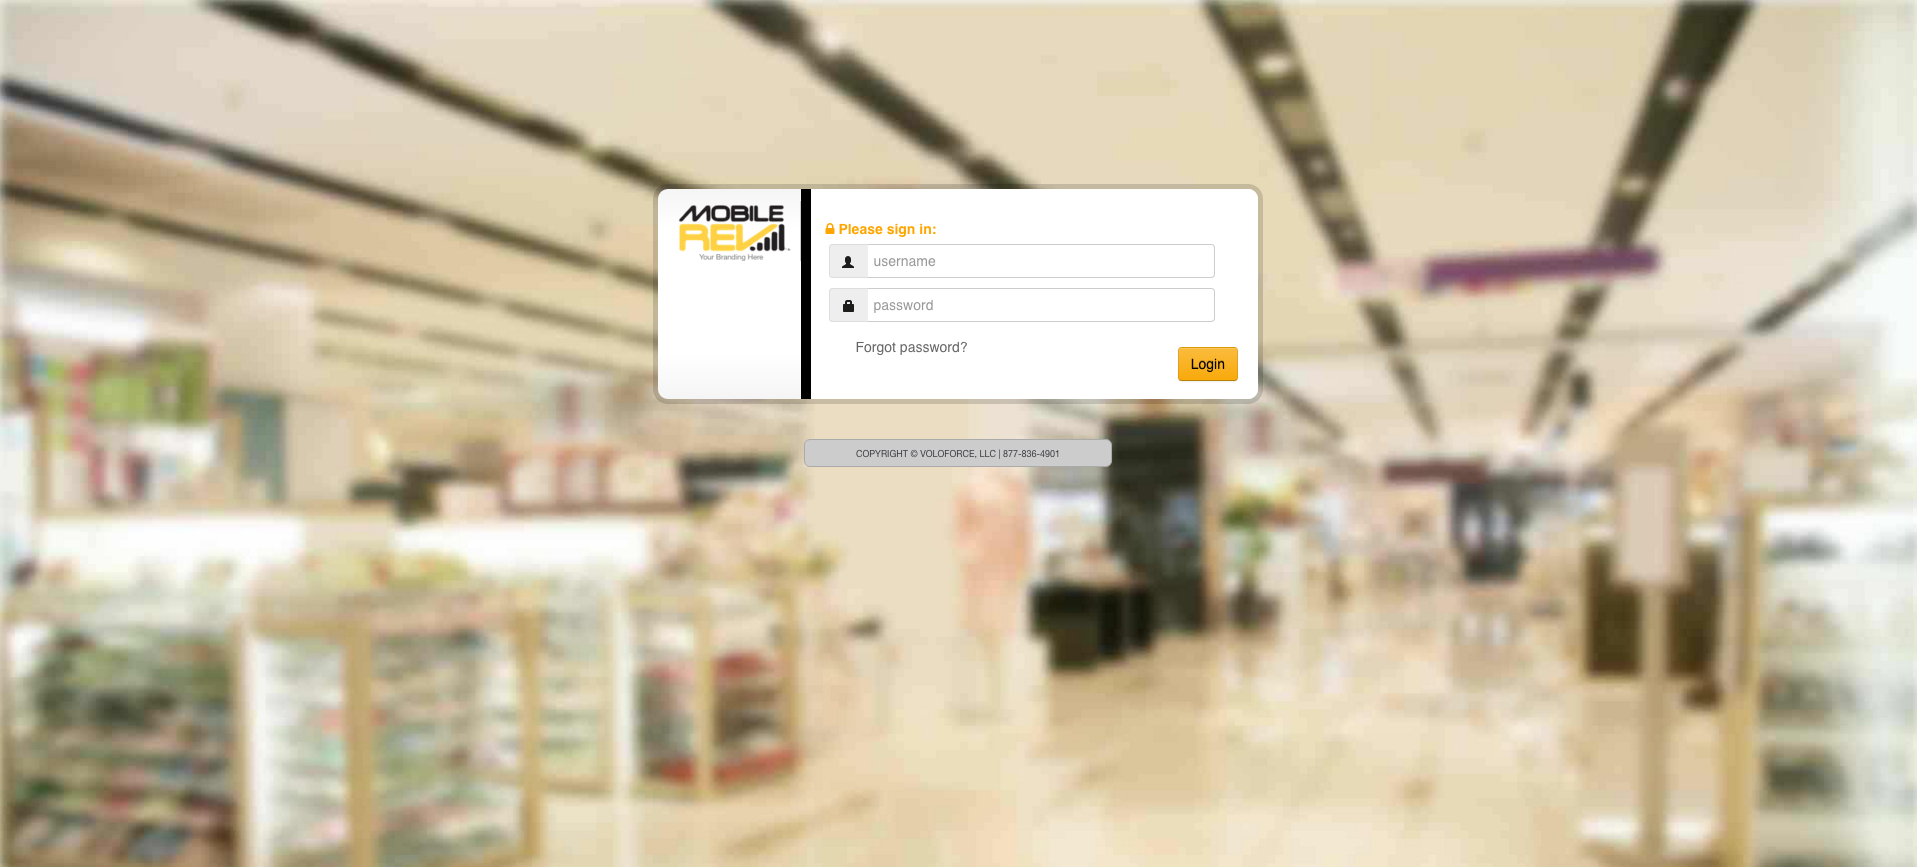
How-to: Login
|


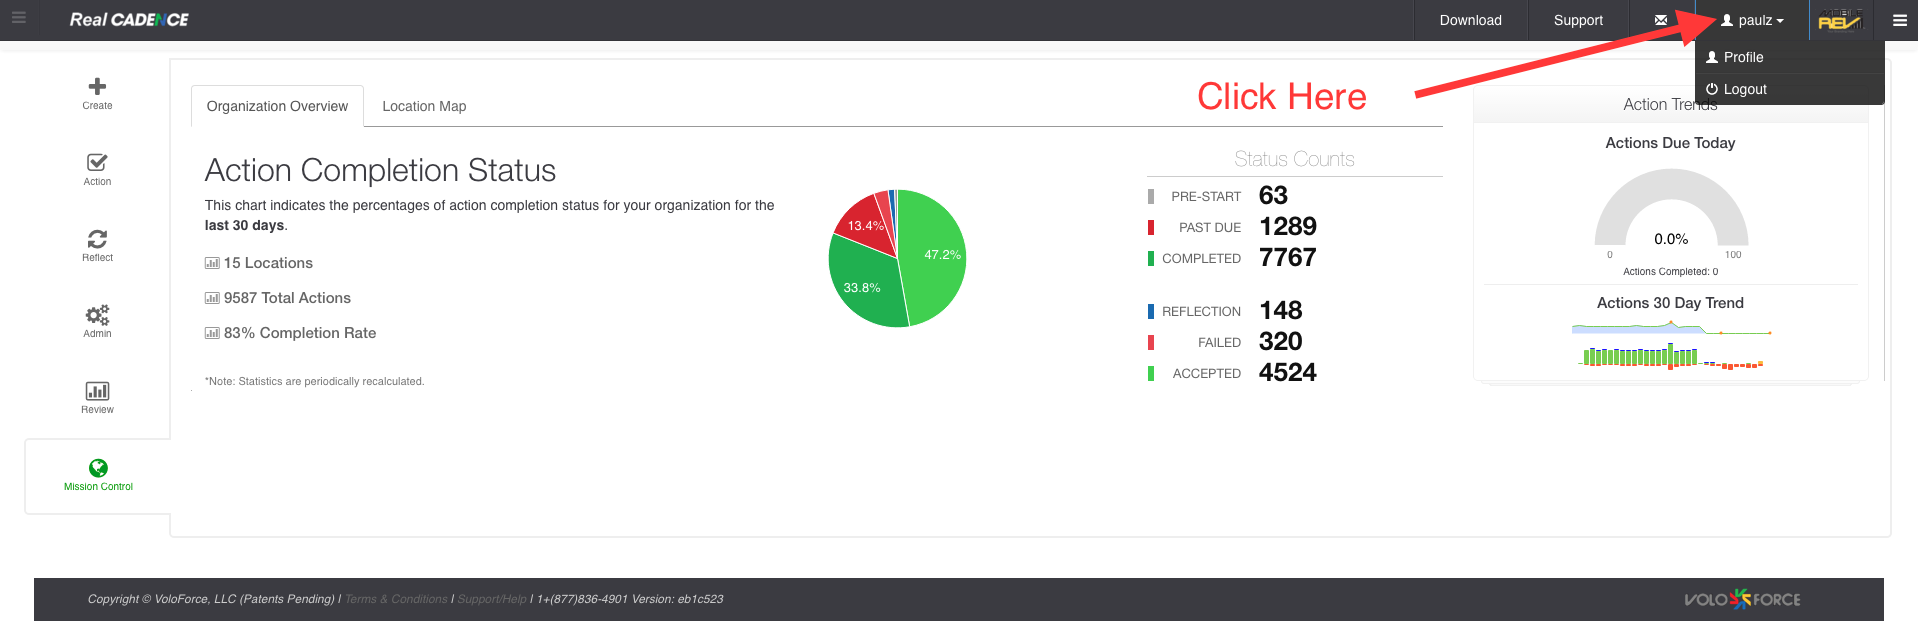
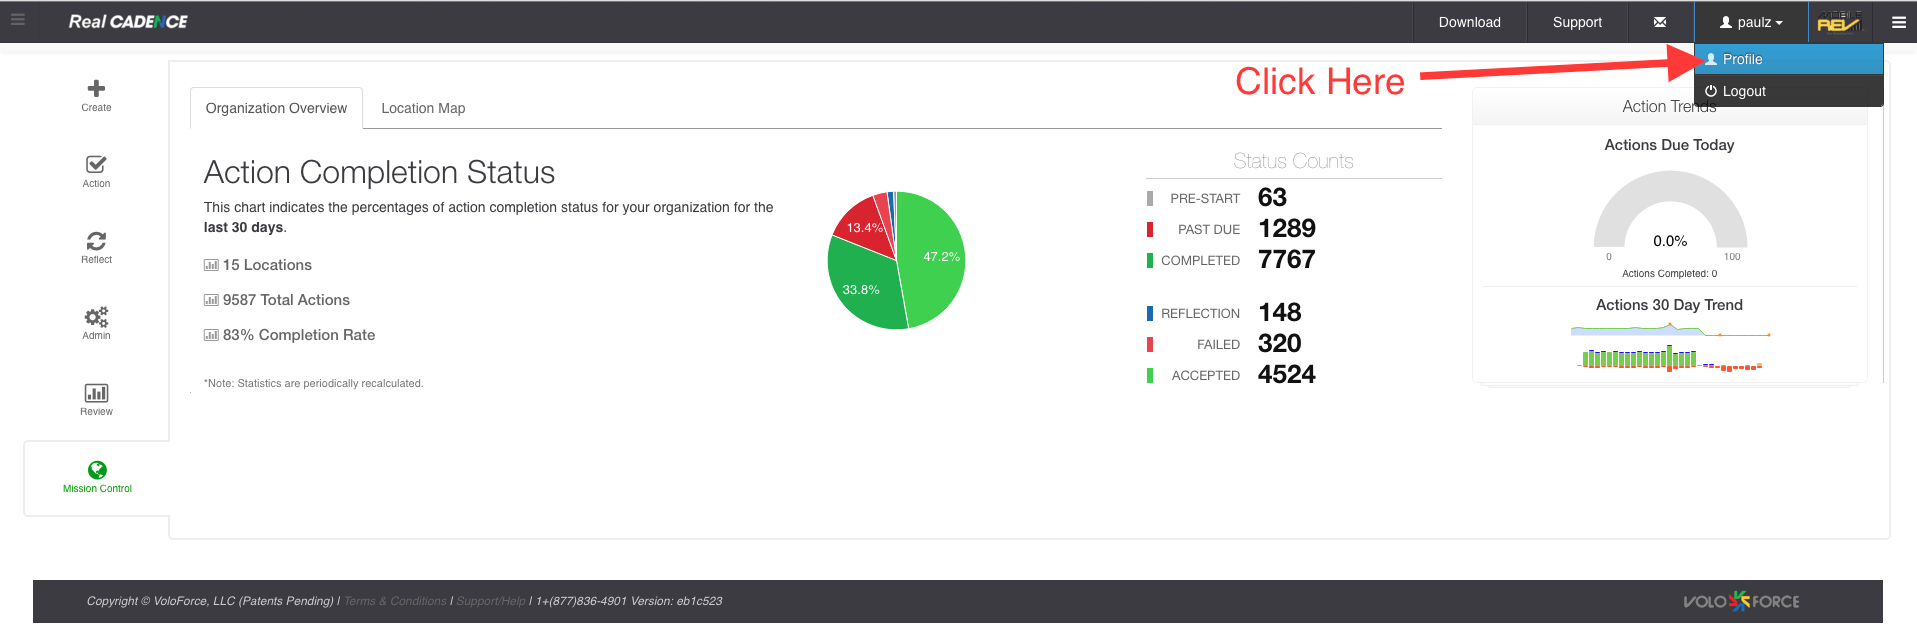
How-to: Reset Password
|


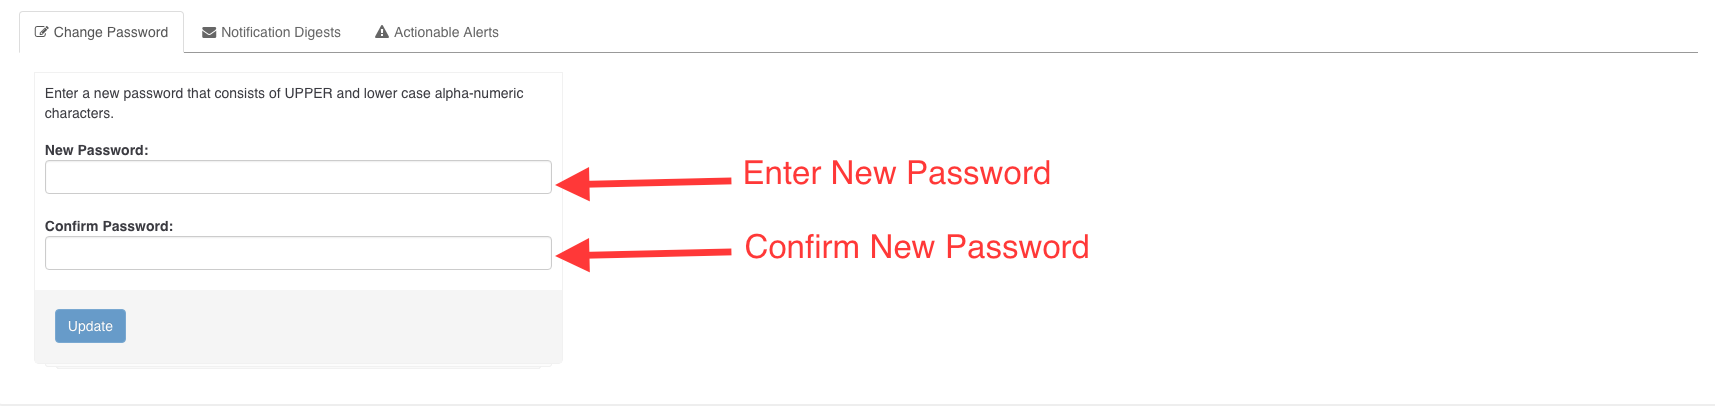
How-to: Change Password
|
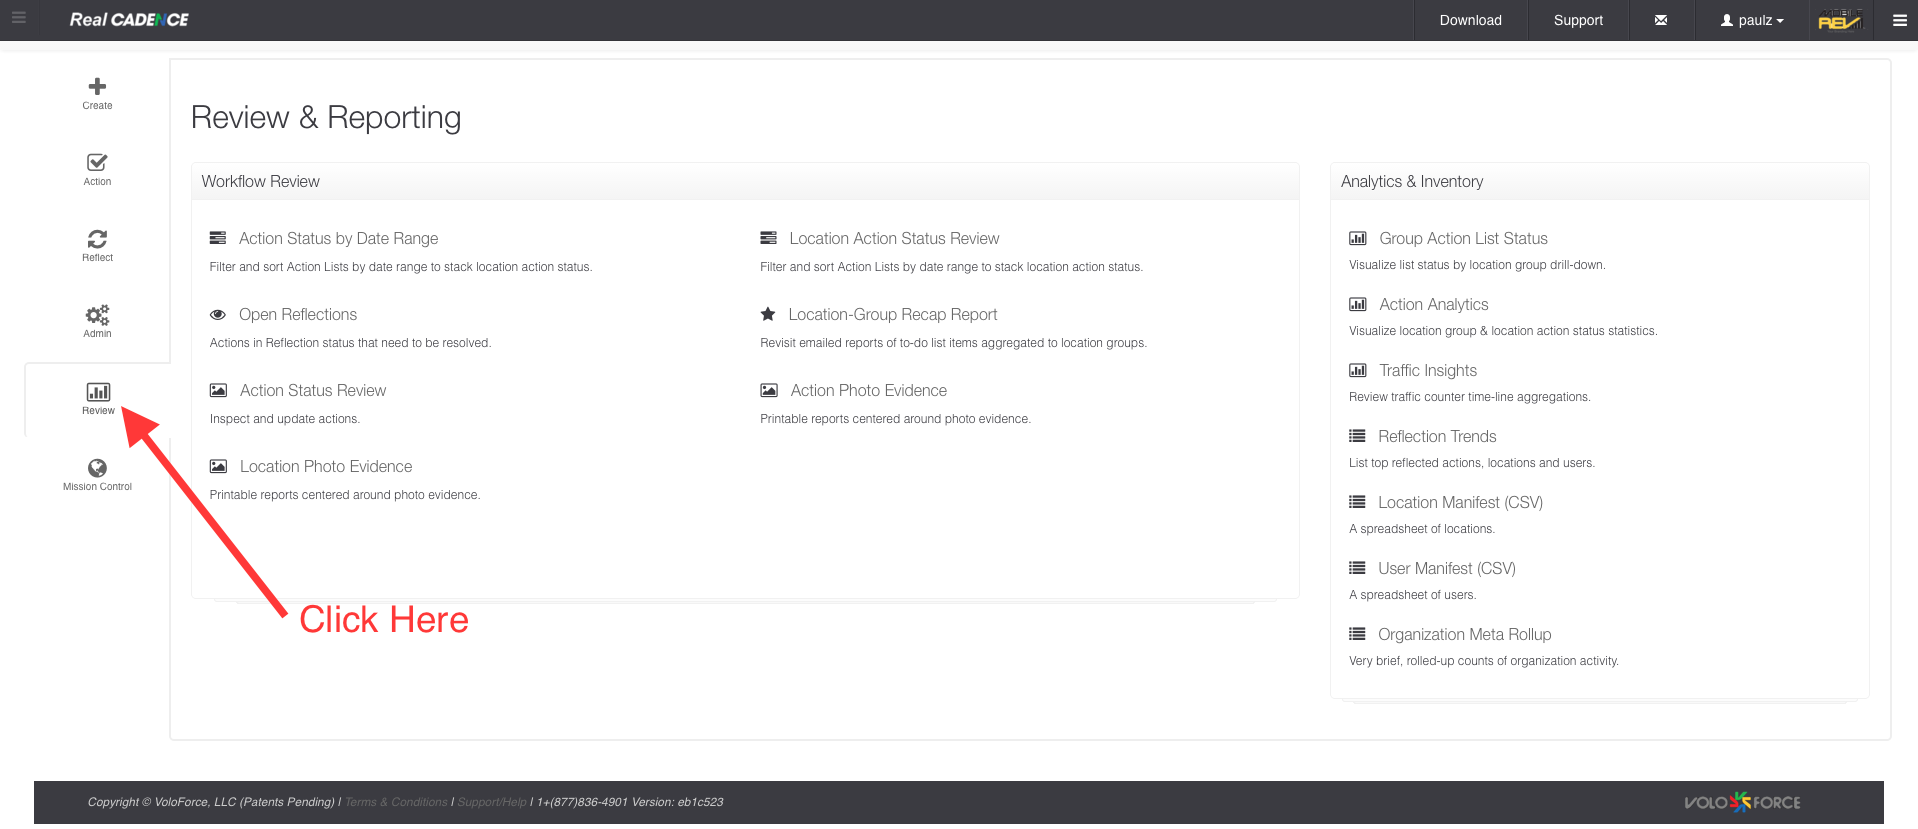
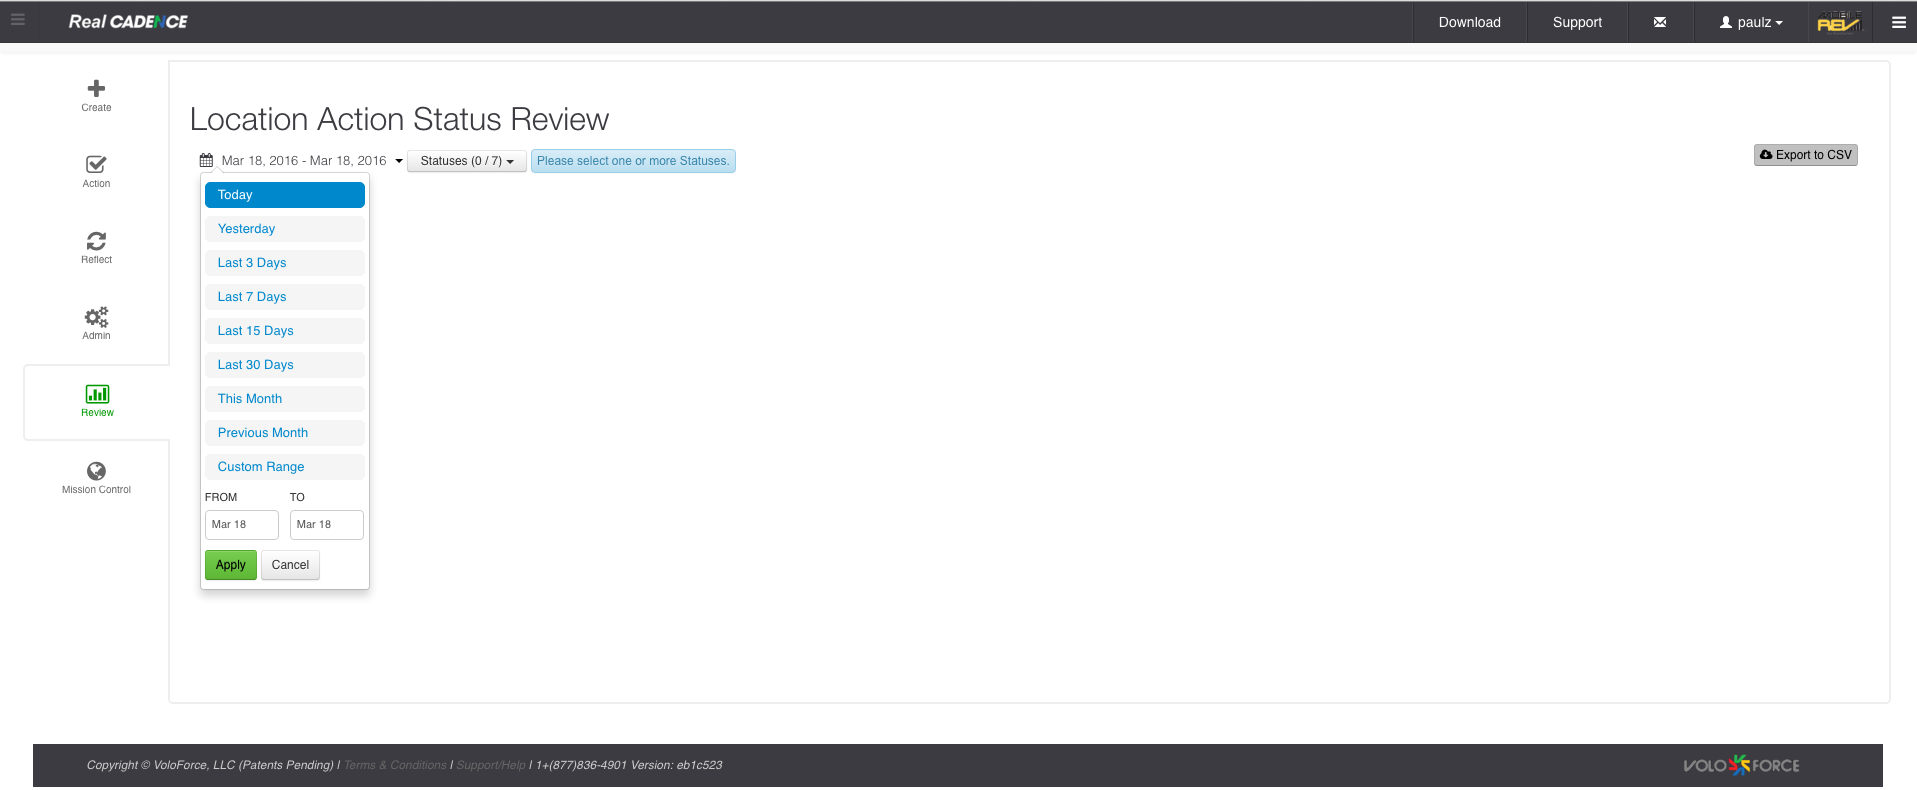
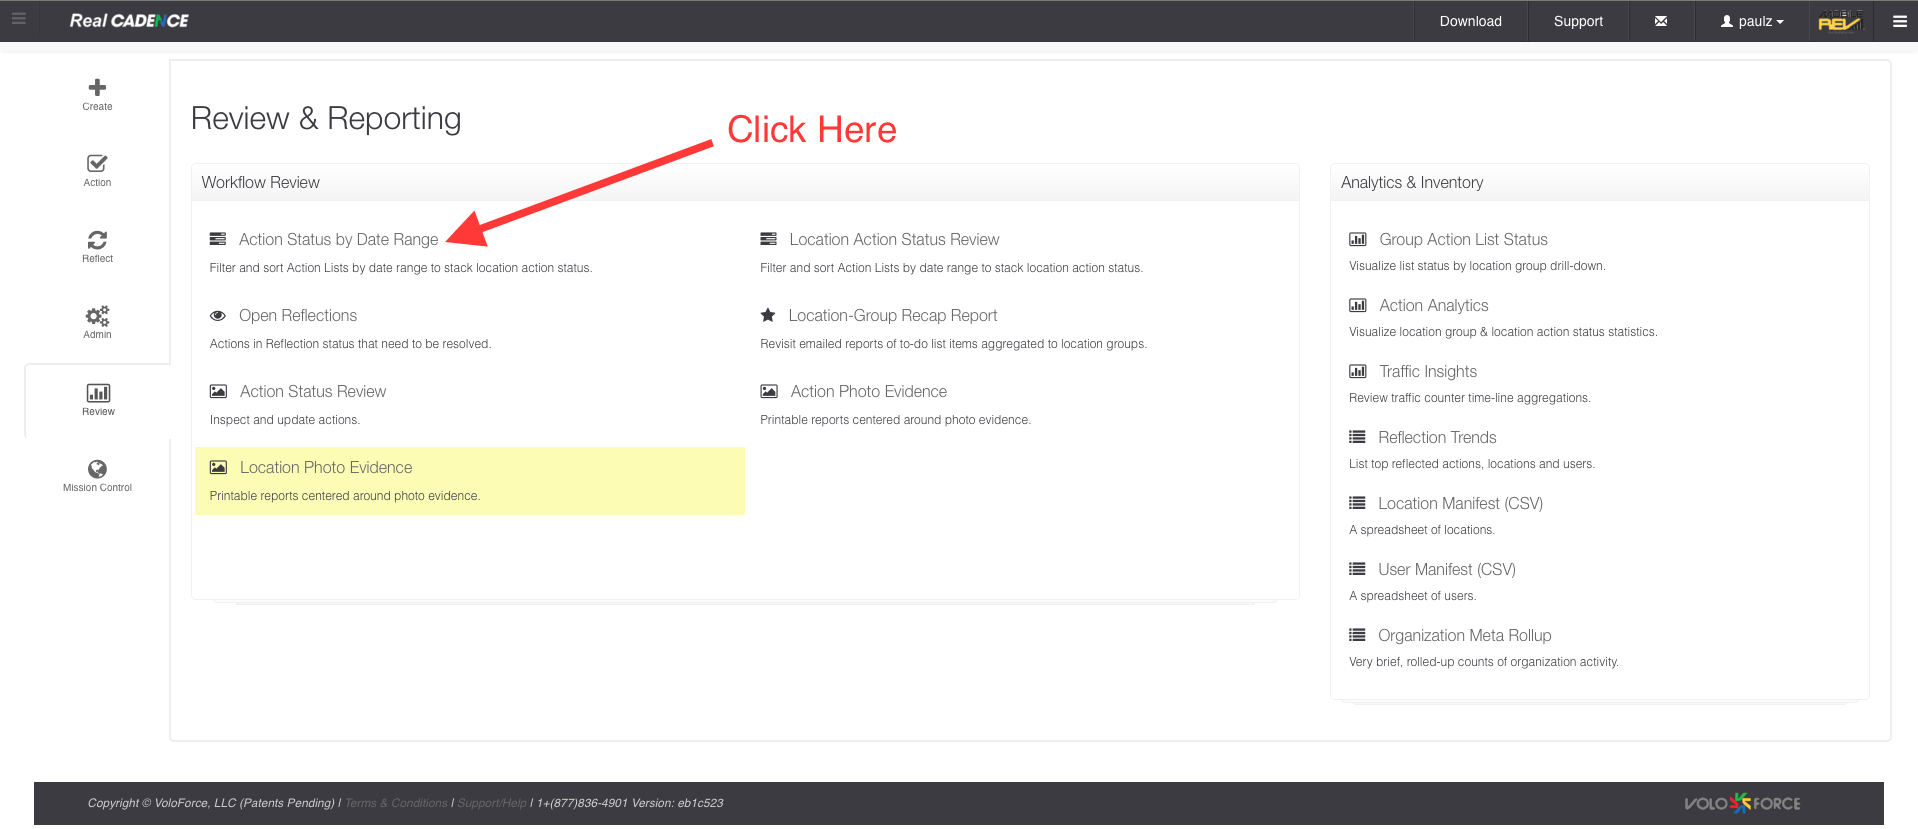
How-to: View location action list status by date range
|

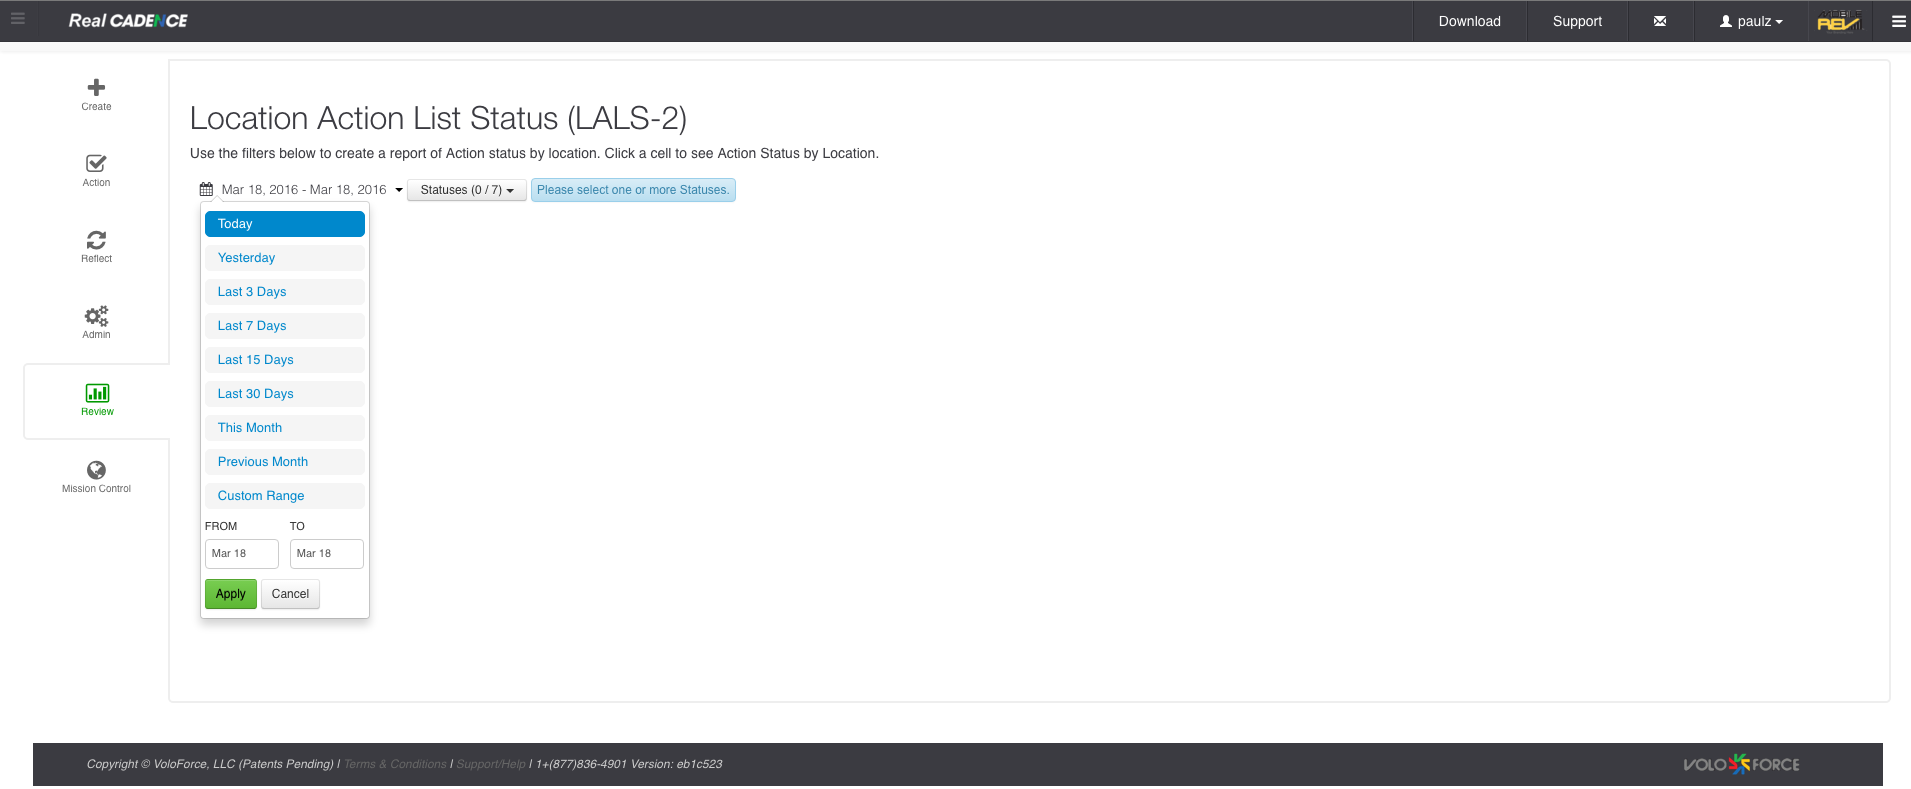
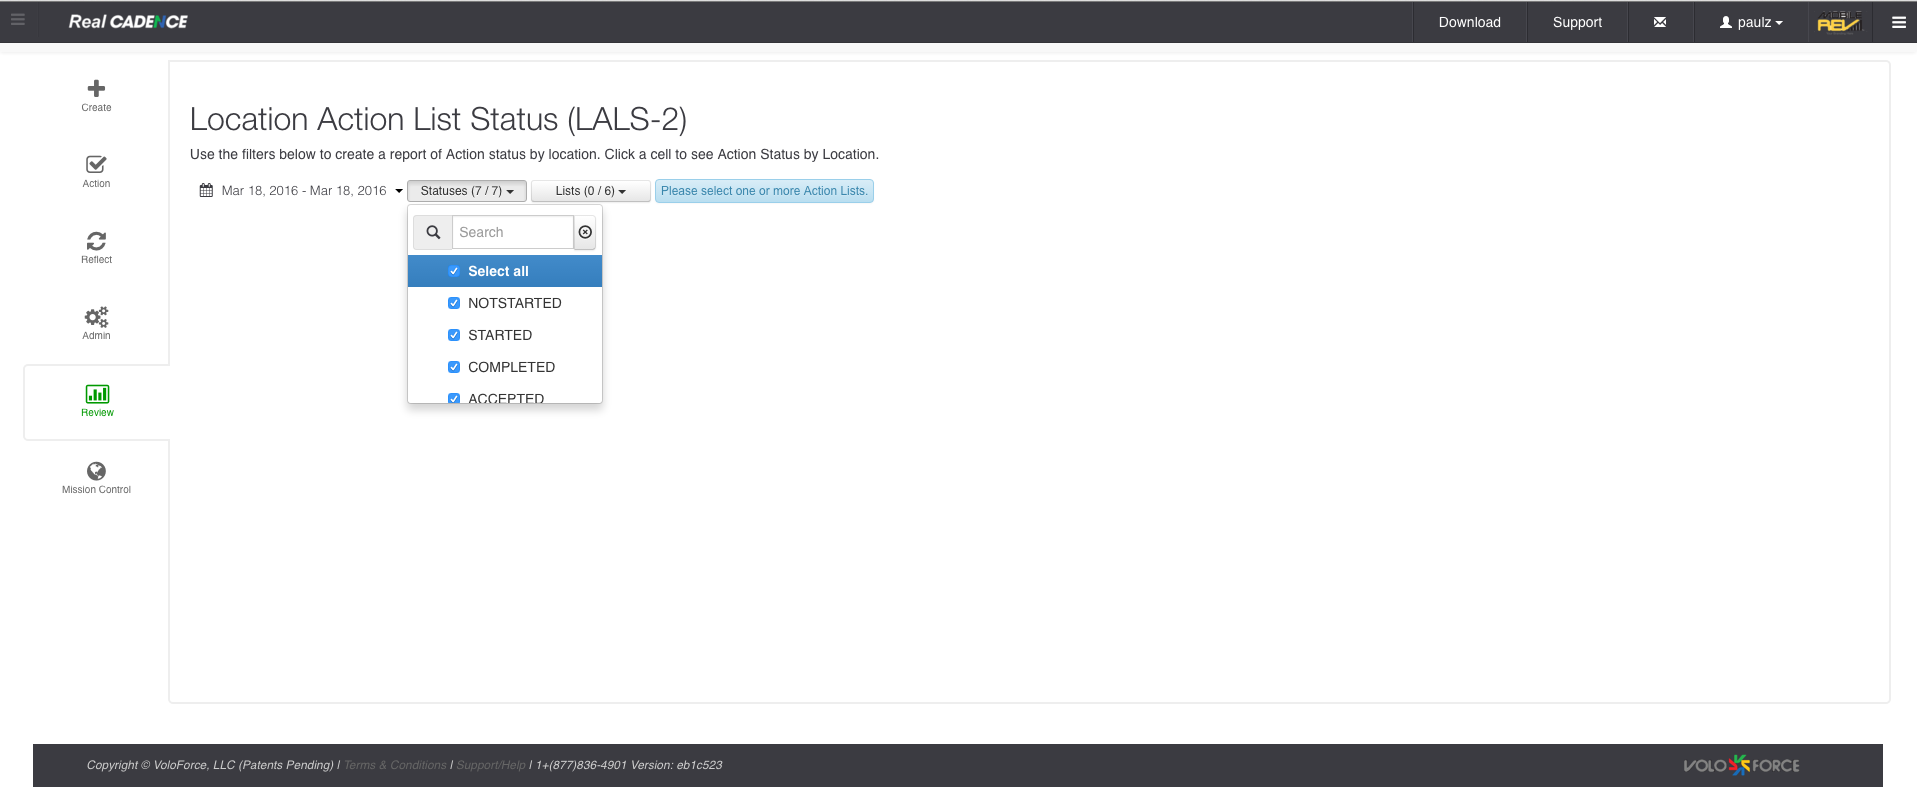
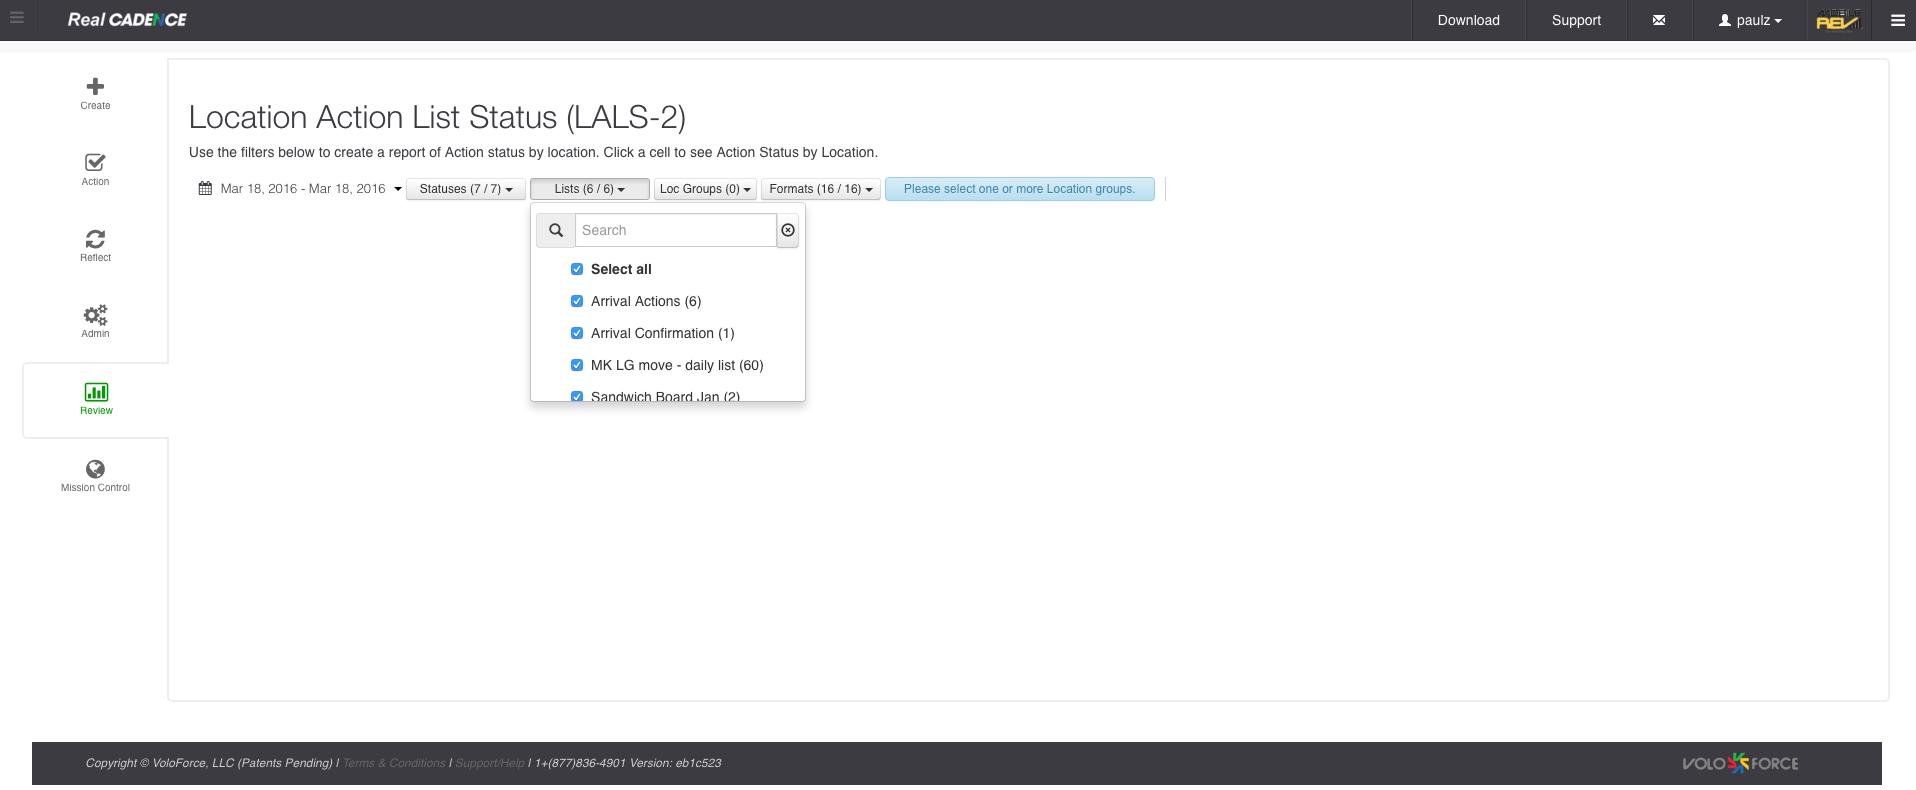
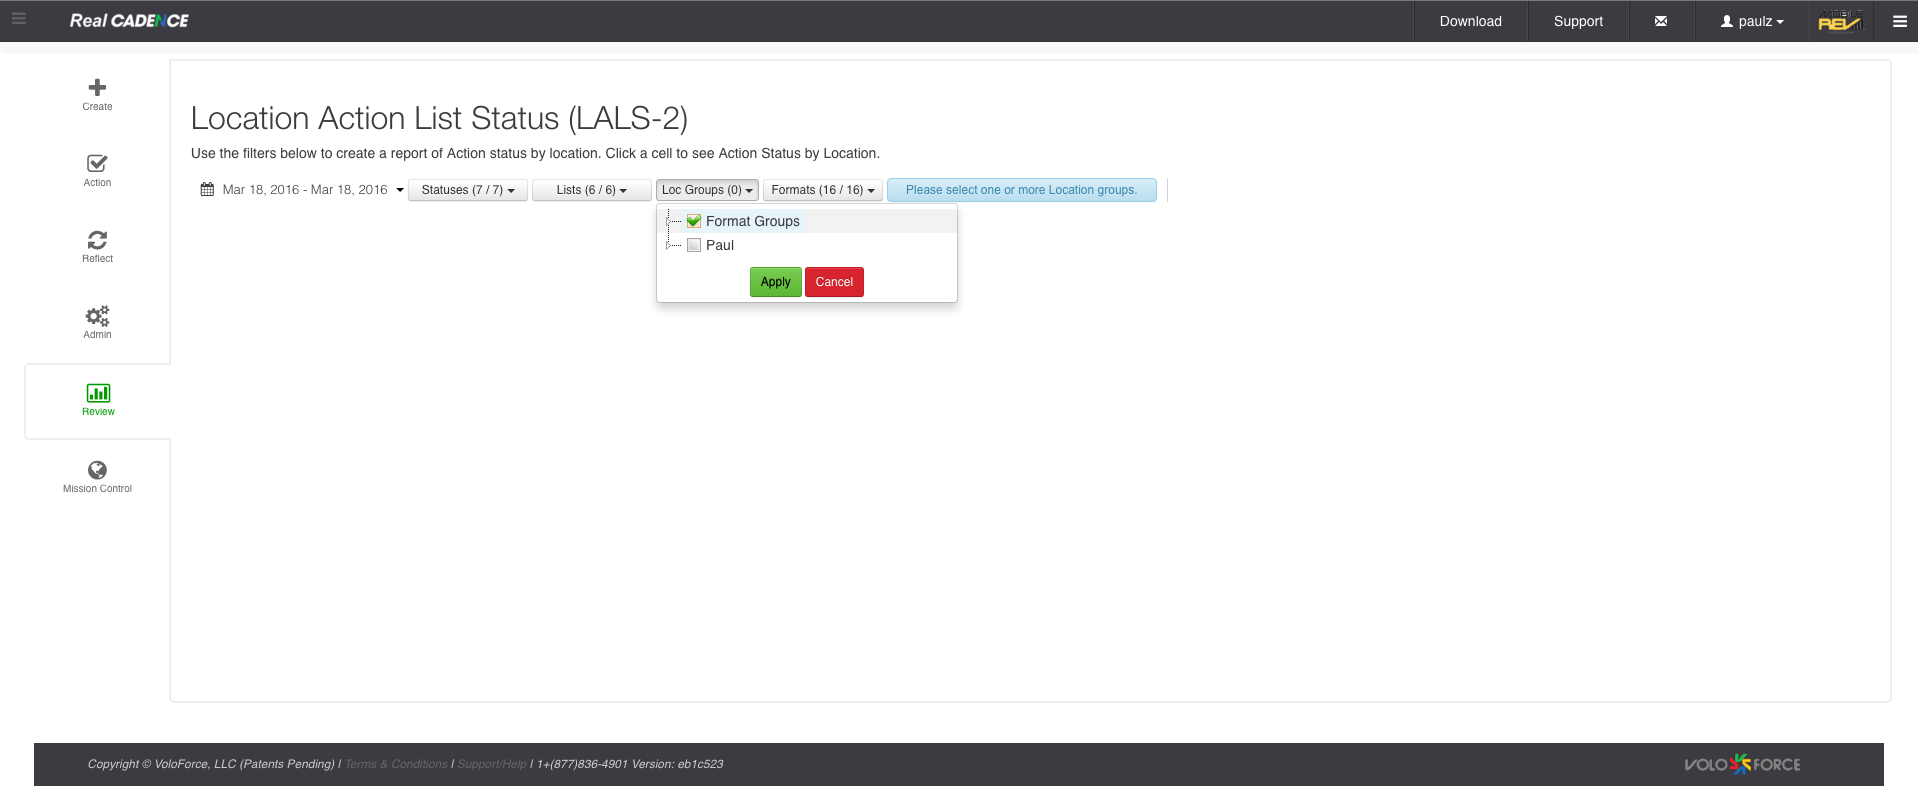
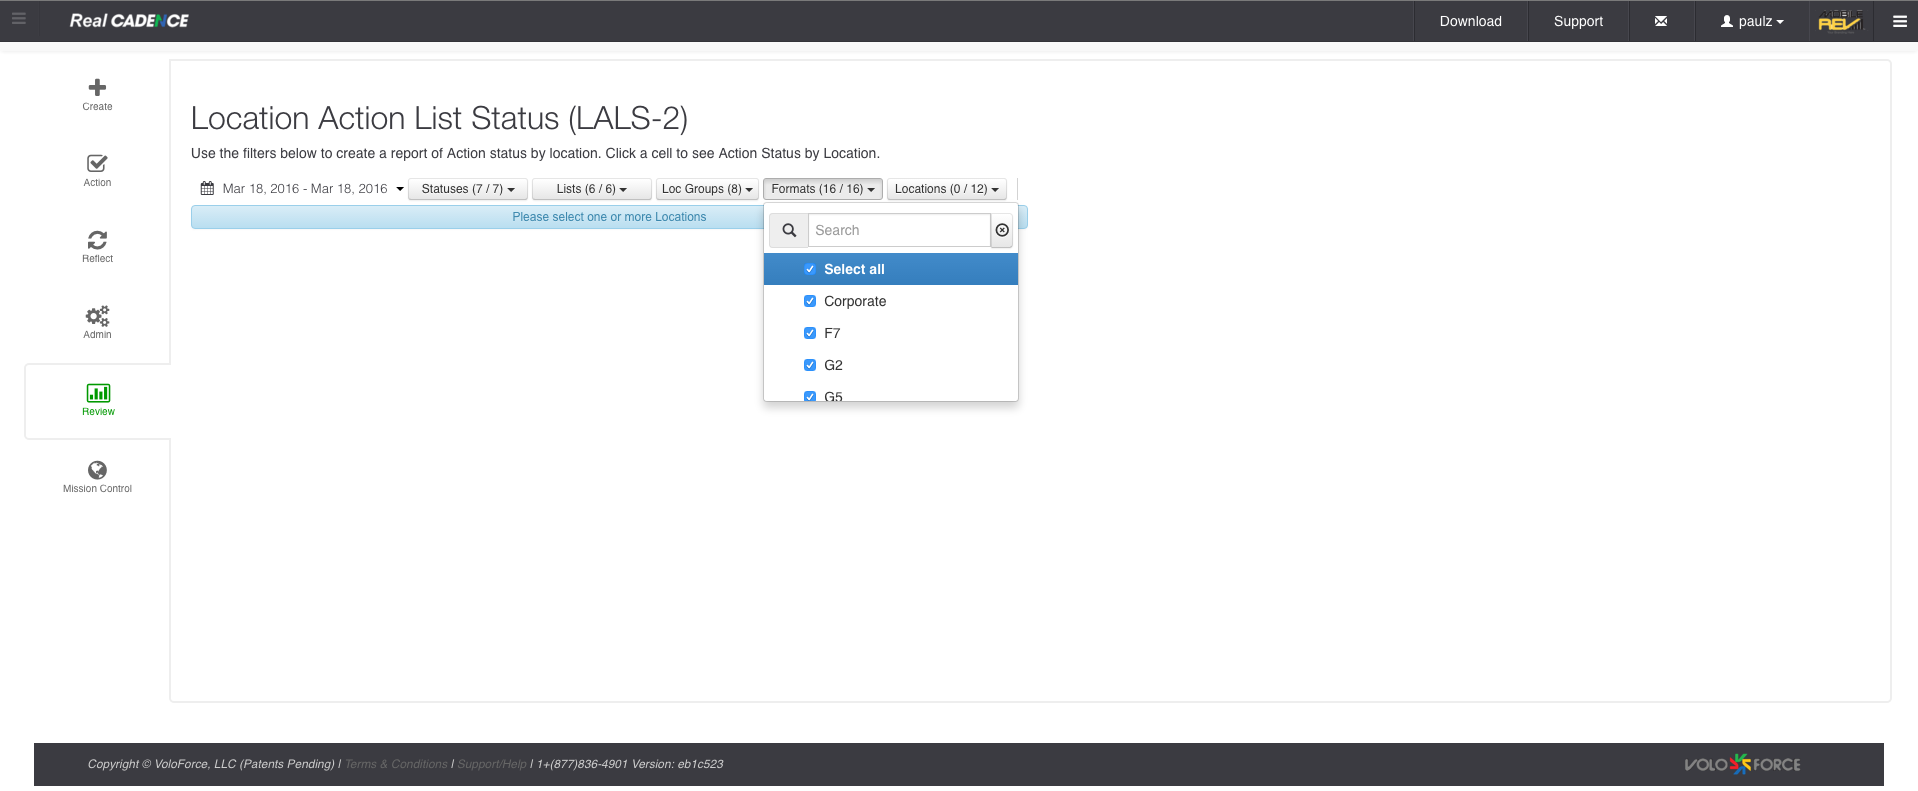
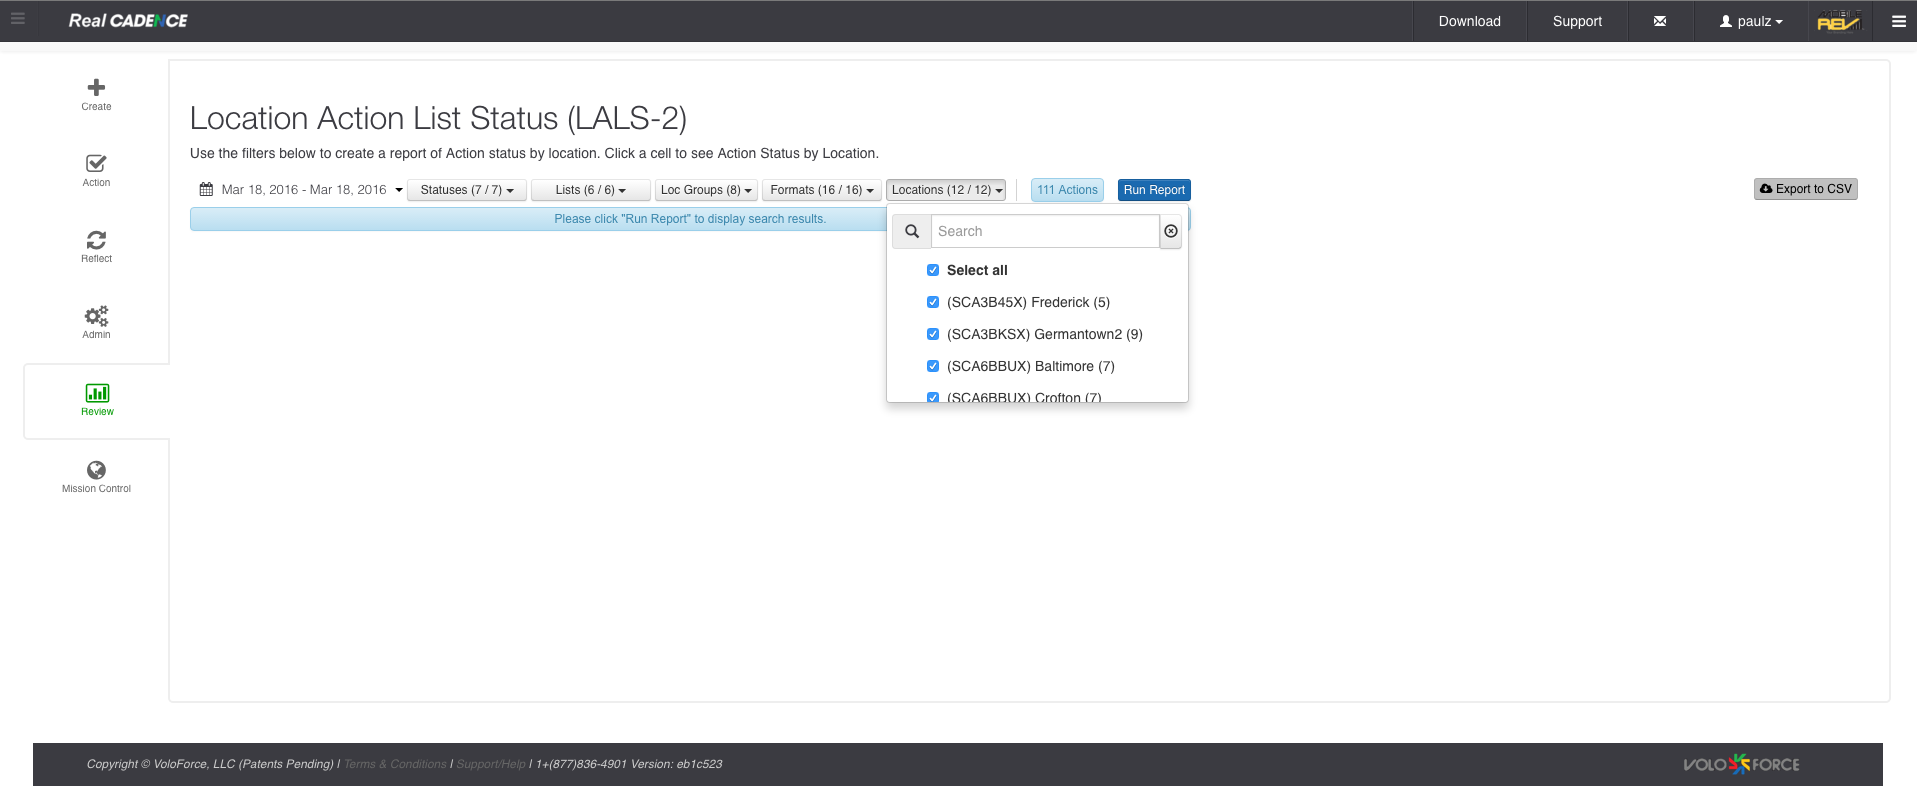
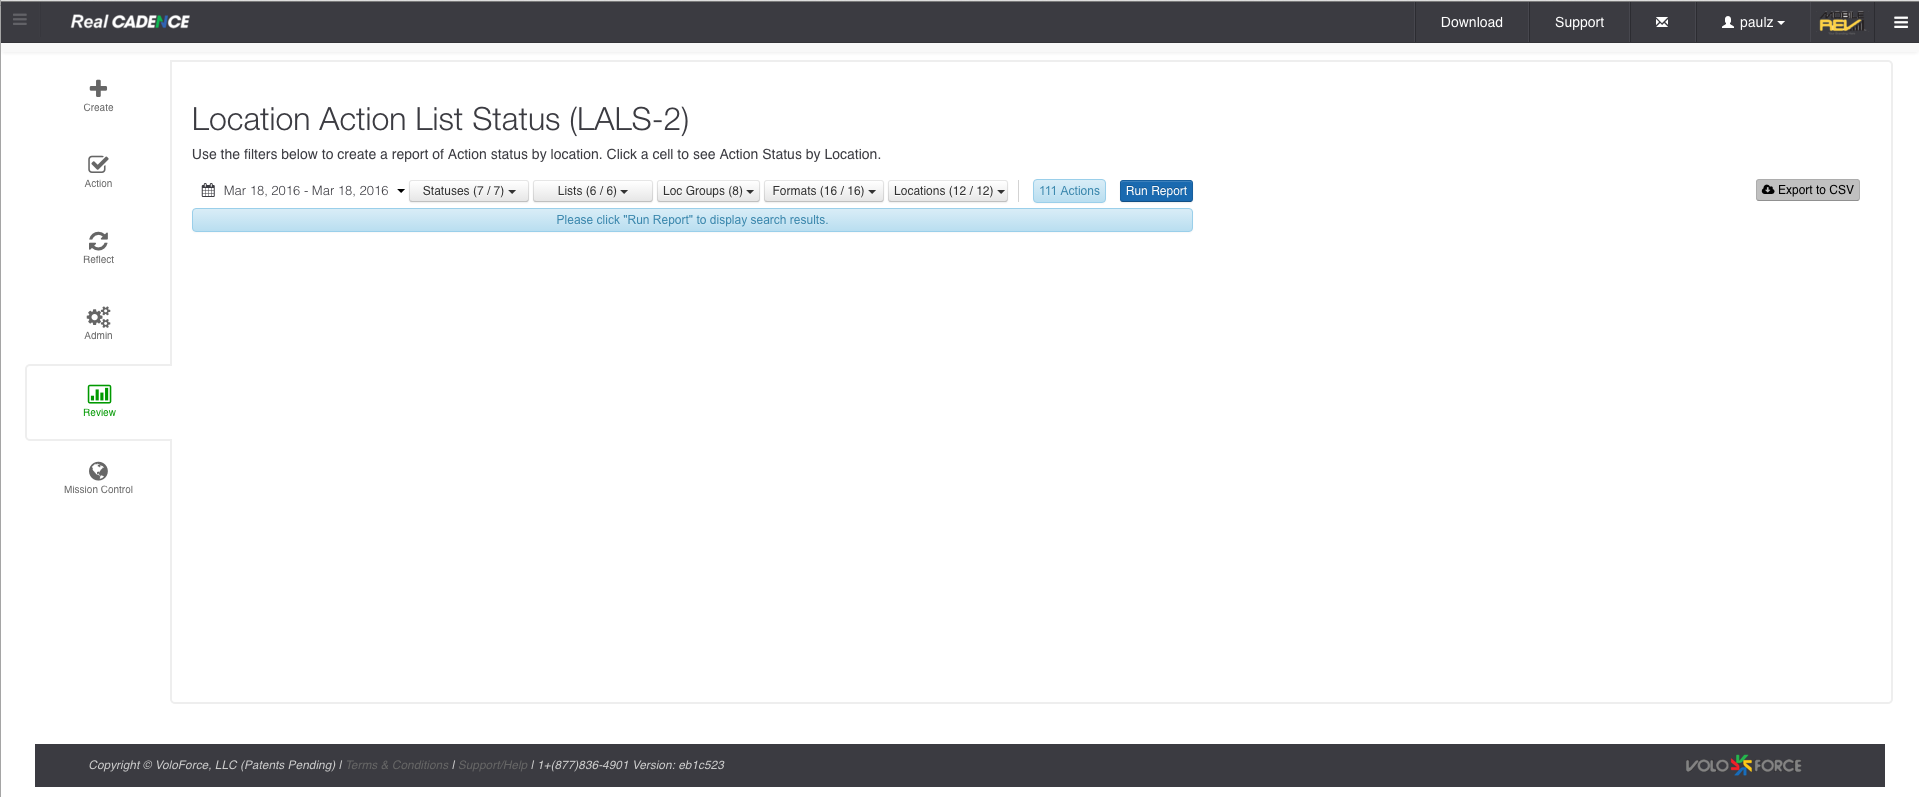

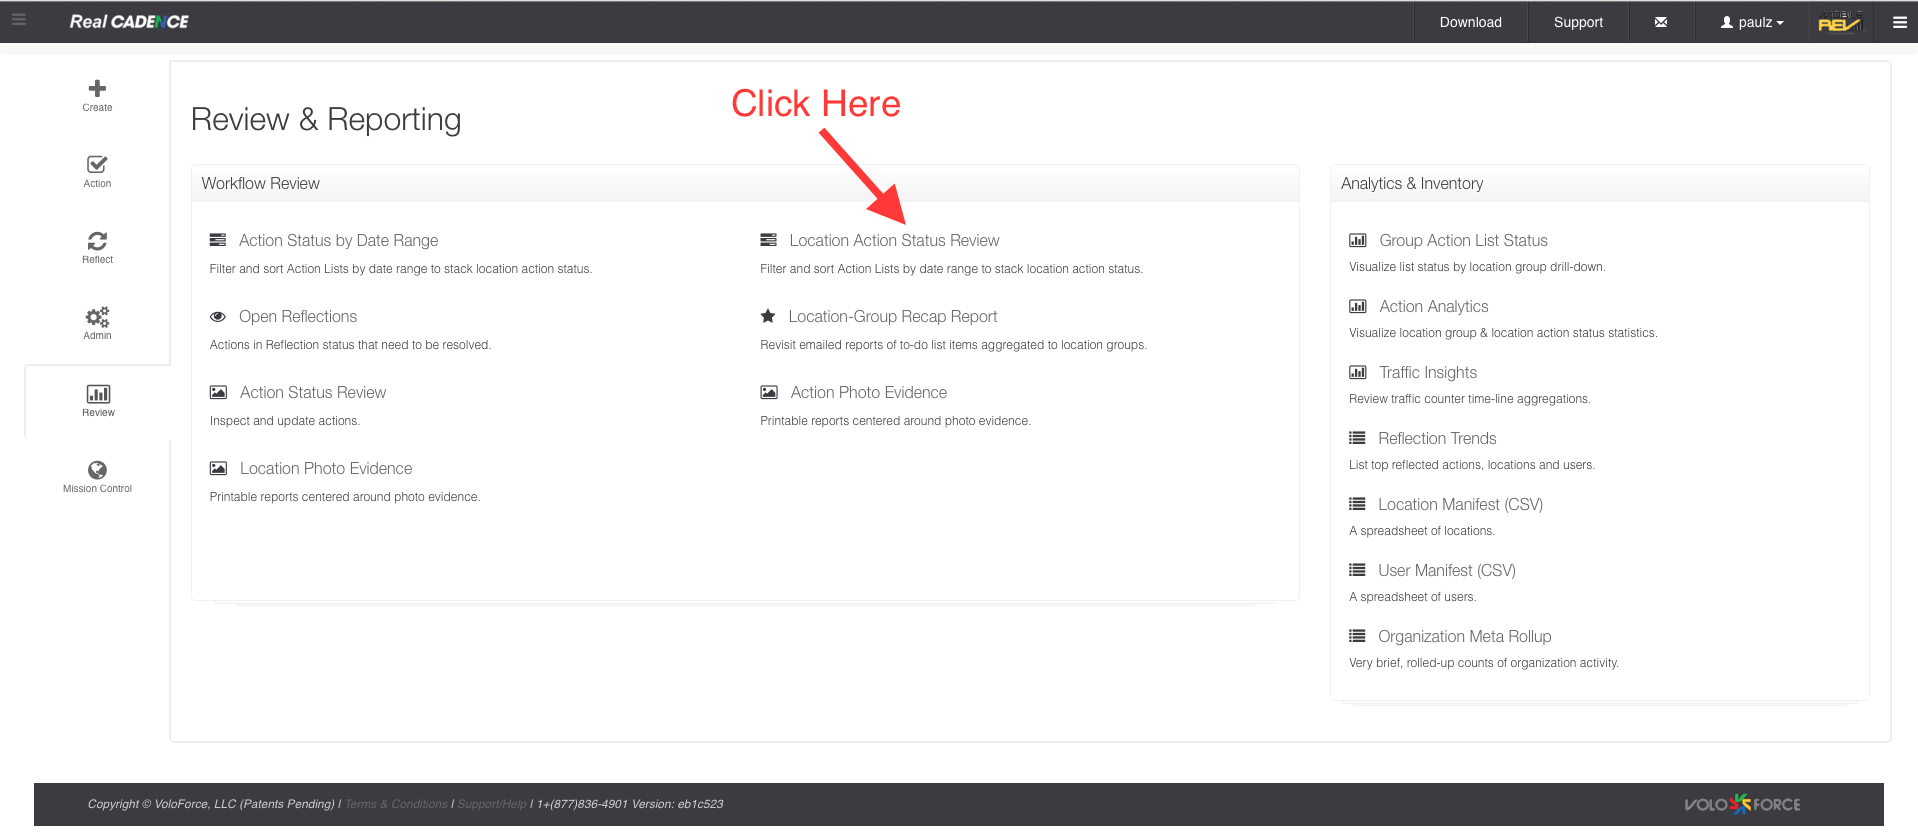
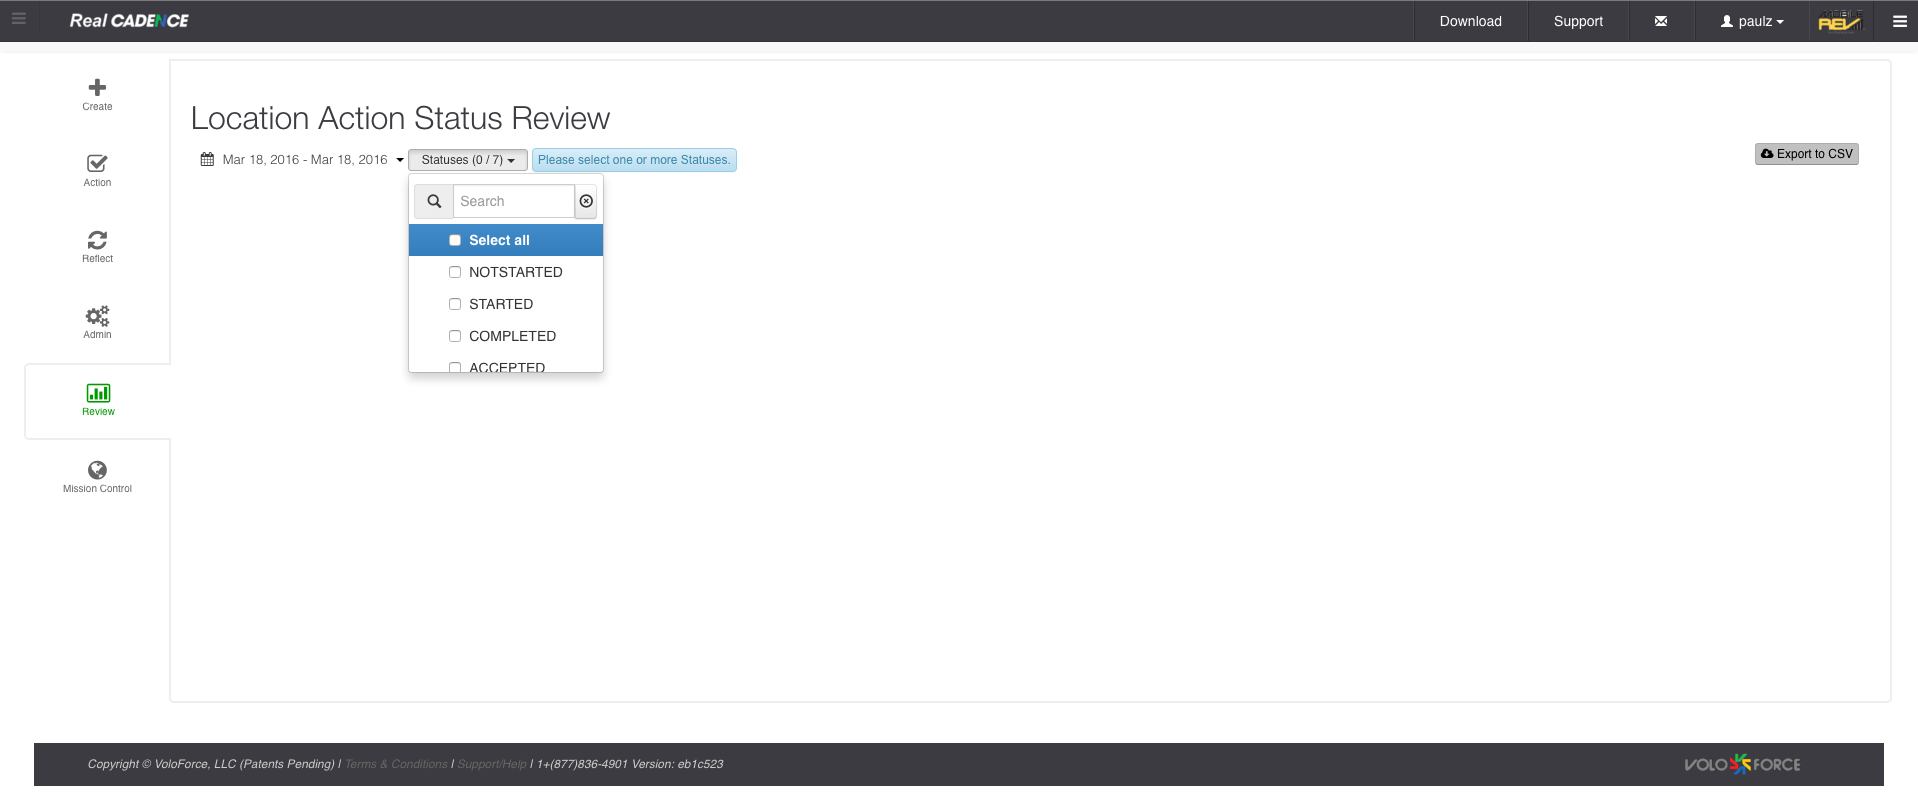
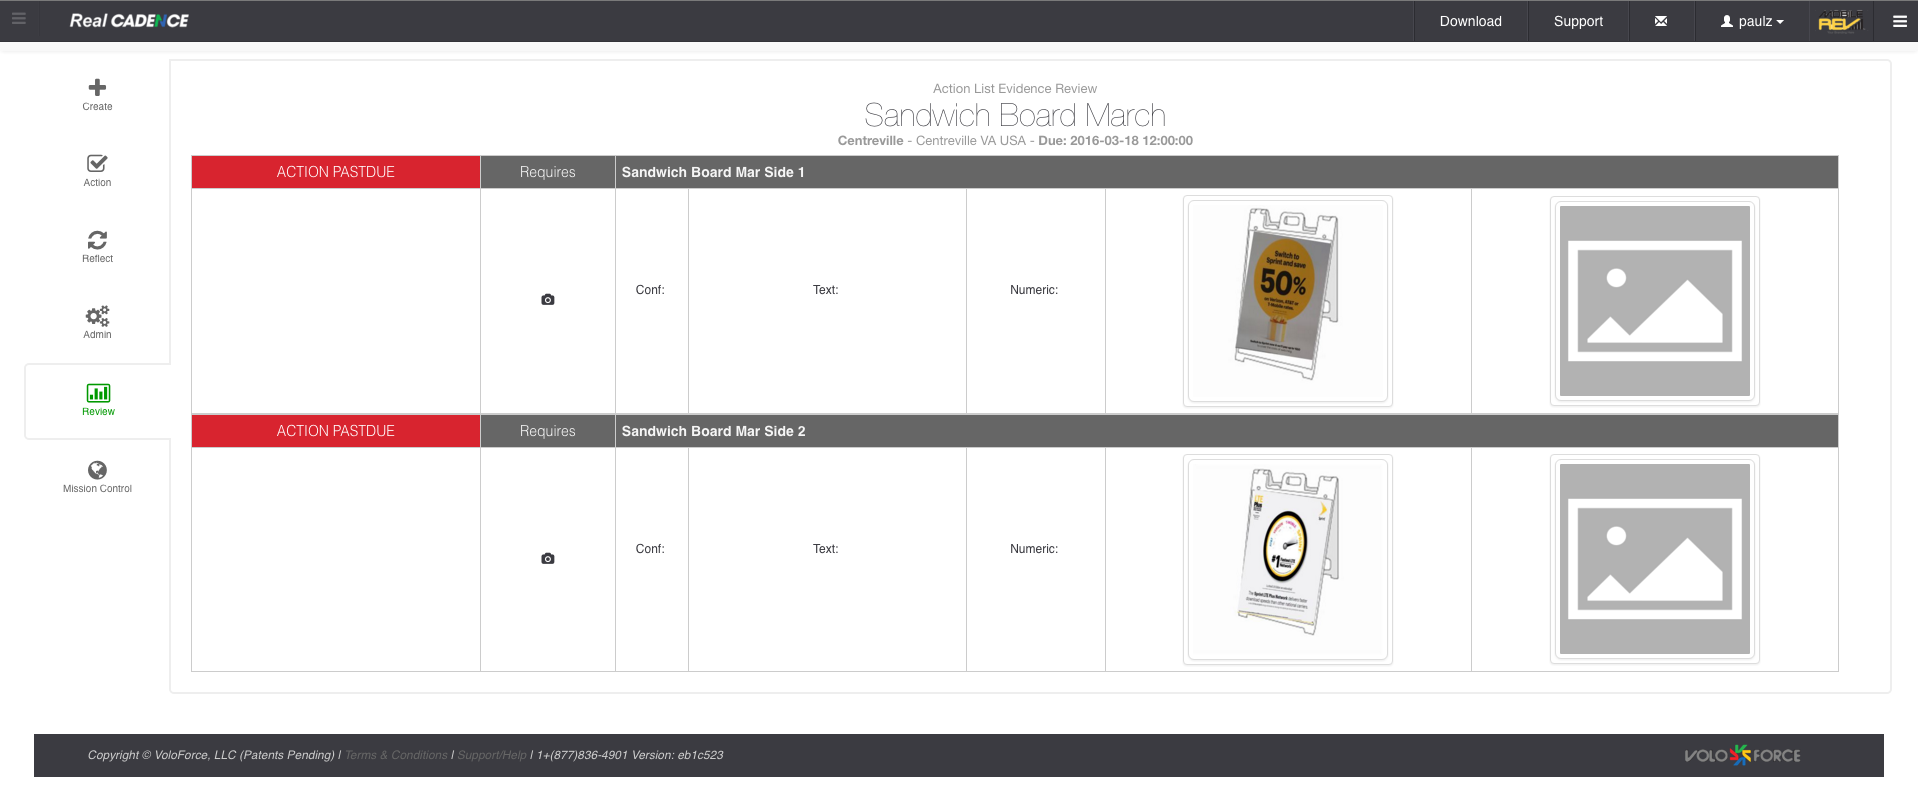
How-to: Use Location action status report
|